About This Project
Welcome to Blueprints to Brilliance, the perfect example of what magic happens when homeowners bring their style and vision to our specialists who perform with precision. This remodel involved transforming many areas of the home — updated flooring throughout the main level, fully redesigned 2 bathrooms and the bottom run of stairs, statement chandeliers in several rooms, new tile in the kitchen and laundry room, and replacing interior doors.
The homeowners saw a way to redesign the primary bathroom layout for a luxious soaker tub and oversized shower stall, as well as a double vanity. We also converted a library into a dreamy primary closet/dressing room. It’s amazing how new decorative fixtures (vanity, flooring, tile accent wall, pendant lights, & paint) transformed the powder room into a dramatic moment. Unified engineered hardwood flooring throughout the main level ties all the areas together. With luxury materials, thoughtful layouts, and expert craftsmanship, we created a modern yet timeless home that’s both highly functional and beautiful. From demolition to redesign, we documented every step as we turned blueprints into brilliance.


Photo Gallery

BEFORE- Blueprints Tub
BEFORE: The original primary bathroom layout included a dated built-in jetted tub. We gutted this entire space and changed the layout for comfort and style.
537a13e1-272f-4531-987e-da64a962a43b
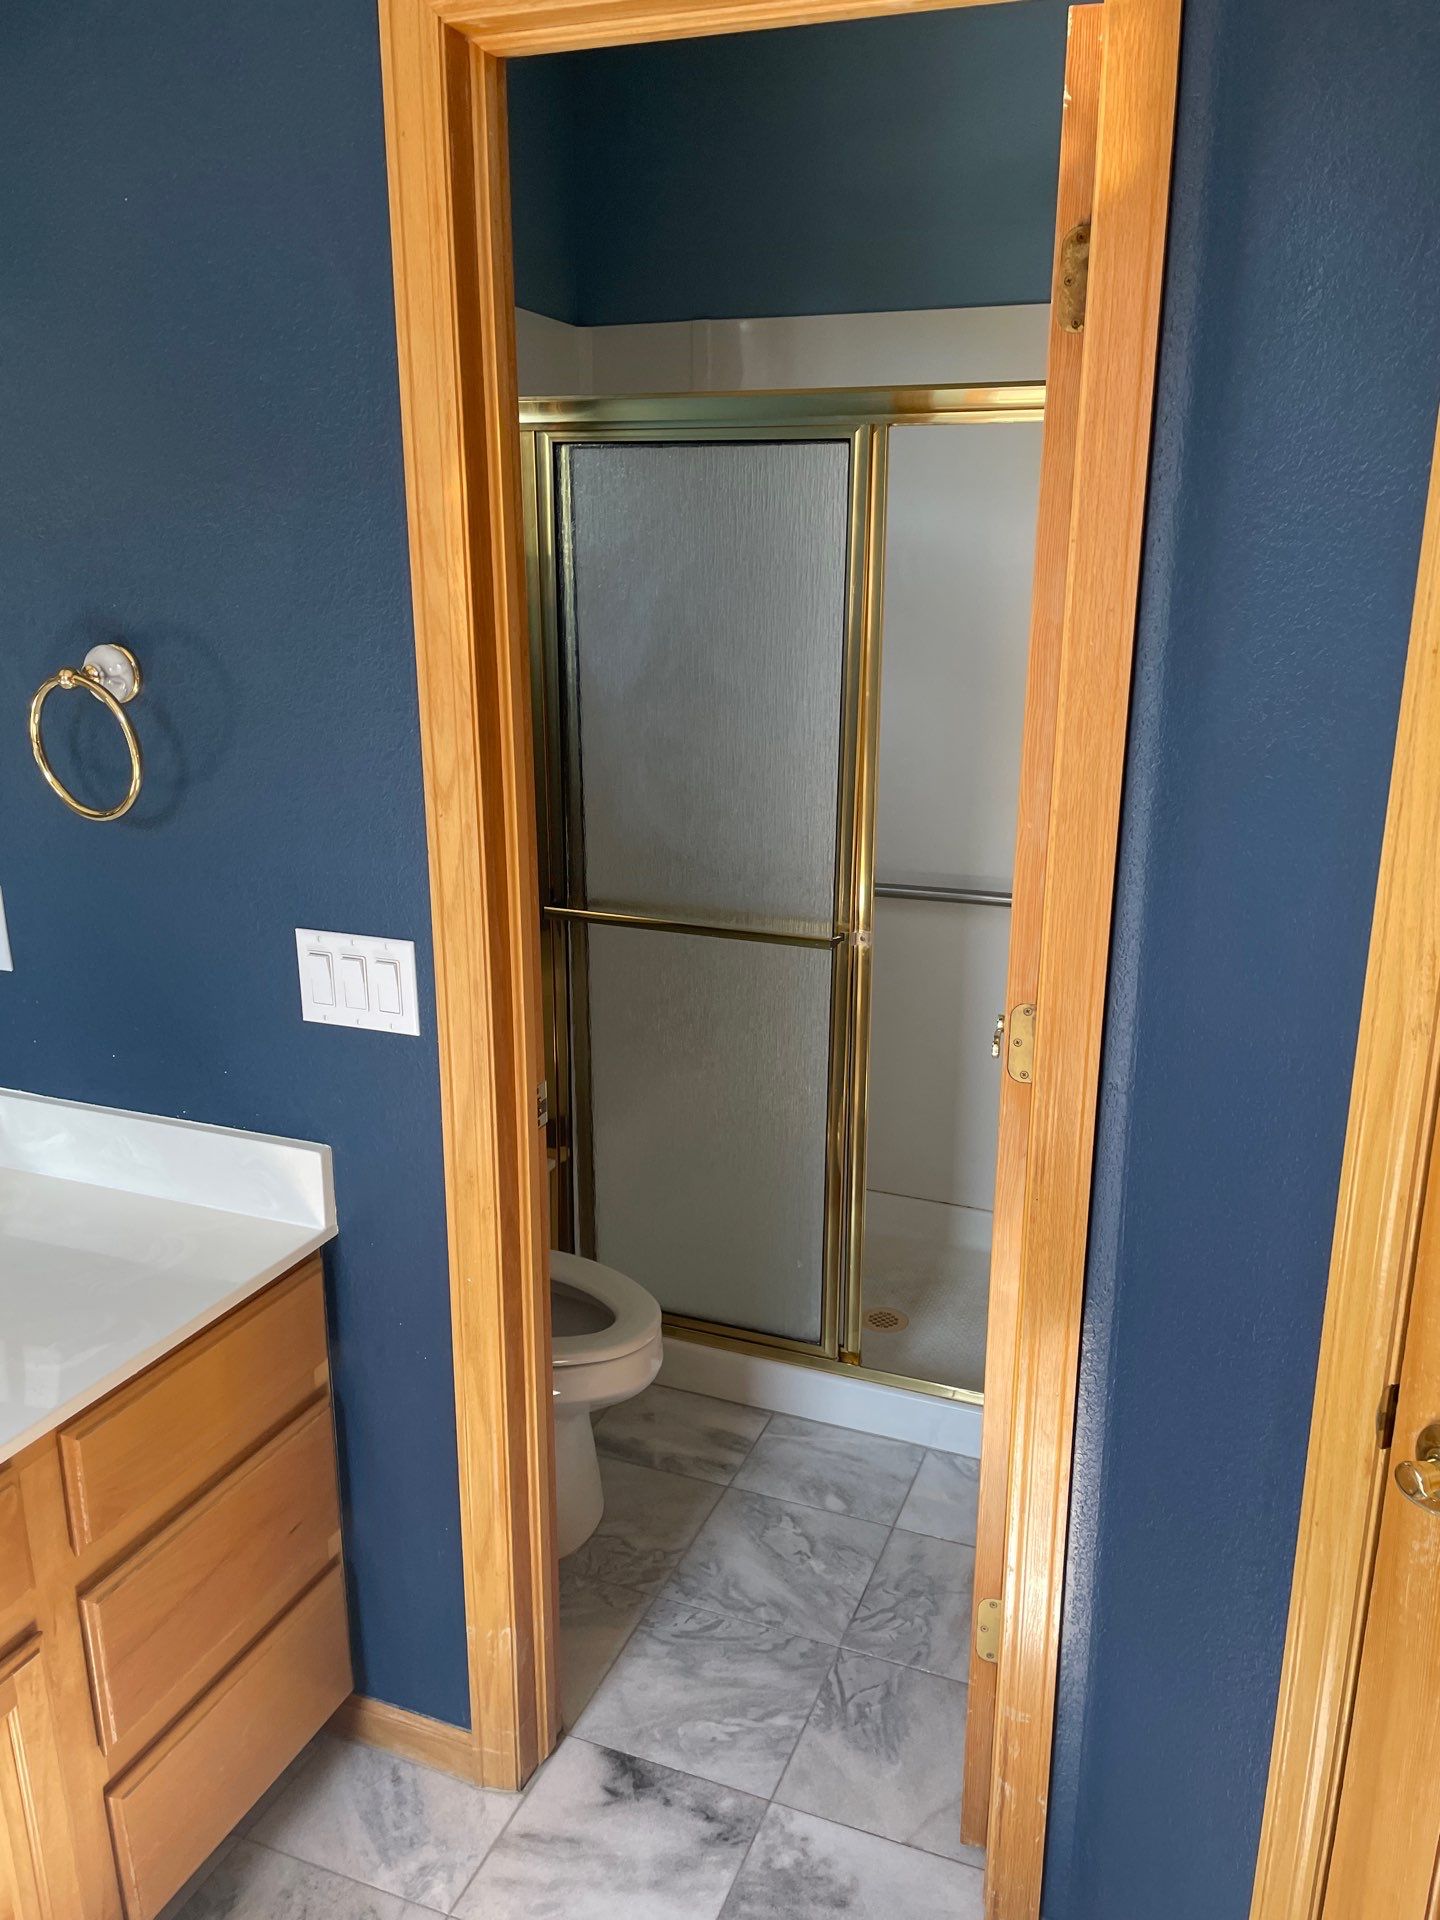
BEFORE: The gold-framed shower stall didn’t fit the homeowners’ idea of luxury.
8c431f30-96c6-4857-a140-2fd46ef3f72b
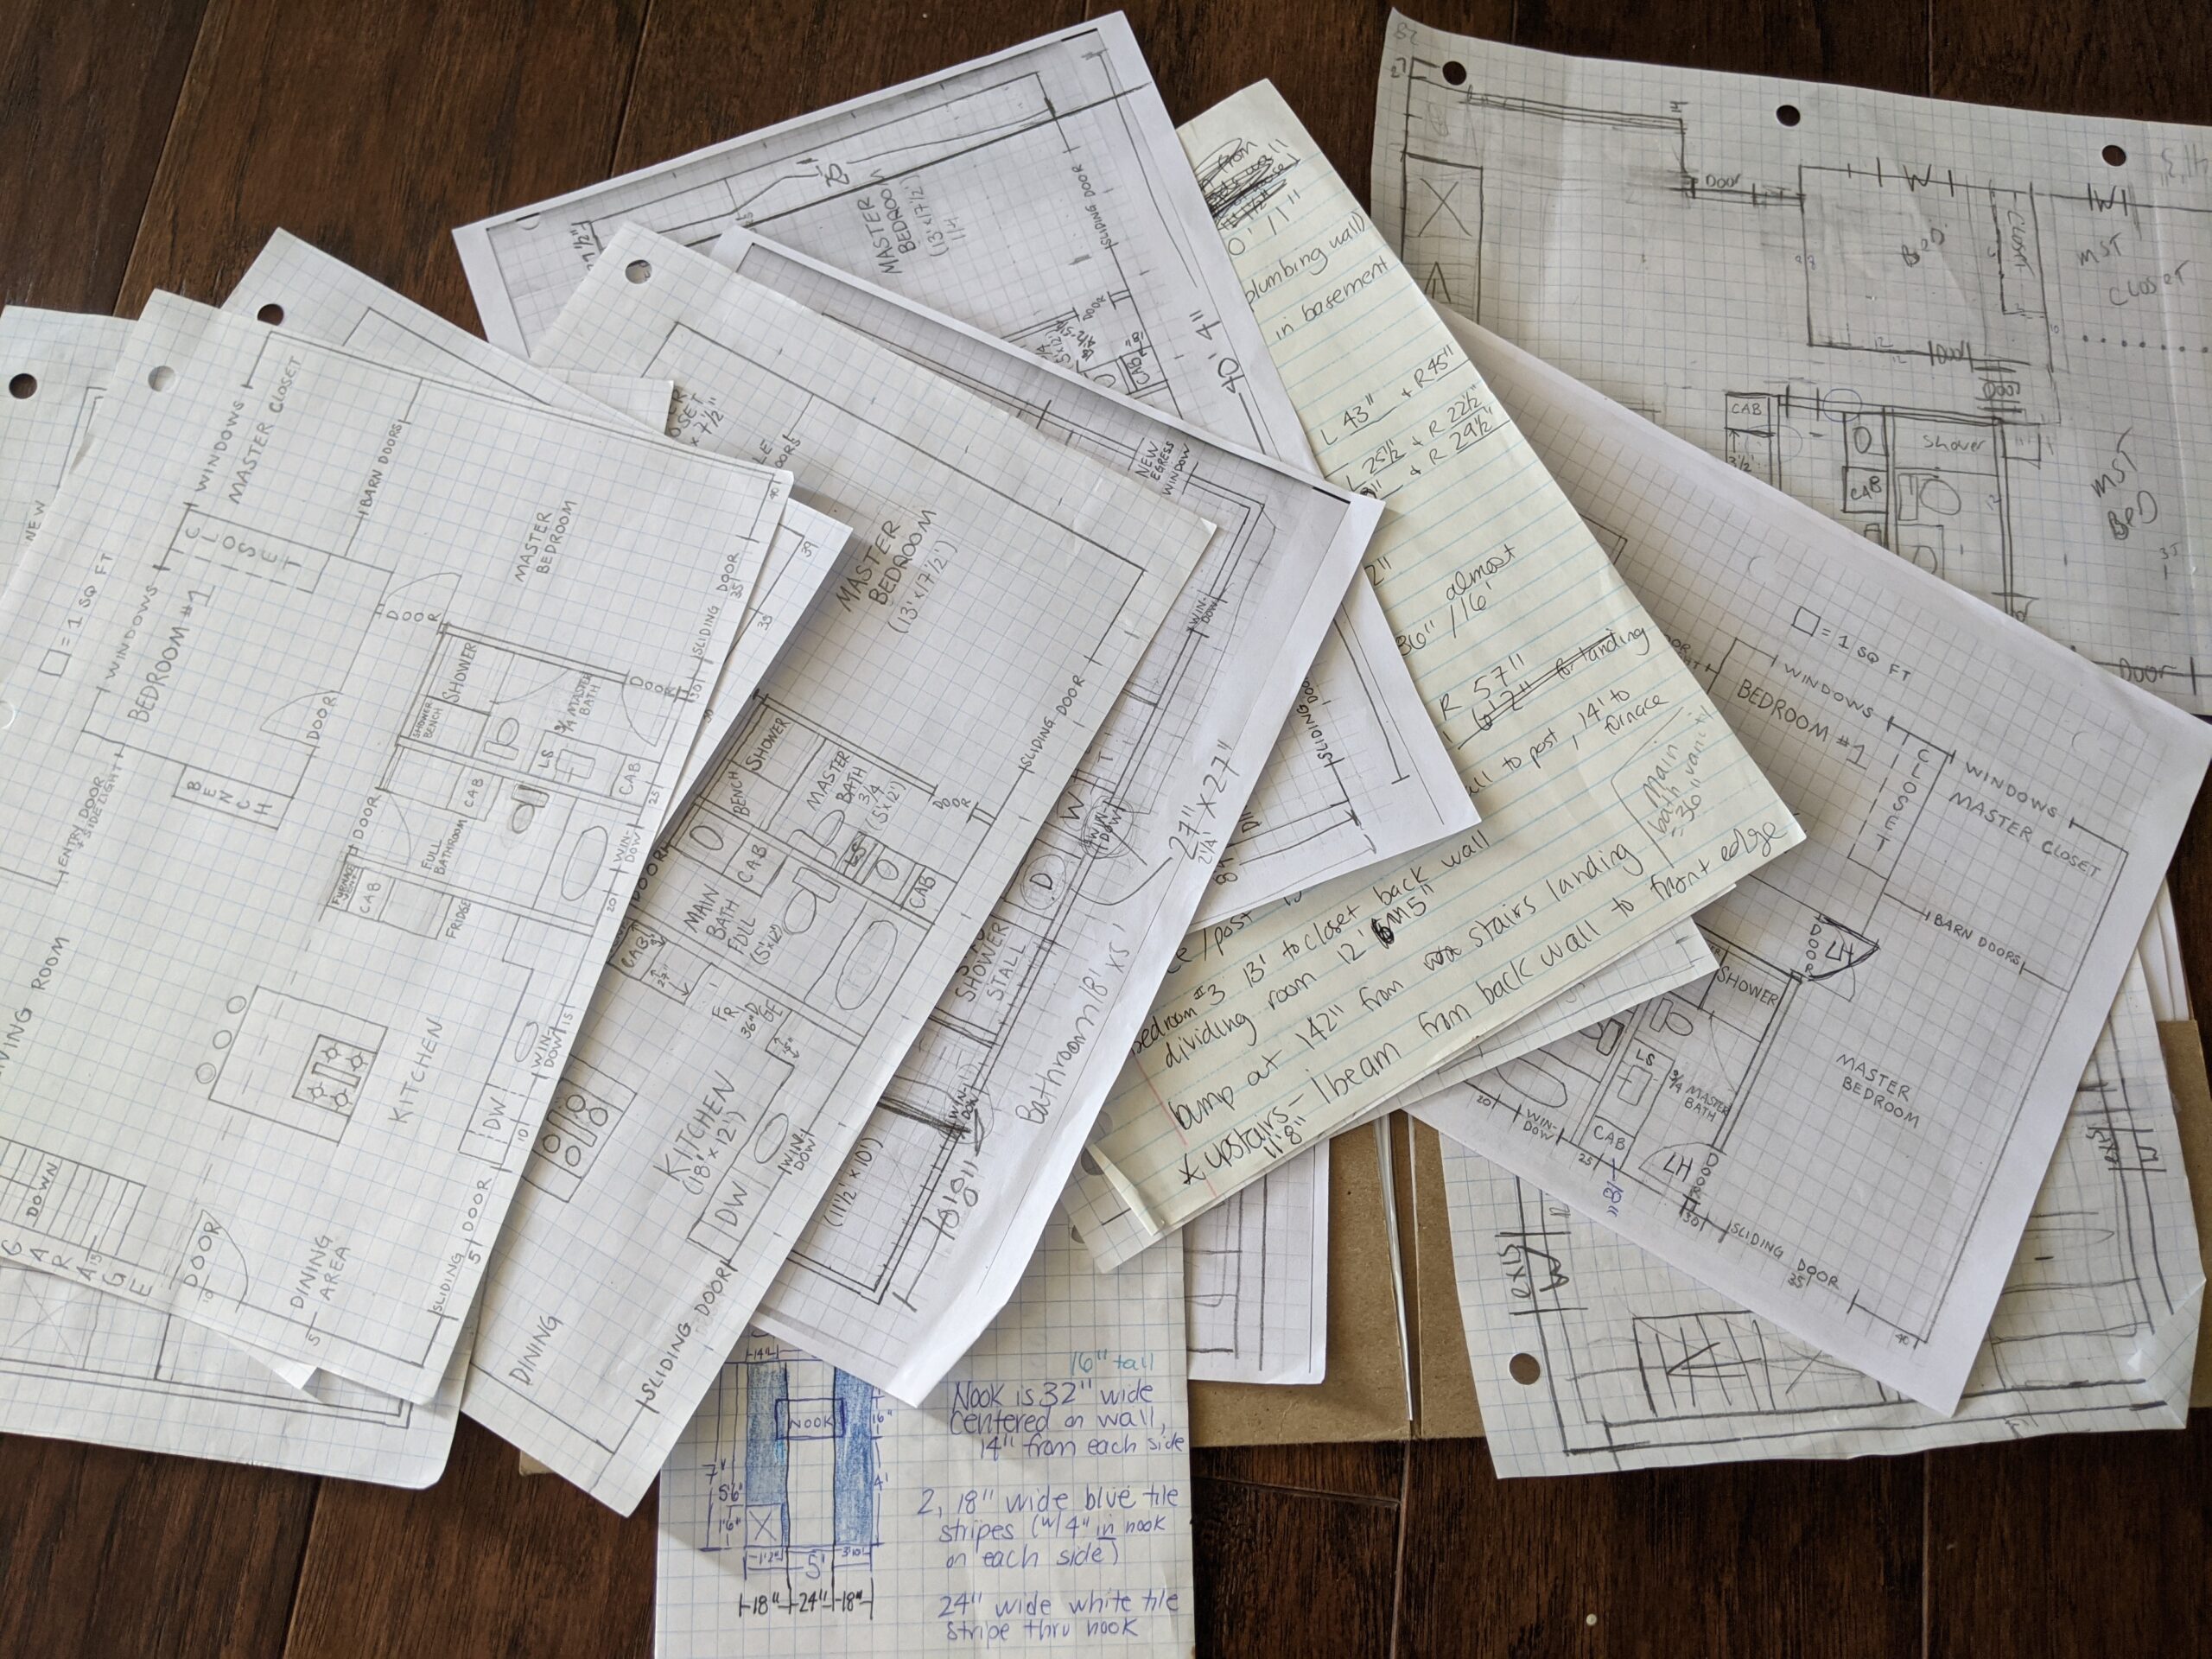
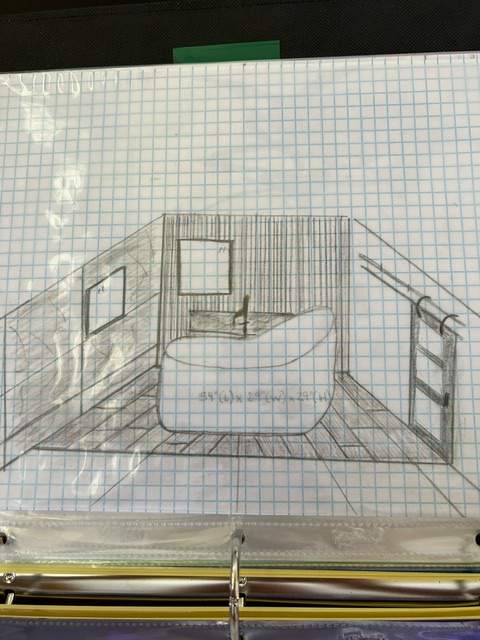
PLANS: We love to bring homeowners’ visions to life! This homeowner drew these designs for the bespoke, deluxe primary bathroom suite of her dreams with soaker tub focal piece in front of a textured tile wall and a barn door separating it from the toilet and shower room.

DURING- Blueprints Tub
DURING: The oversized corner jetted tub was removed to maximize the space with a more modern layout.

7d9d155a-7954-41ac-b60f-16cb2b5889cf
DURING: We removed the existing shower stall, vanity, and the wall between them to make a larger shower room.
73ce220b-ec05-47f1-956c-06aaf264a034
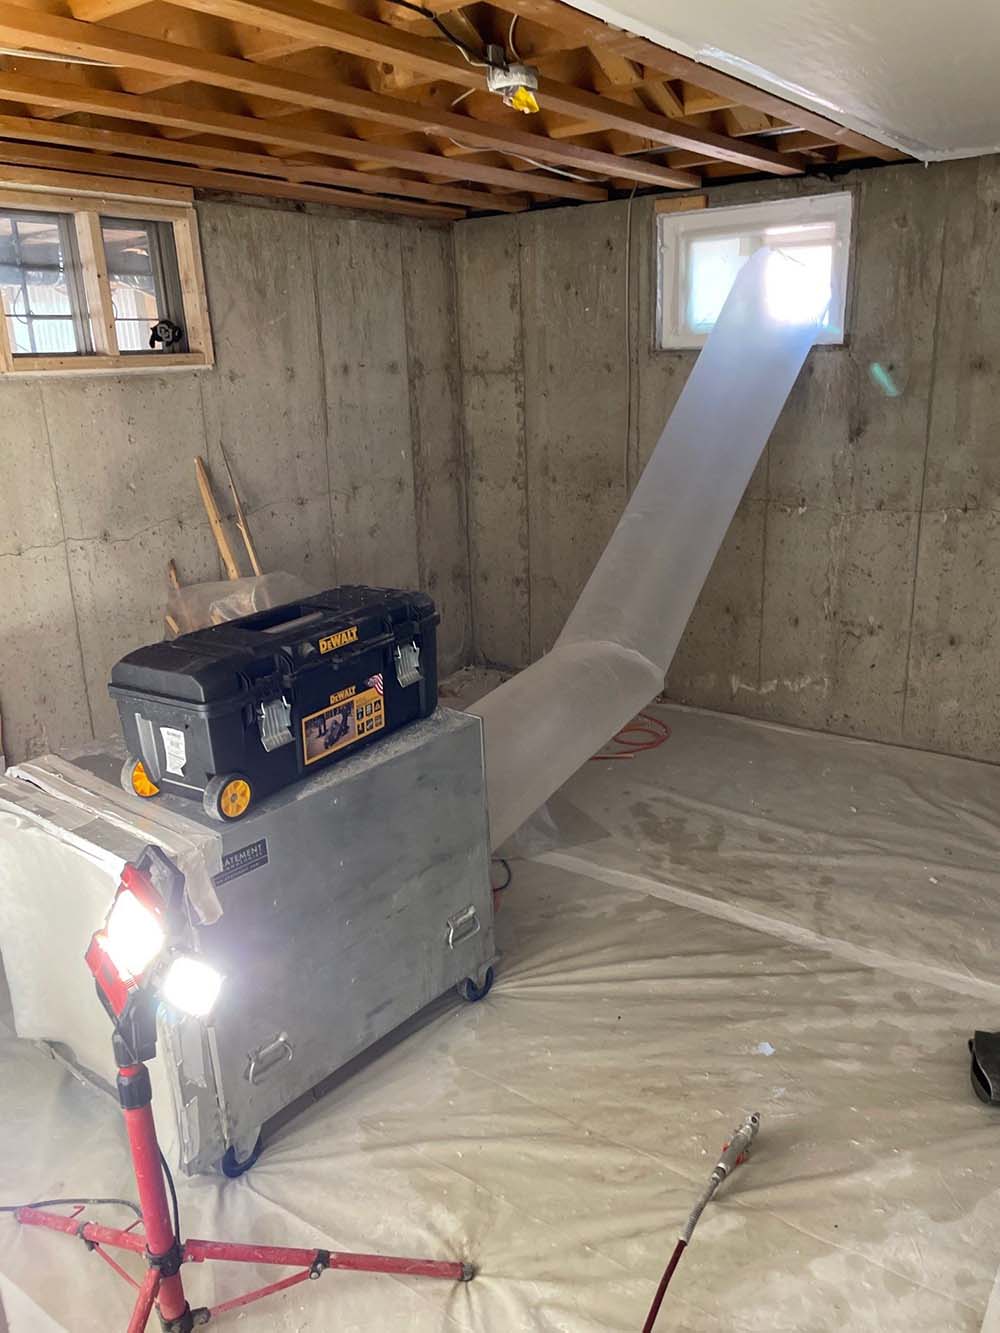
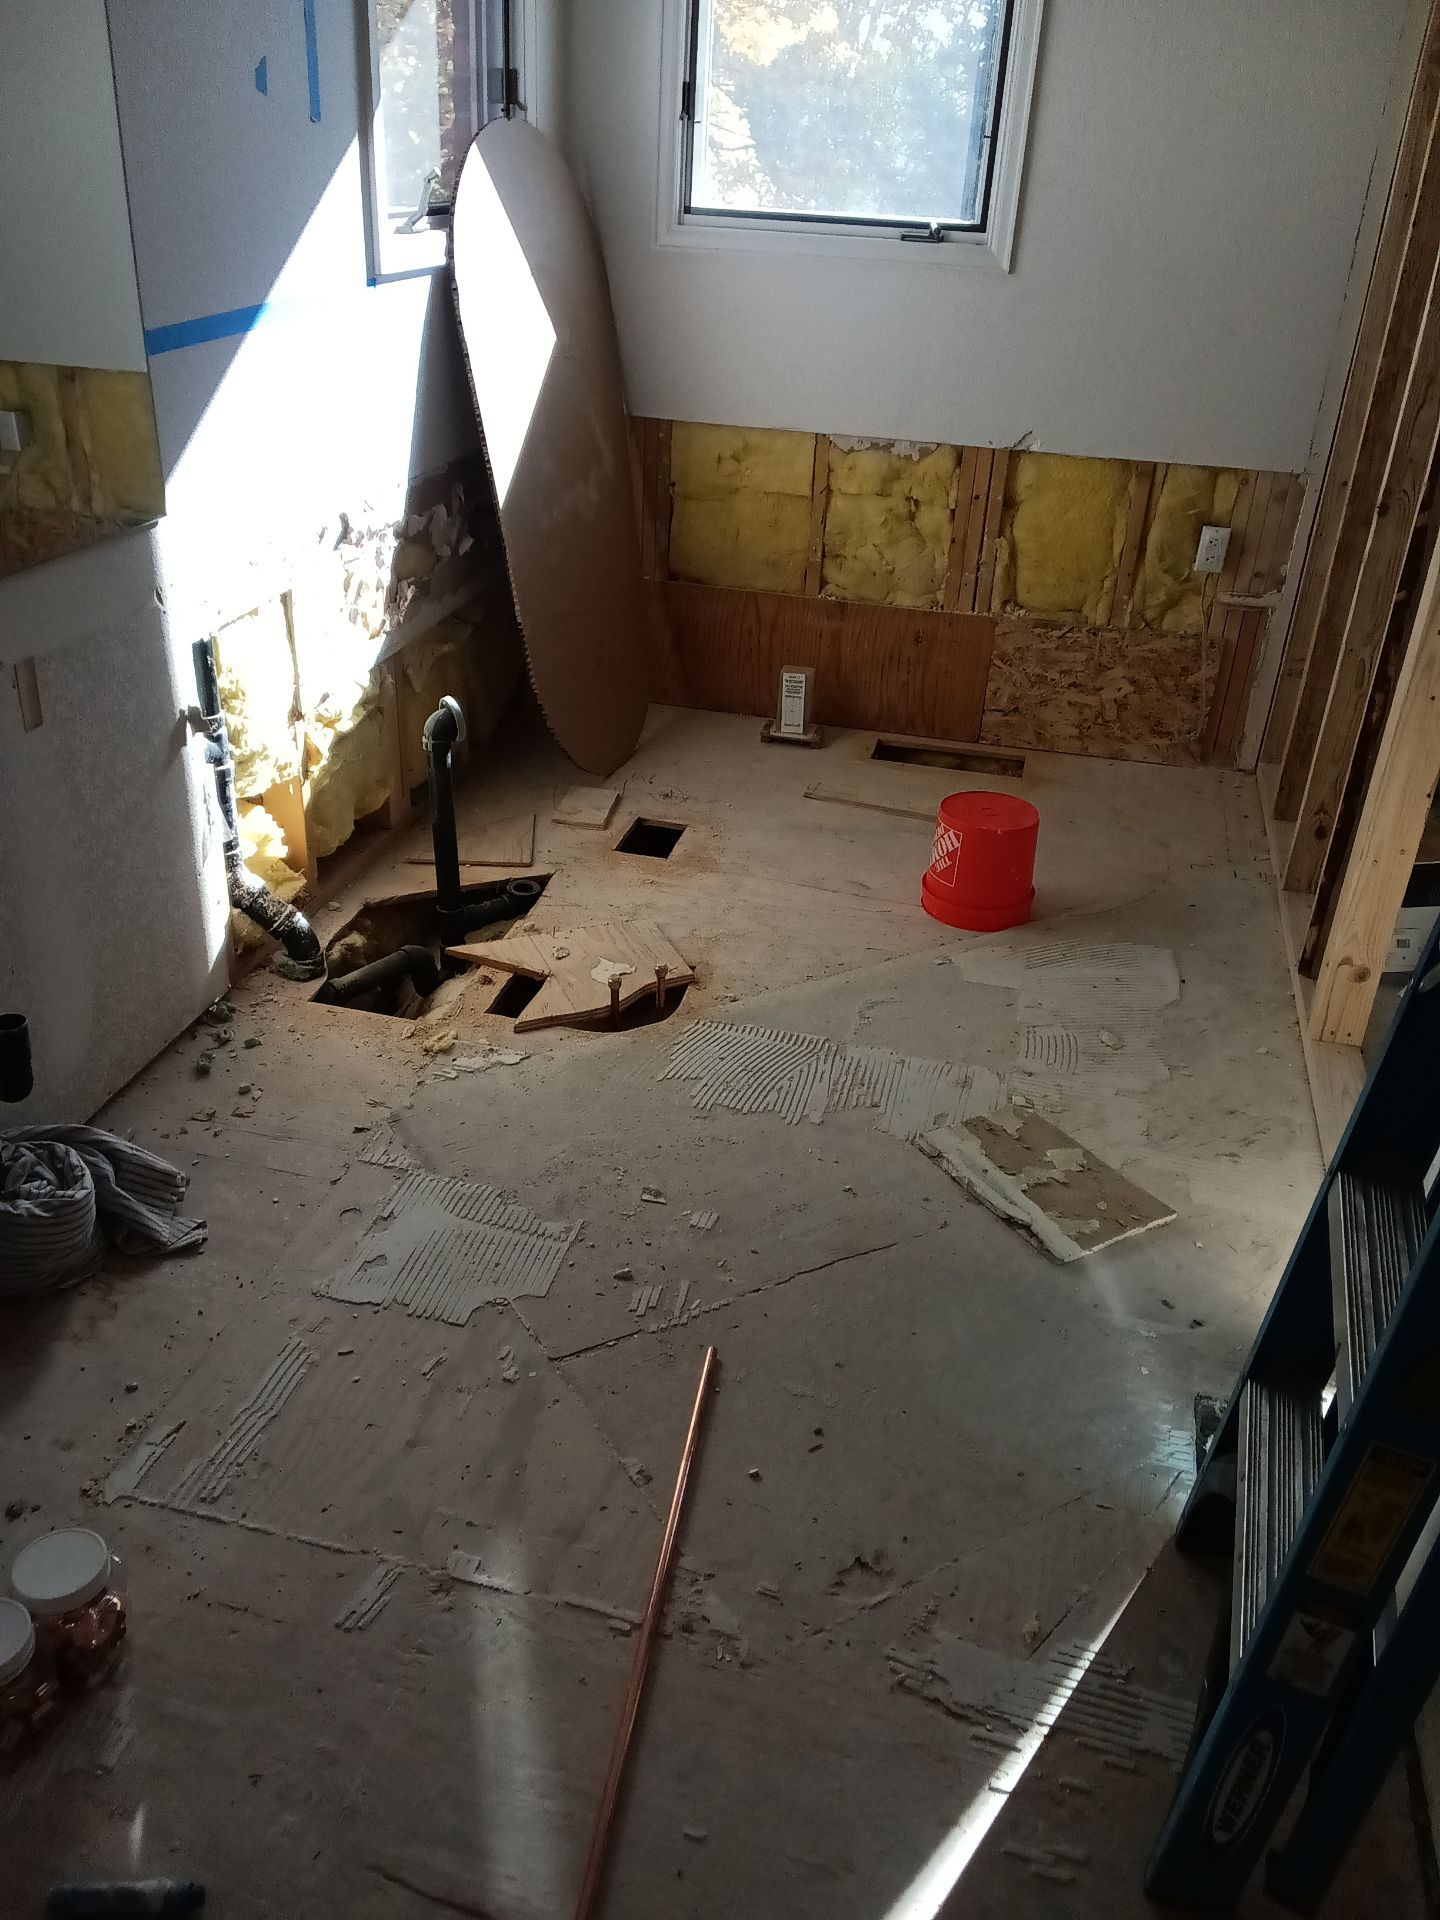
DURING: We added insulation in the primary bathroom to make it more comfortable when soaking in the tub. The pipe sticking out of the floor will be moved to the new location for the tub filler faucet.
e0c91487-1f96-49e5-8e14-6abf10c44ebe
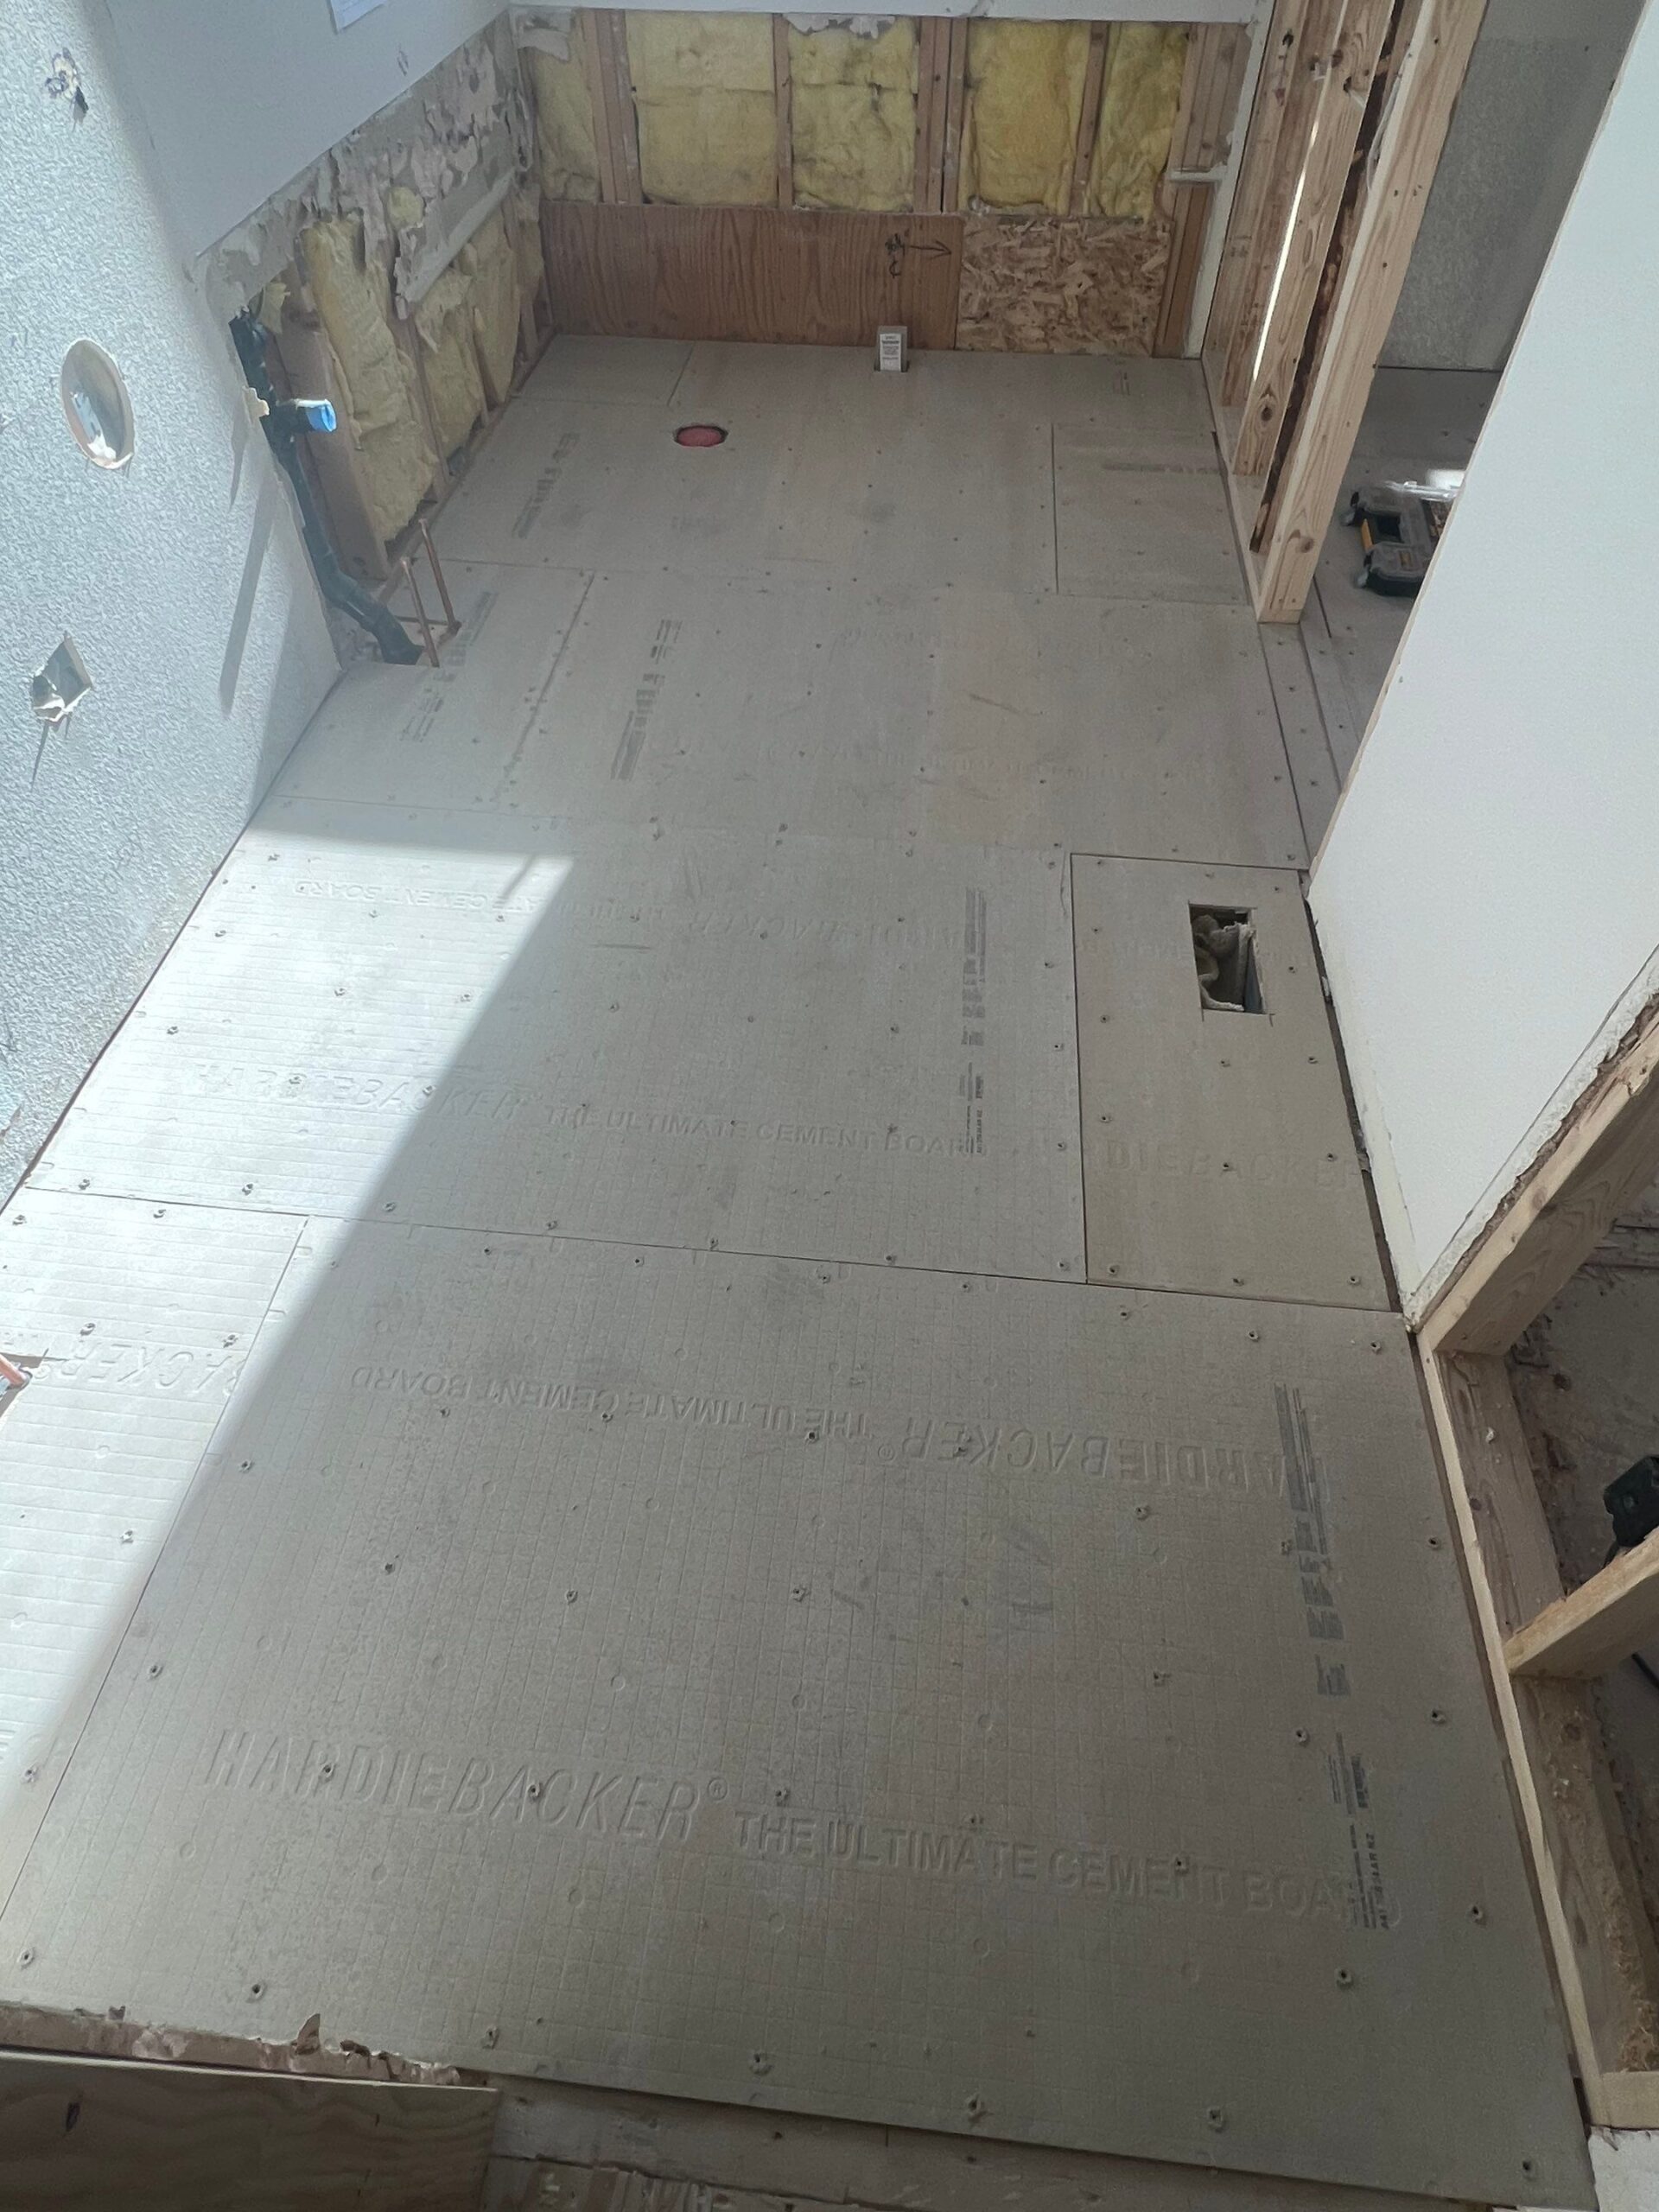
DURING: We installed tile backerboard on the primary bathroom floor in create a level surface for a flawless tile installation.

DURING- Blueprints Bath Tile
DURING: Progress in the en suite primary bath! Spacers ensure uniform, straight grout lines in the space between the tiles as they set.

DURING- Blueprints Bath Tile 2
DURING Our expert tile crew masterfully cut around floor vents and plumbing for smooth installation of large subway tiles that seamlessly meet wood-look tiles in the other parts of the primary en suite bathroom.
ed2c589c-f7f8-45e4-bb41-46ed01d36e00
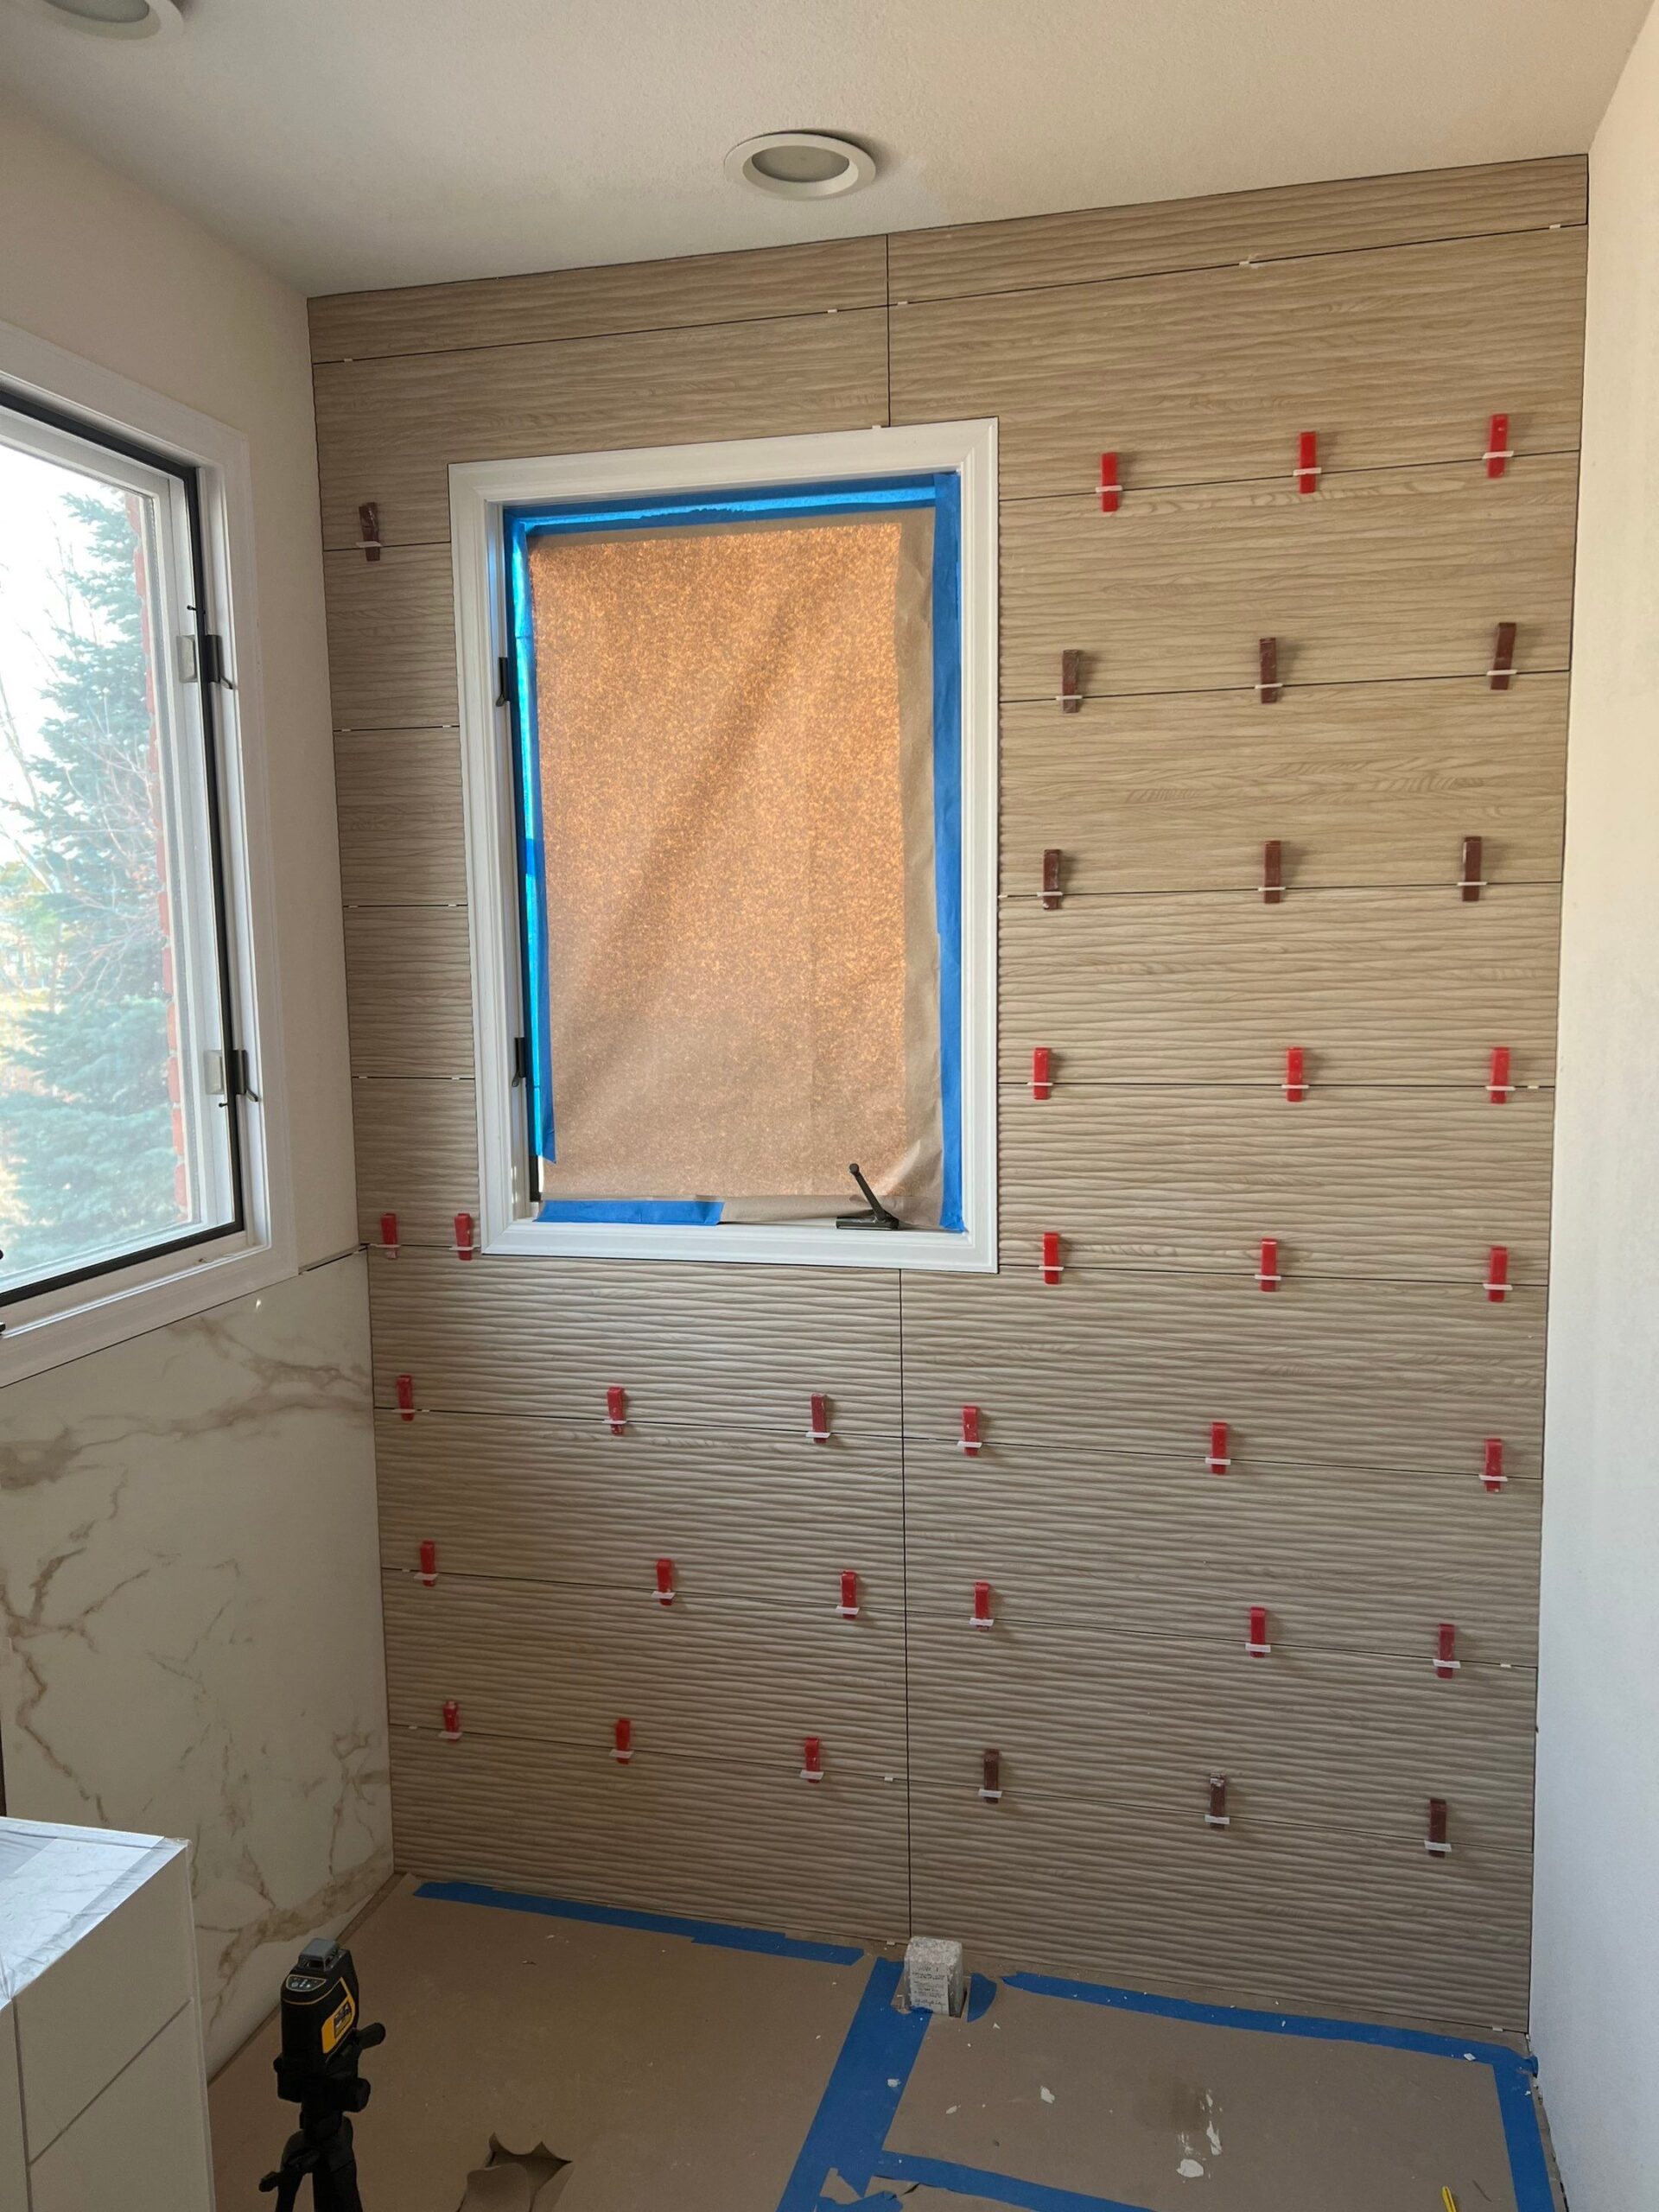
DURING: Spacers also hold the textured tiles in place on the wall. The soaker tub will go in front of this feature wall.

DURING- Blueprints Soaker Tub
DURING: A sleek freestanding soaker tub brings spa-like luxury to this master bathroom remodel, featuring a textured accent wall and floor-mounted tub filler.

DURING- Blueprints Shower Barrier
DURING: The red is a waterproofing membrane used to seal the tile backerboard one the shower walls and bench. Even the screw holes are covered to prevent water intrusion.
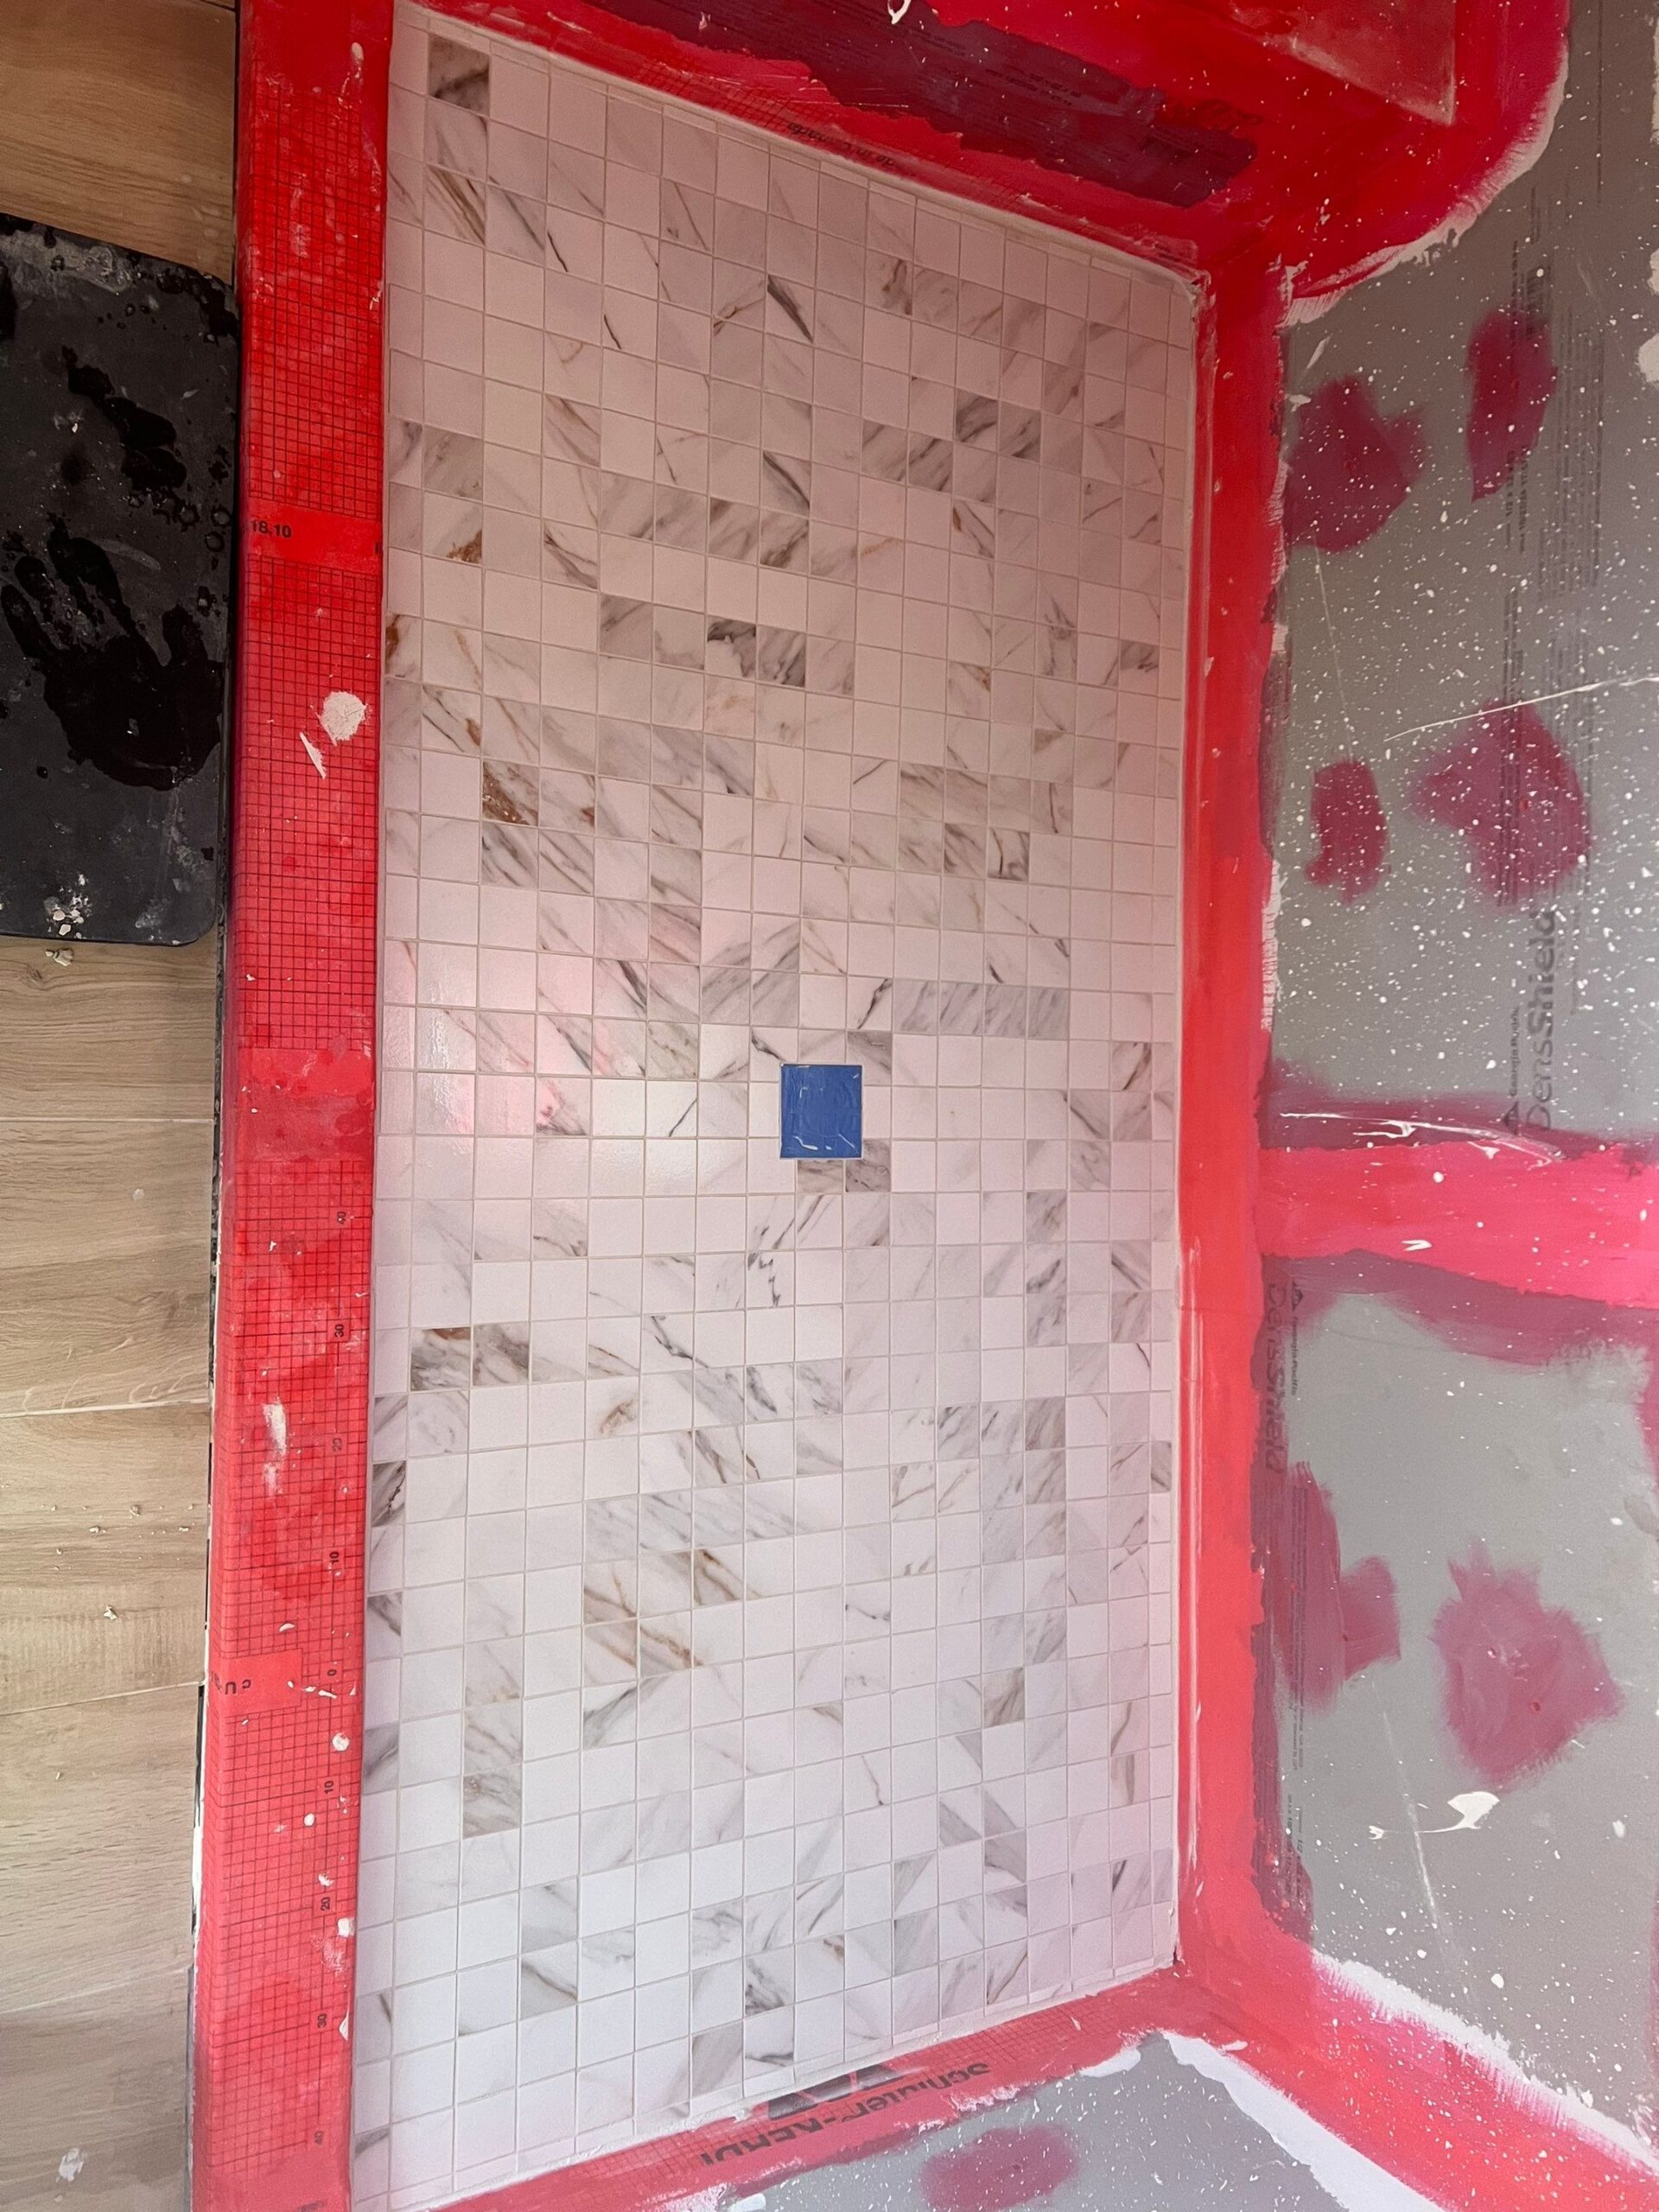
During-Shower-Tiles
DURING Tip: Small tiles <2" make a smooth slope towards the drain in a custom shower pan. These homeowners found ones that match their large format wall tiles.

DURING- Blueprints Shower
DURING: To showcase the homeowner’s great taste in selecting these oversized porcelain tiles, we aligned the marble veining across the tiles for a polished finish.
f2d79d28-81e9-4287-9670-2f01fefe68ed
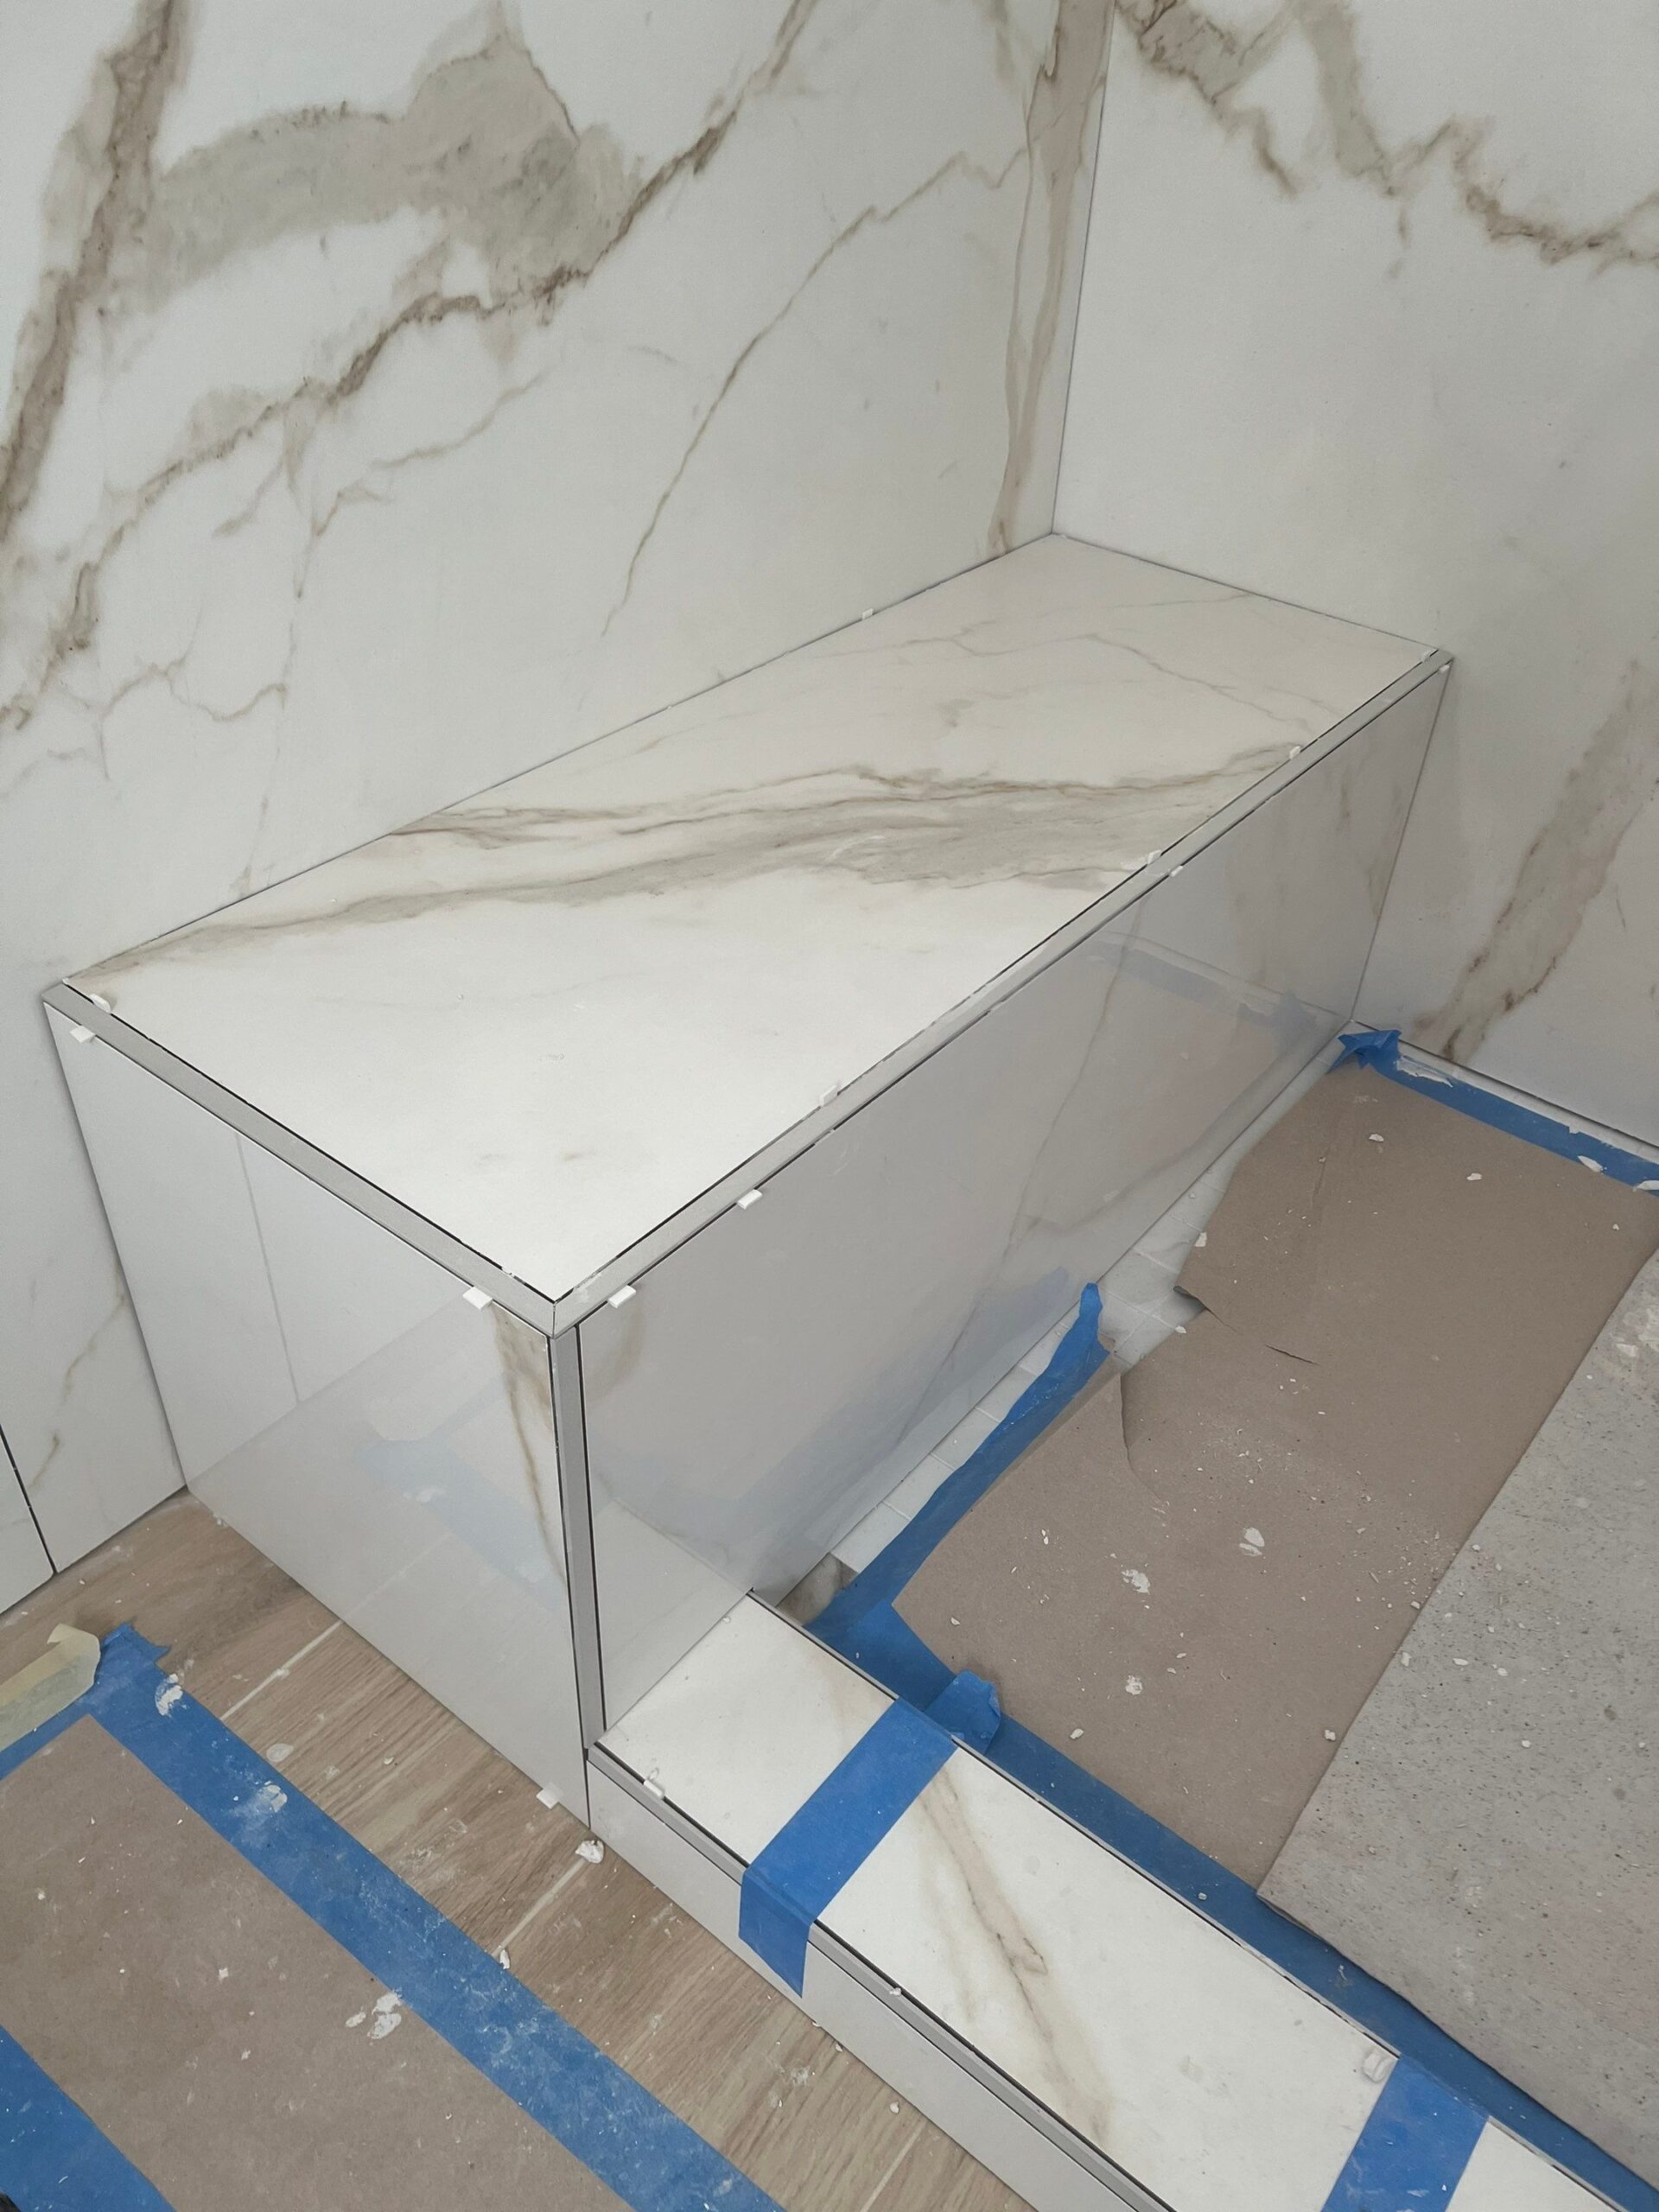
DURING: We used beveled trim for a smoother, detailed edge of the shower bench and flush trim on the shower curb.

DURING- Blueprints Shower Tile
DURING: When homeowners dream of a primary en suite bathroom, they want attention to detail on the finishes finish, like showcasing these large format porcelain tiles with precise alignment on the walls and cut to size for the custom shower bench and curb.

DURING- Blueprints Shower Electrical
DURING: Luxurious, large format porcelain tiles mimic marble for major impact in this en suite primary bathroom remodel.
After-Shower
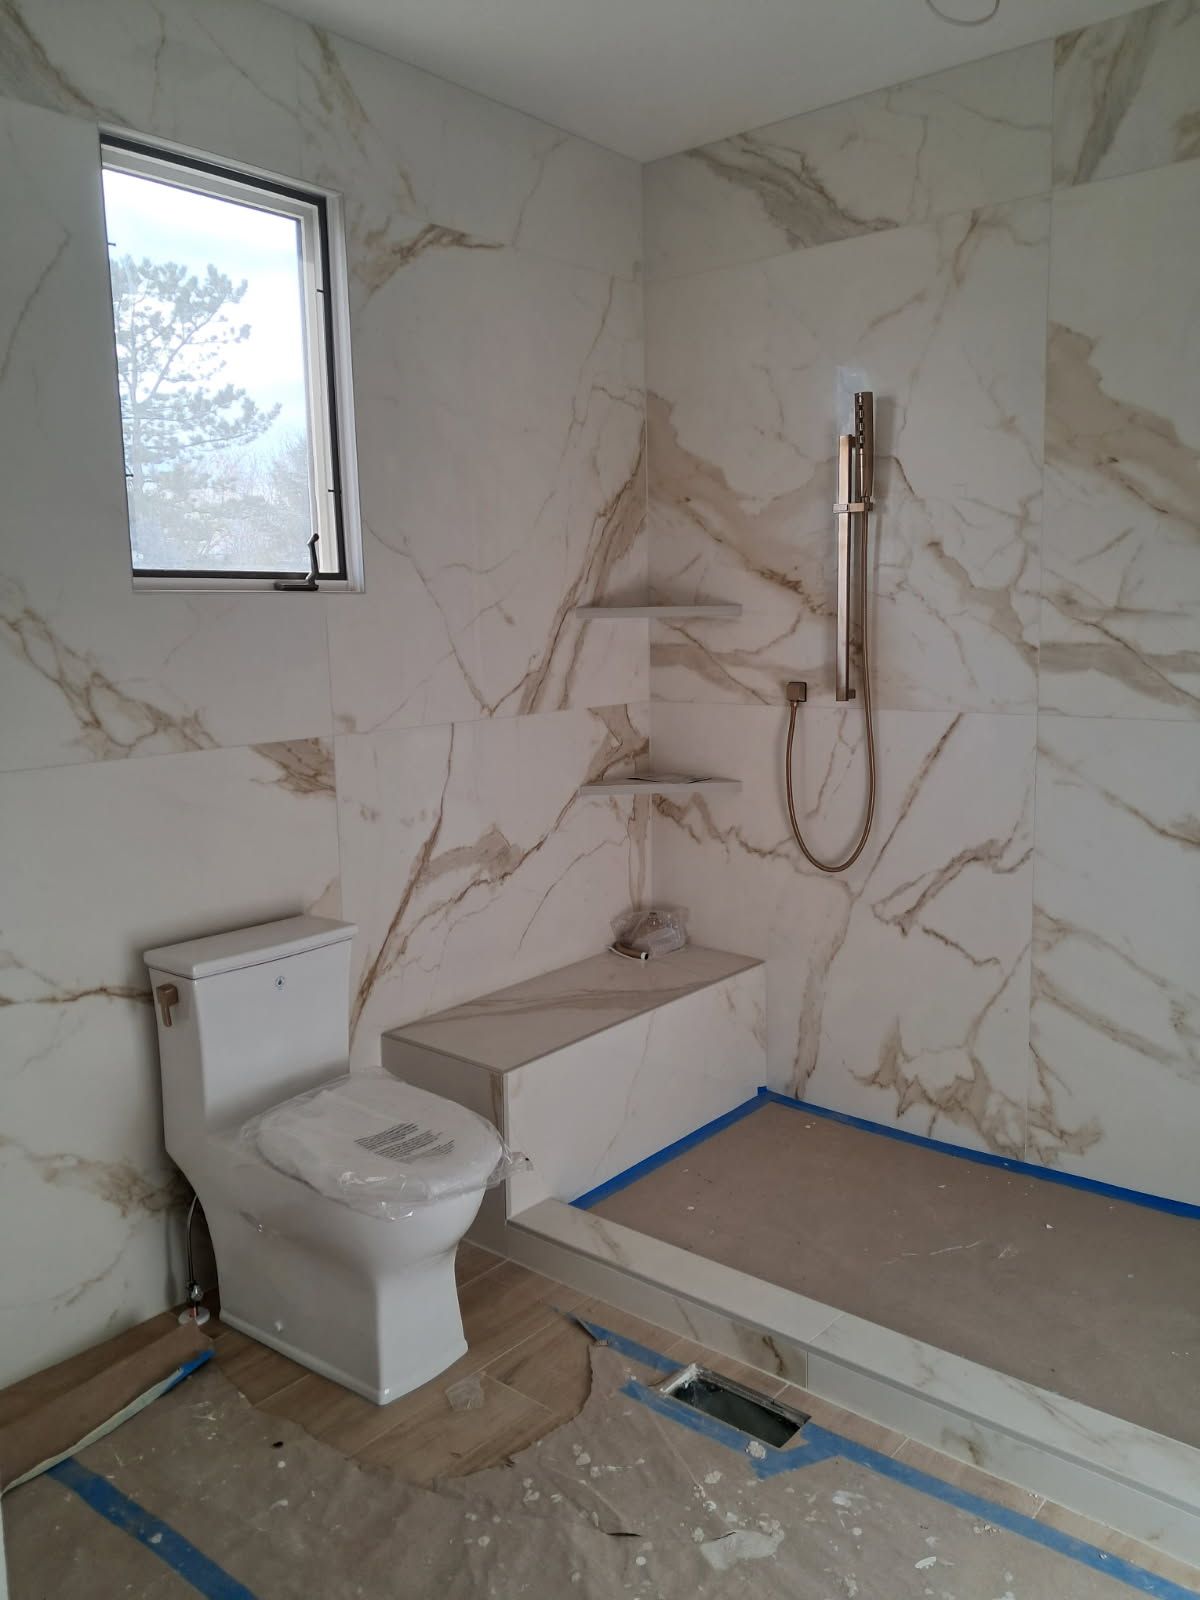
AFTER: Every detail was perfectly planned and executed in this primary shower—like corner shelves for toiletries and the handheld shower faucet in easy reach from the bench.
25026e0e-fda9-4875-803c-5ad9d51614c0
DURING: We installed a double-vanity and tile wainscotting in the other room of primary bathroom en suite.

AFTER- Blueprints Tub
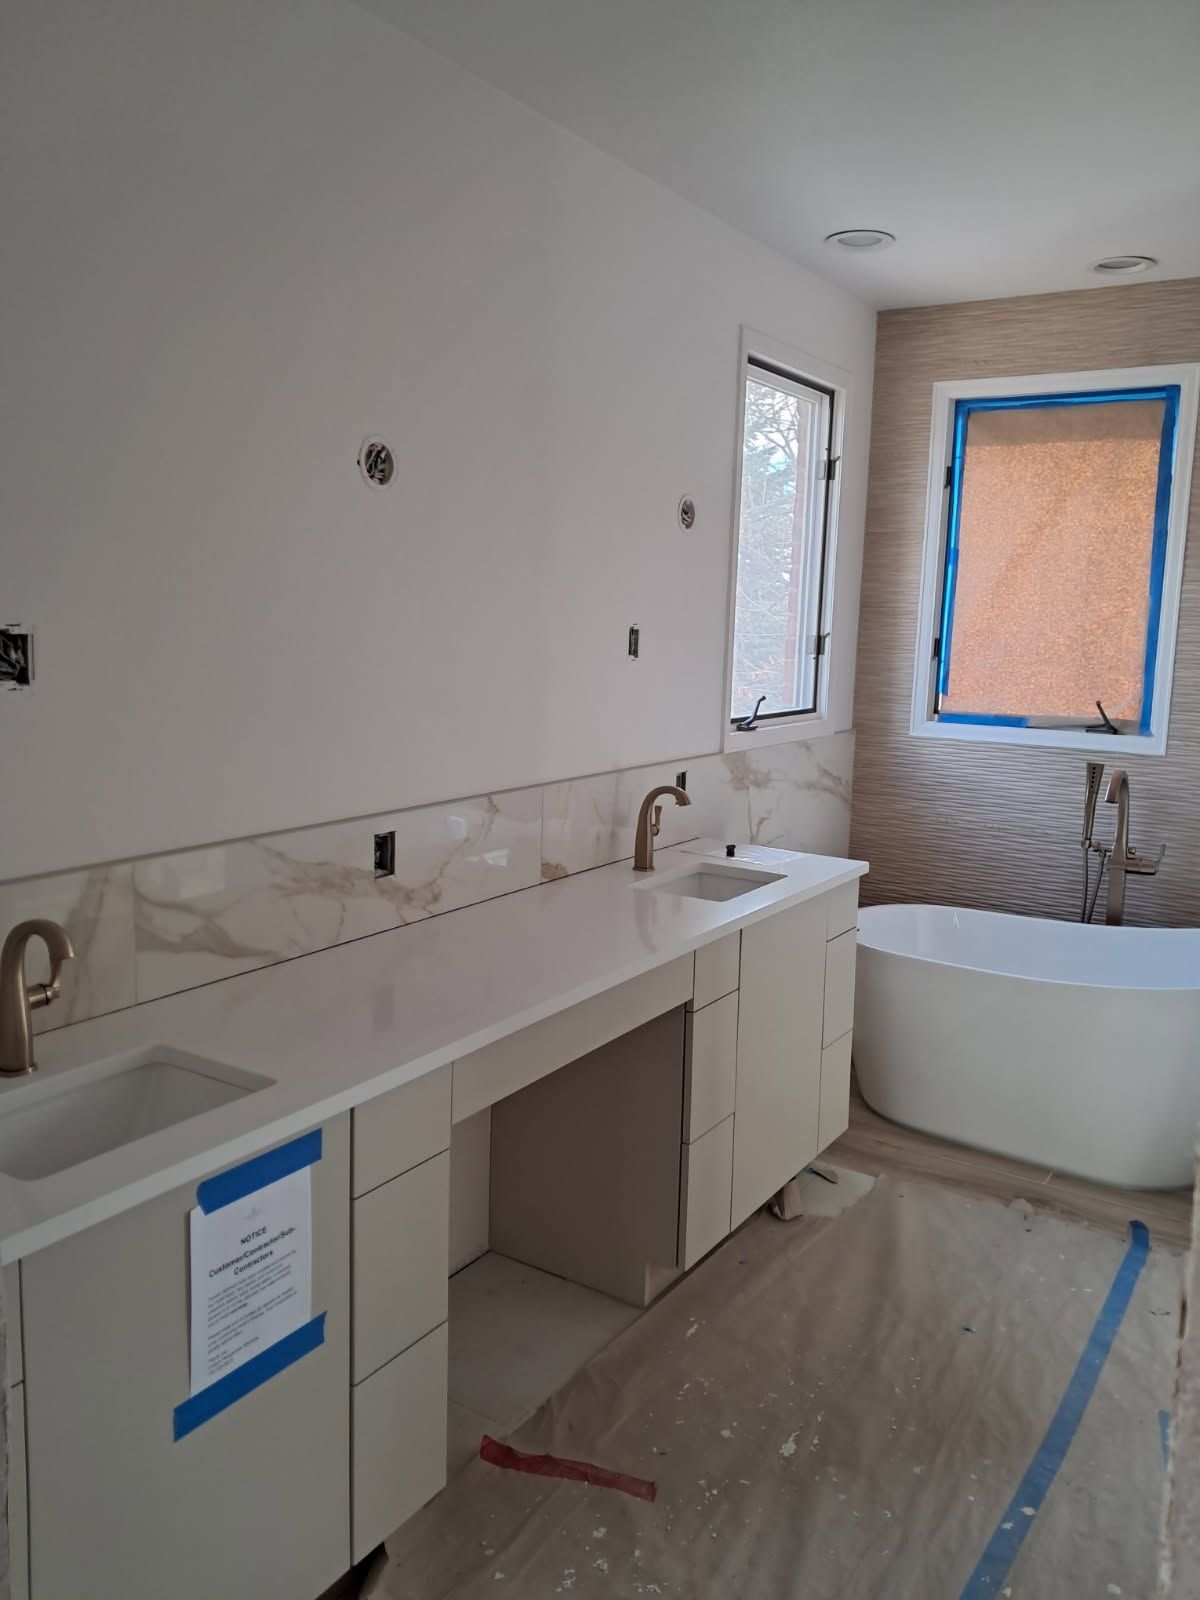
AFTER: A luxurious transformation! The primary en suite bath now boasts a freestanding soaker tub, warm wood-look tile floors, and an oversized shower area—all tied together with a frosted glass sliding door for a modern feel.
f1607f07-5f27-4259-bdef-c0826e1ab043
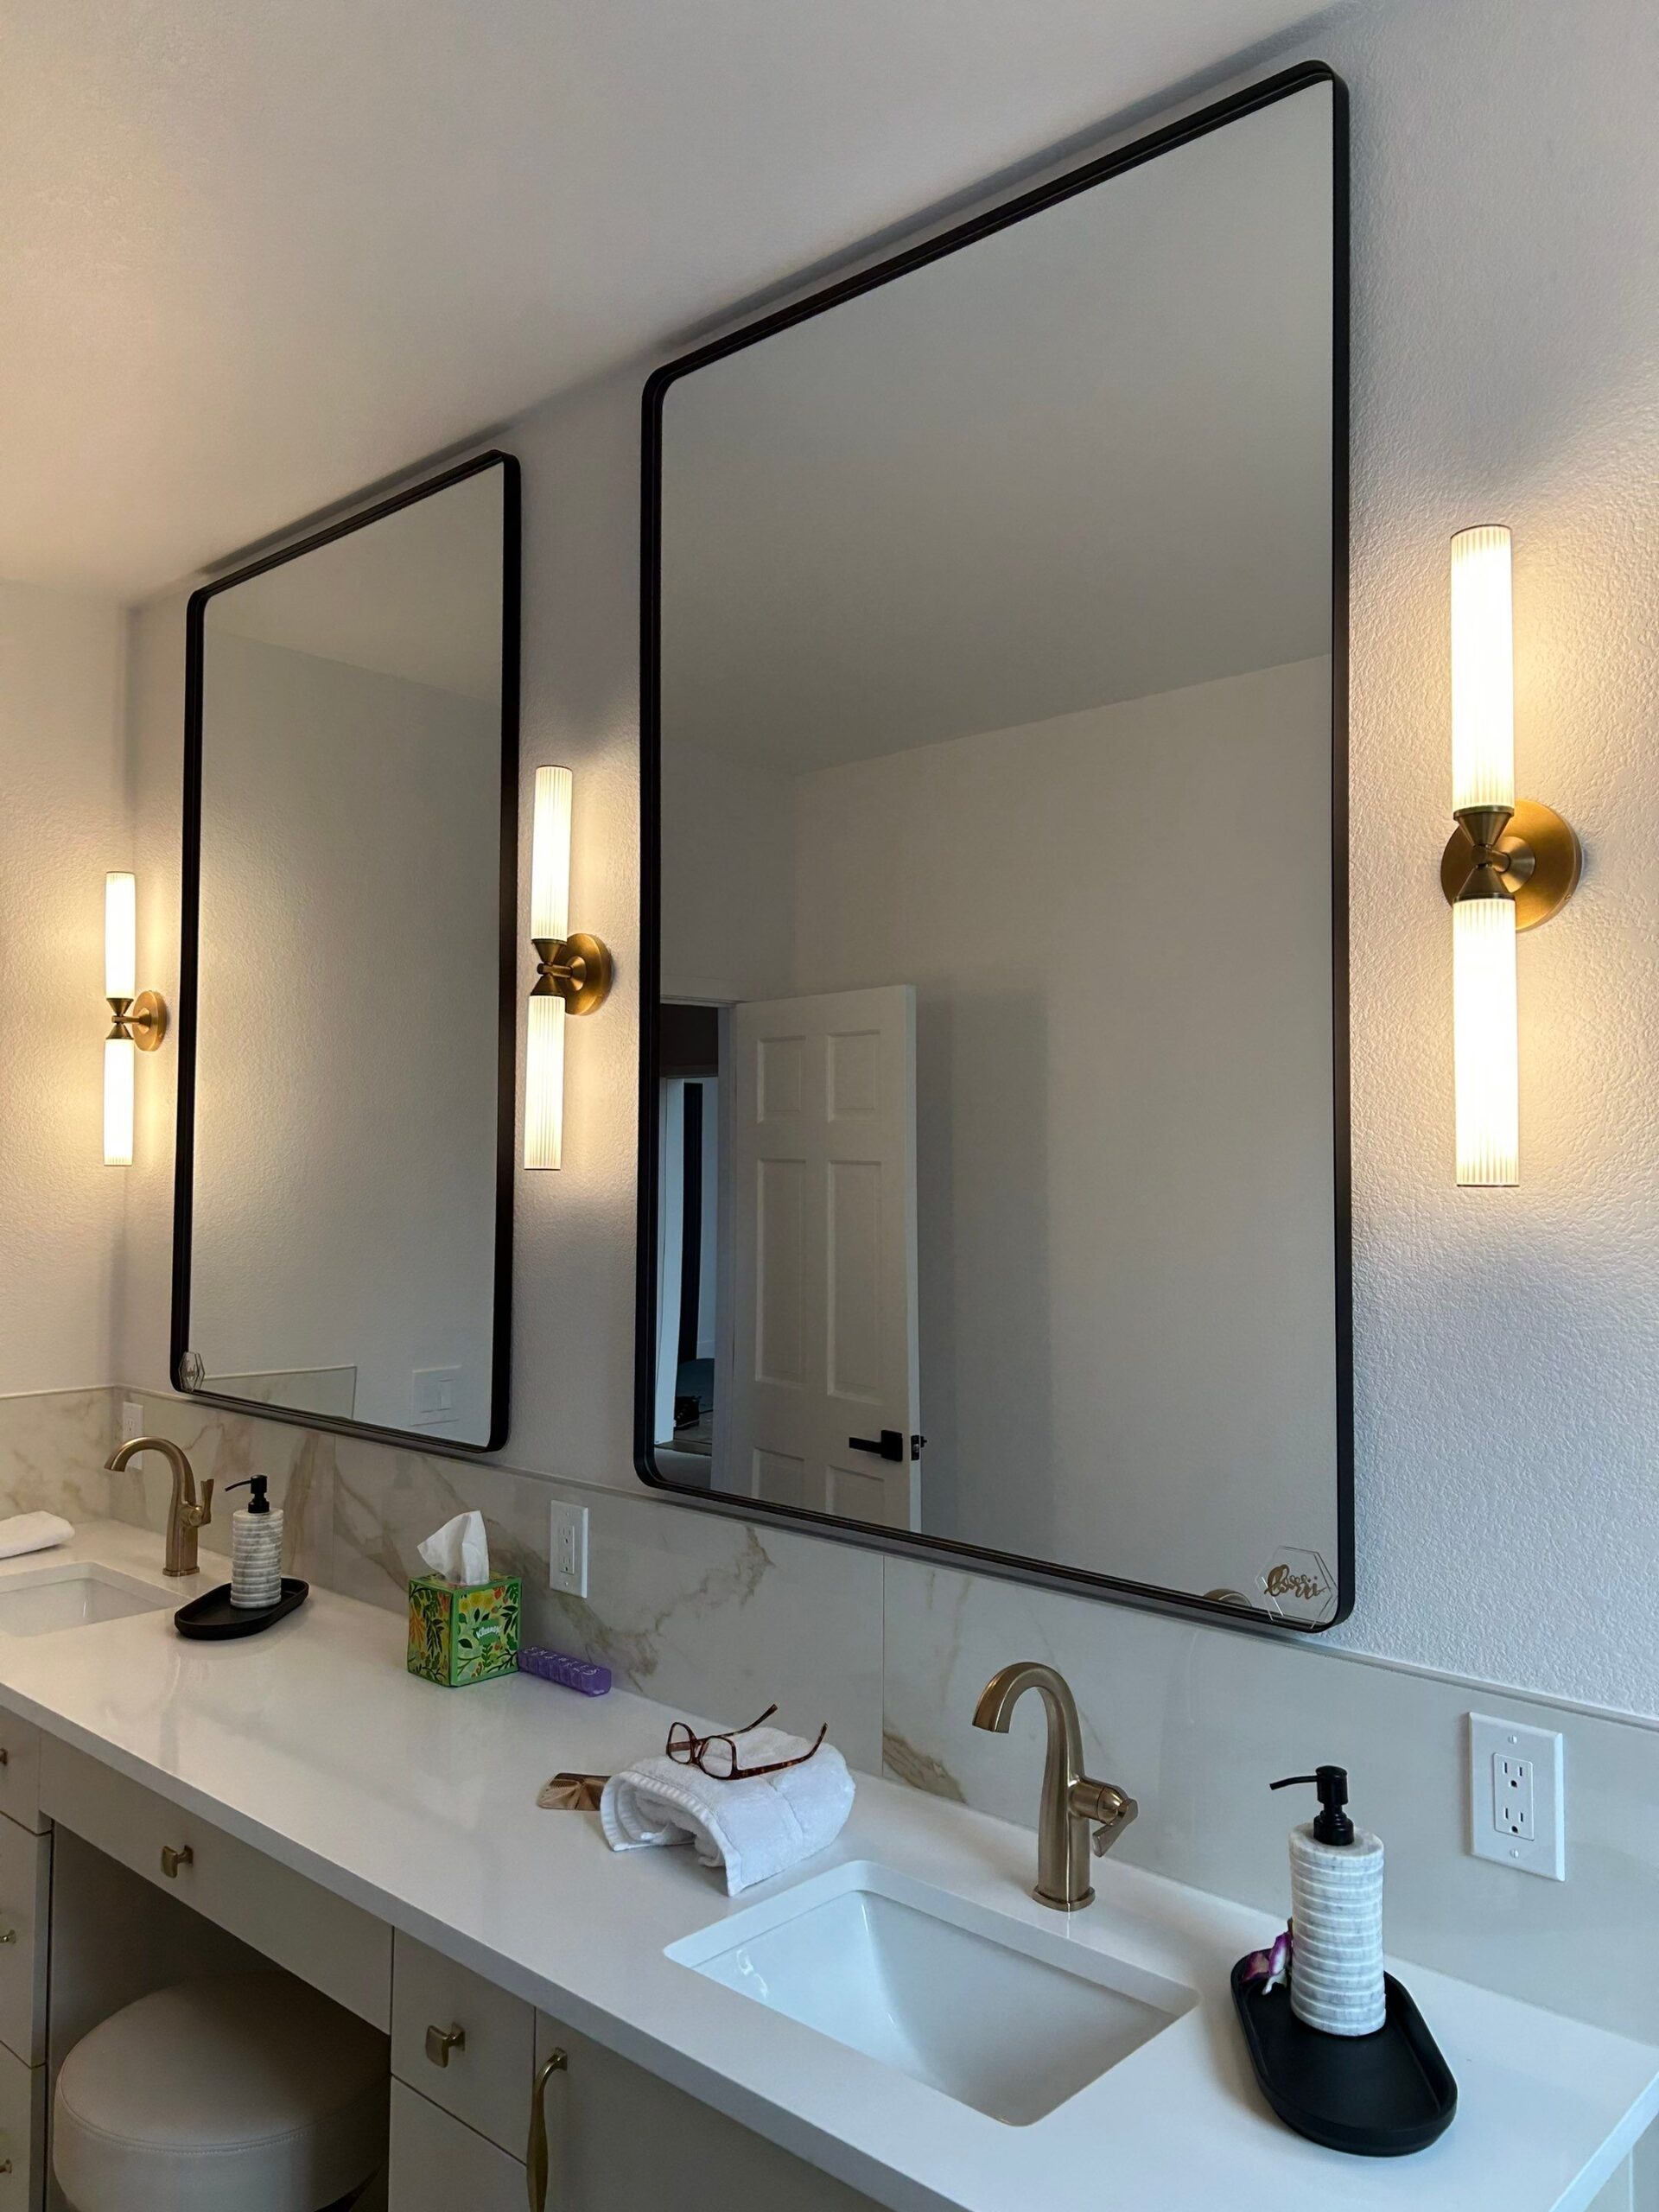
AFTER: There’s plenty of space for both homeowners to get ready at this double vanity with 2 sinks, 2 mirrors, and 3 wall scones in the primary bathroom.
6a19756f-7de7-40da-a3fa-564aca8c2f97
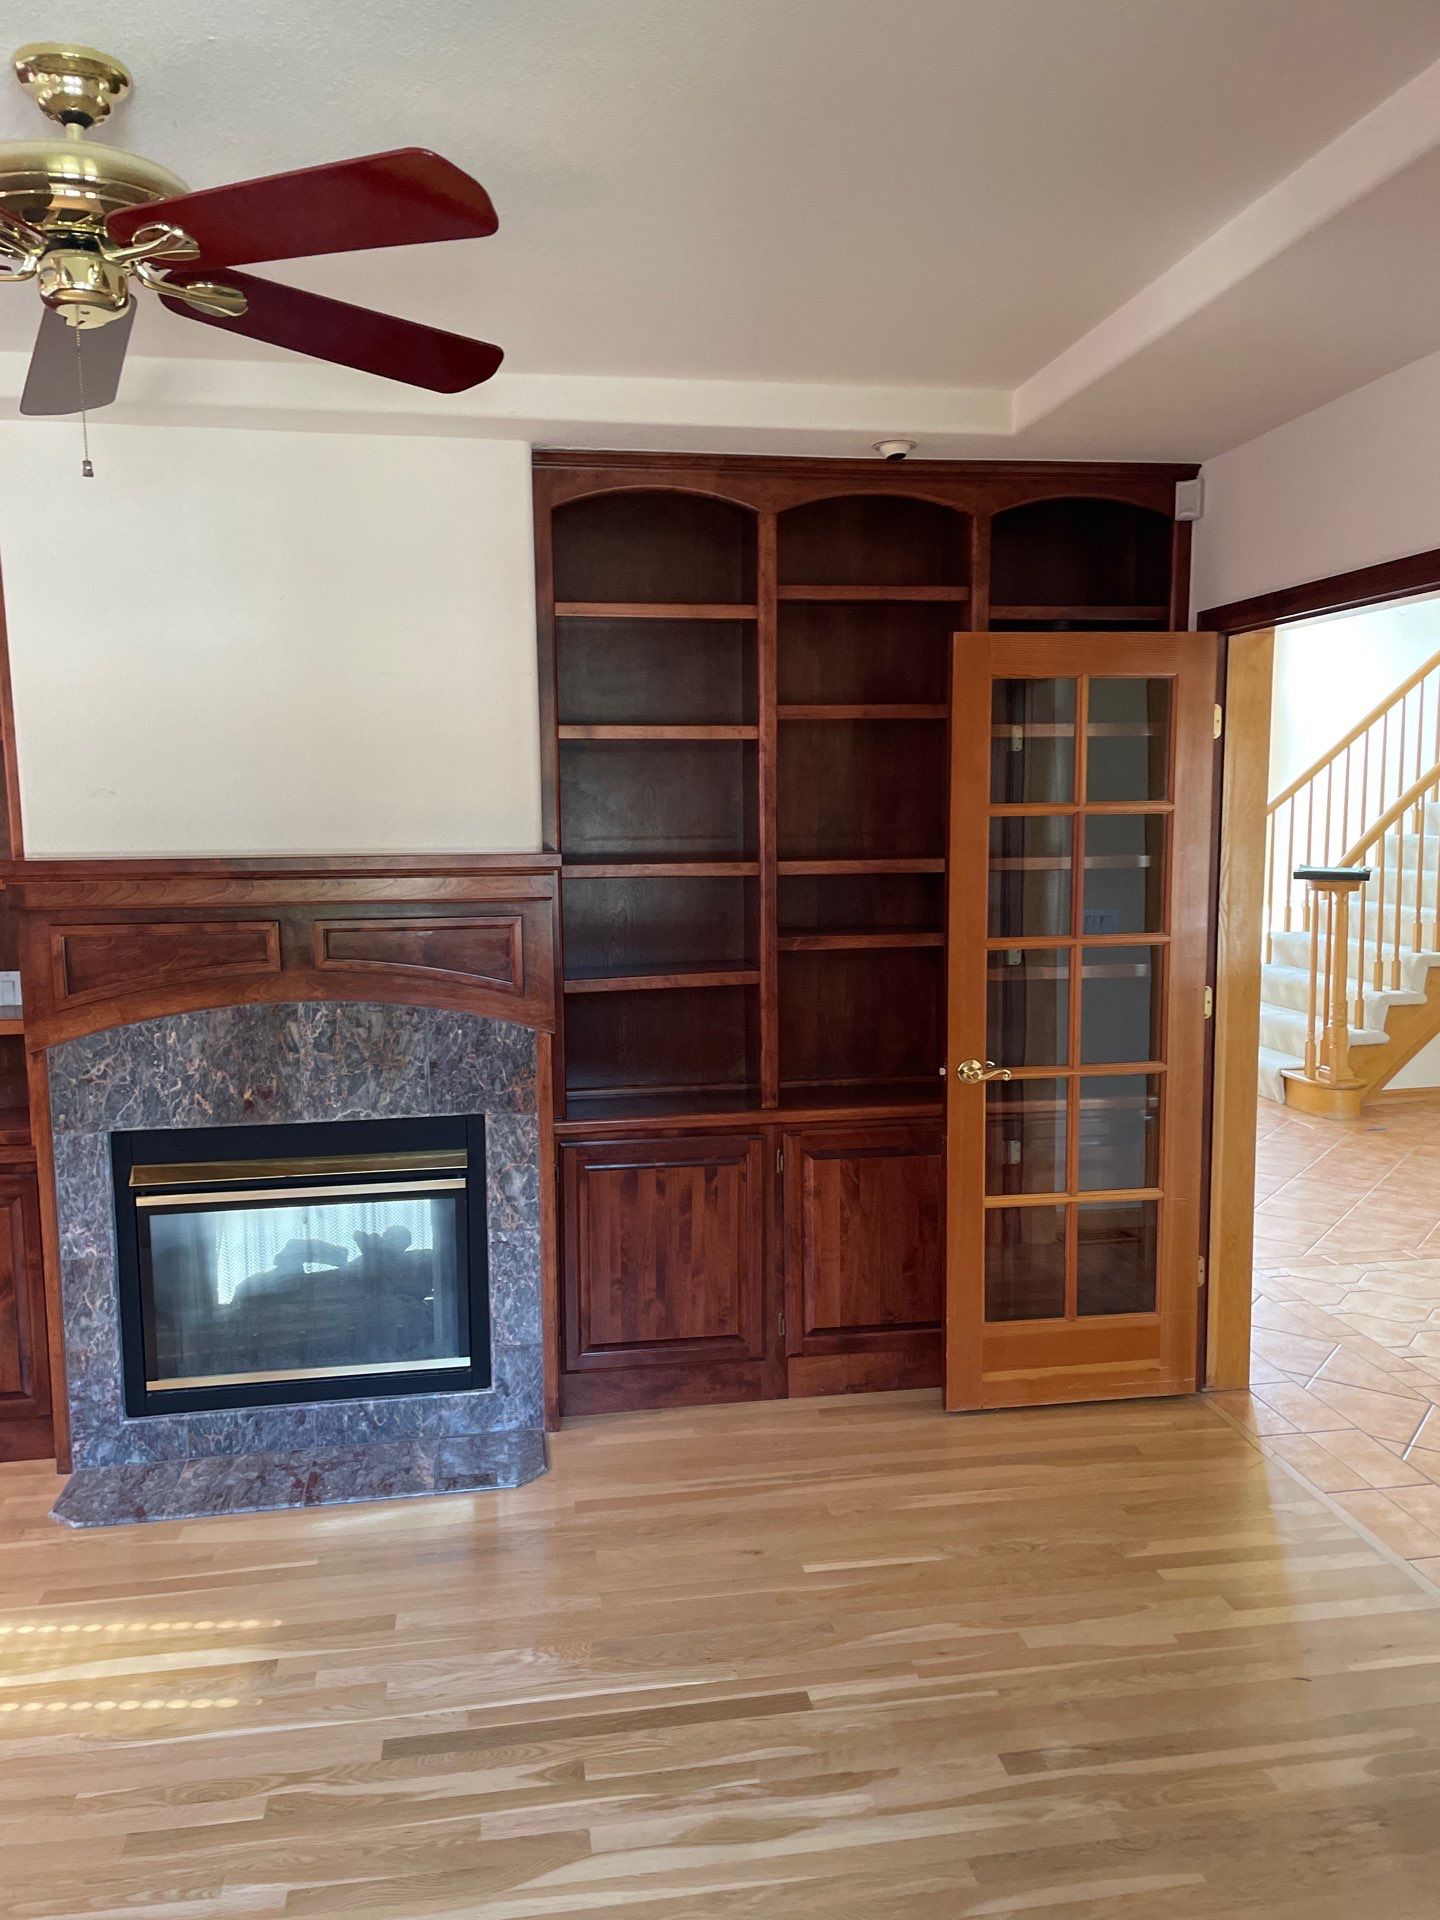
BEFORE: We removed this fireplace, built-in bookcases, and double doorway to convert this library into a deluxe primary closet.

AFTER- Blueprints Closet Light
AFTER: A closet fit for royalty! This custom walk-in features built-in cabinetry, luxe hardware, a spacious island for storage, and a stunning chandelier that adds classic elegance to a modern setup.

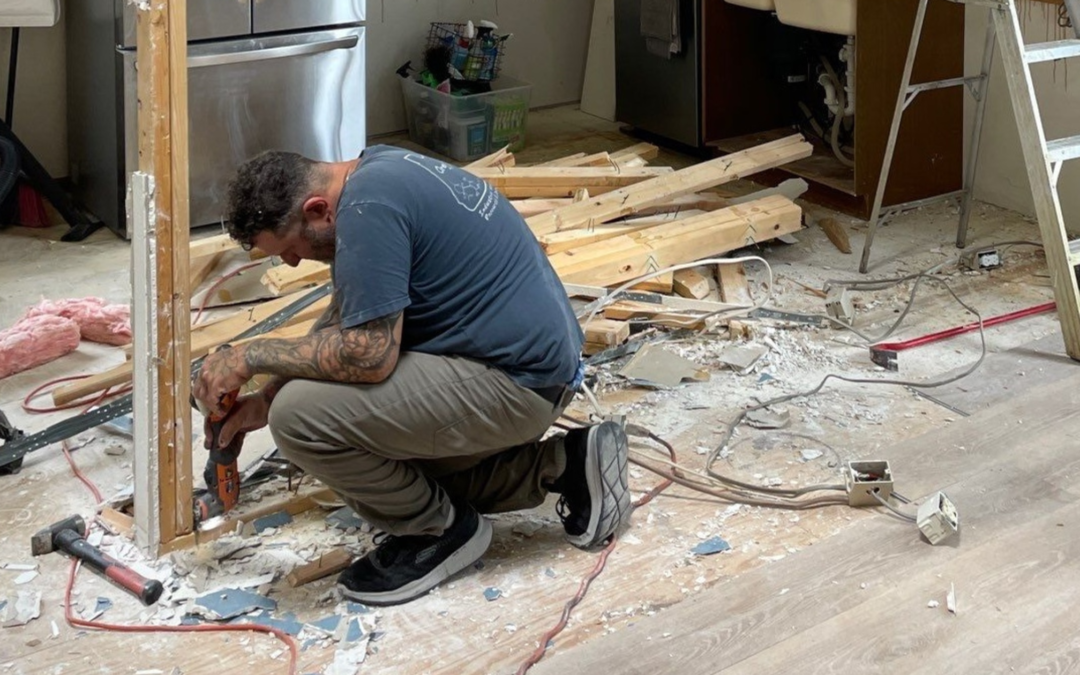
DURING- Blueprints Bath Demo
DURING Stripped to the studs—our team demolished the primary bedroom to prepare for a total transformation, including a reconfigured bathroom suite layout and all-new finishes.

DURING- Blueprints Wall Insulation
DURING: After we framed a new wall for the en suite shower wall, we added insulation for energy efficiency and sound-deadening between rooms before drywall.

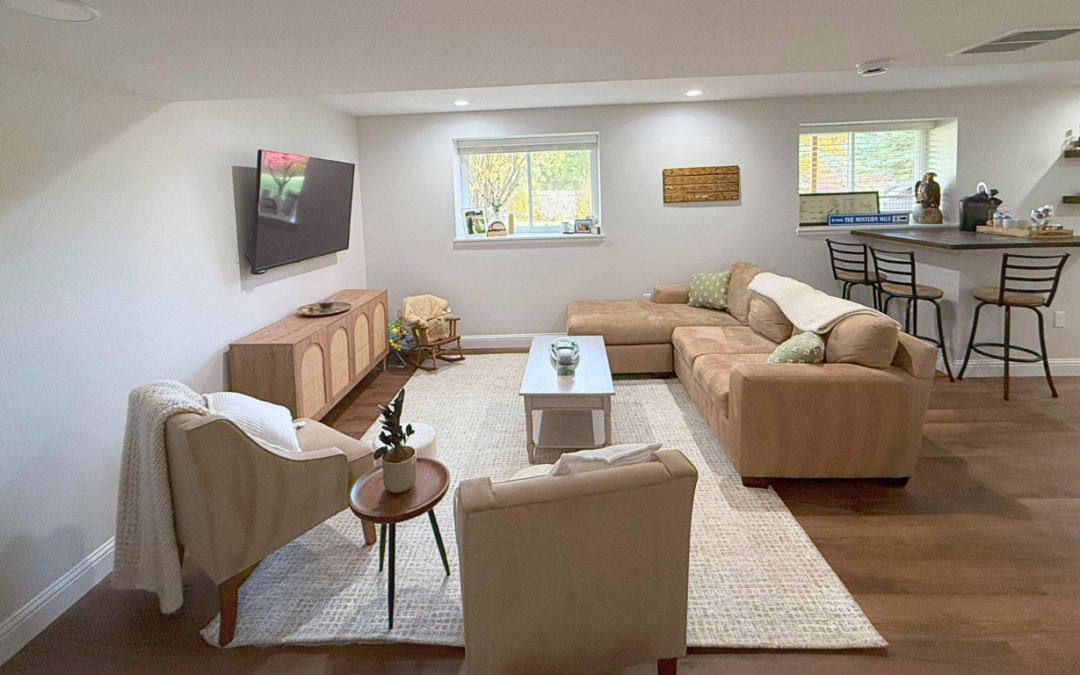
AFTER- Blueprints Seating
AFTER: This stylish seating nook adds a touch of serenity and sophistication to the primary bedroom. With a statement light fixture and warm textures, it’s the perfect corner to curl up with a book.

BEFORE- Blueprints Powder Room
BEFORE: The powder room was totally forgetable with outdated finishes and fixtures.

BEFORE- Blueprints PR Drawing
PLANS: The homeowner’s powder room design concept—this drawing illustrates the bold, modern vision we’ll bring to life in the renovation.
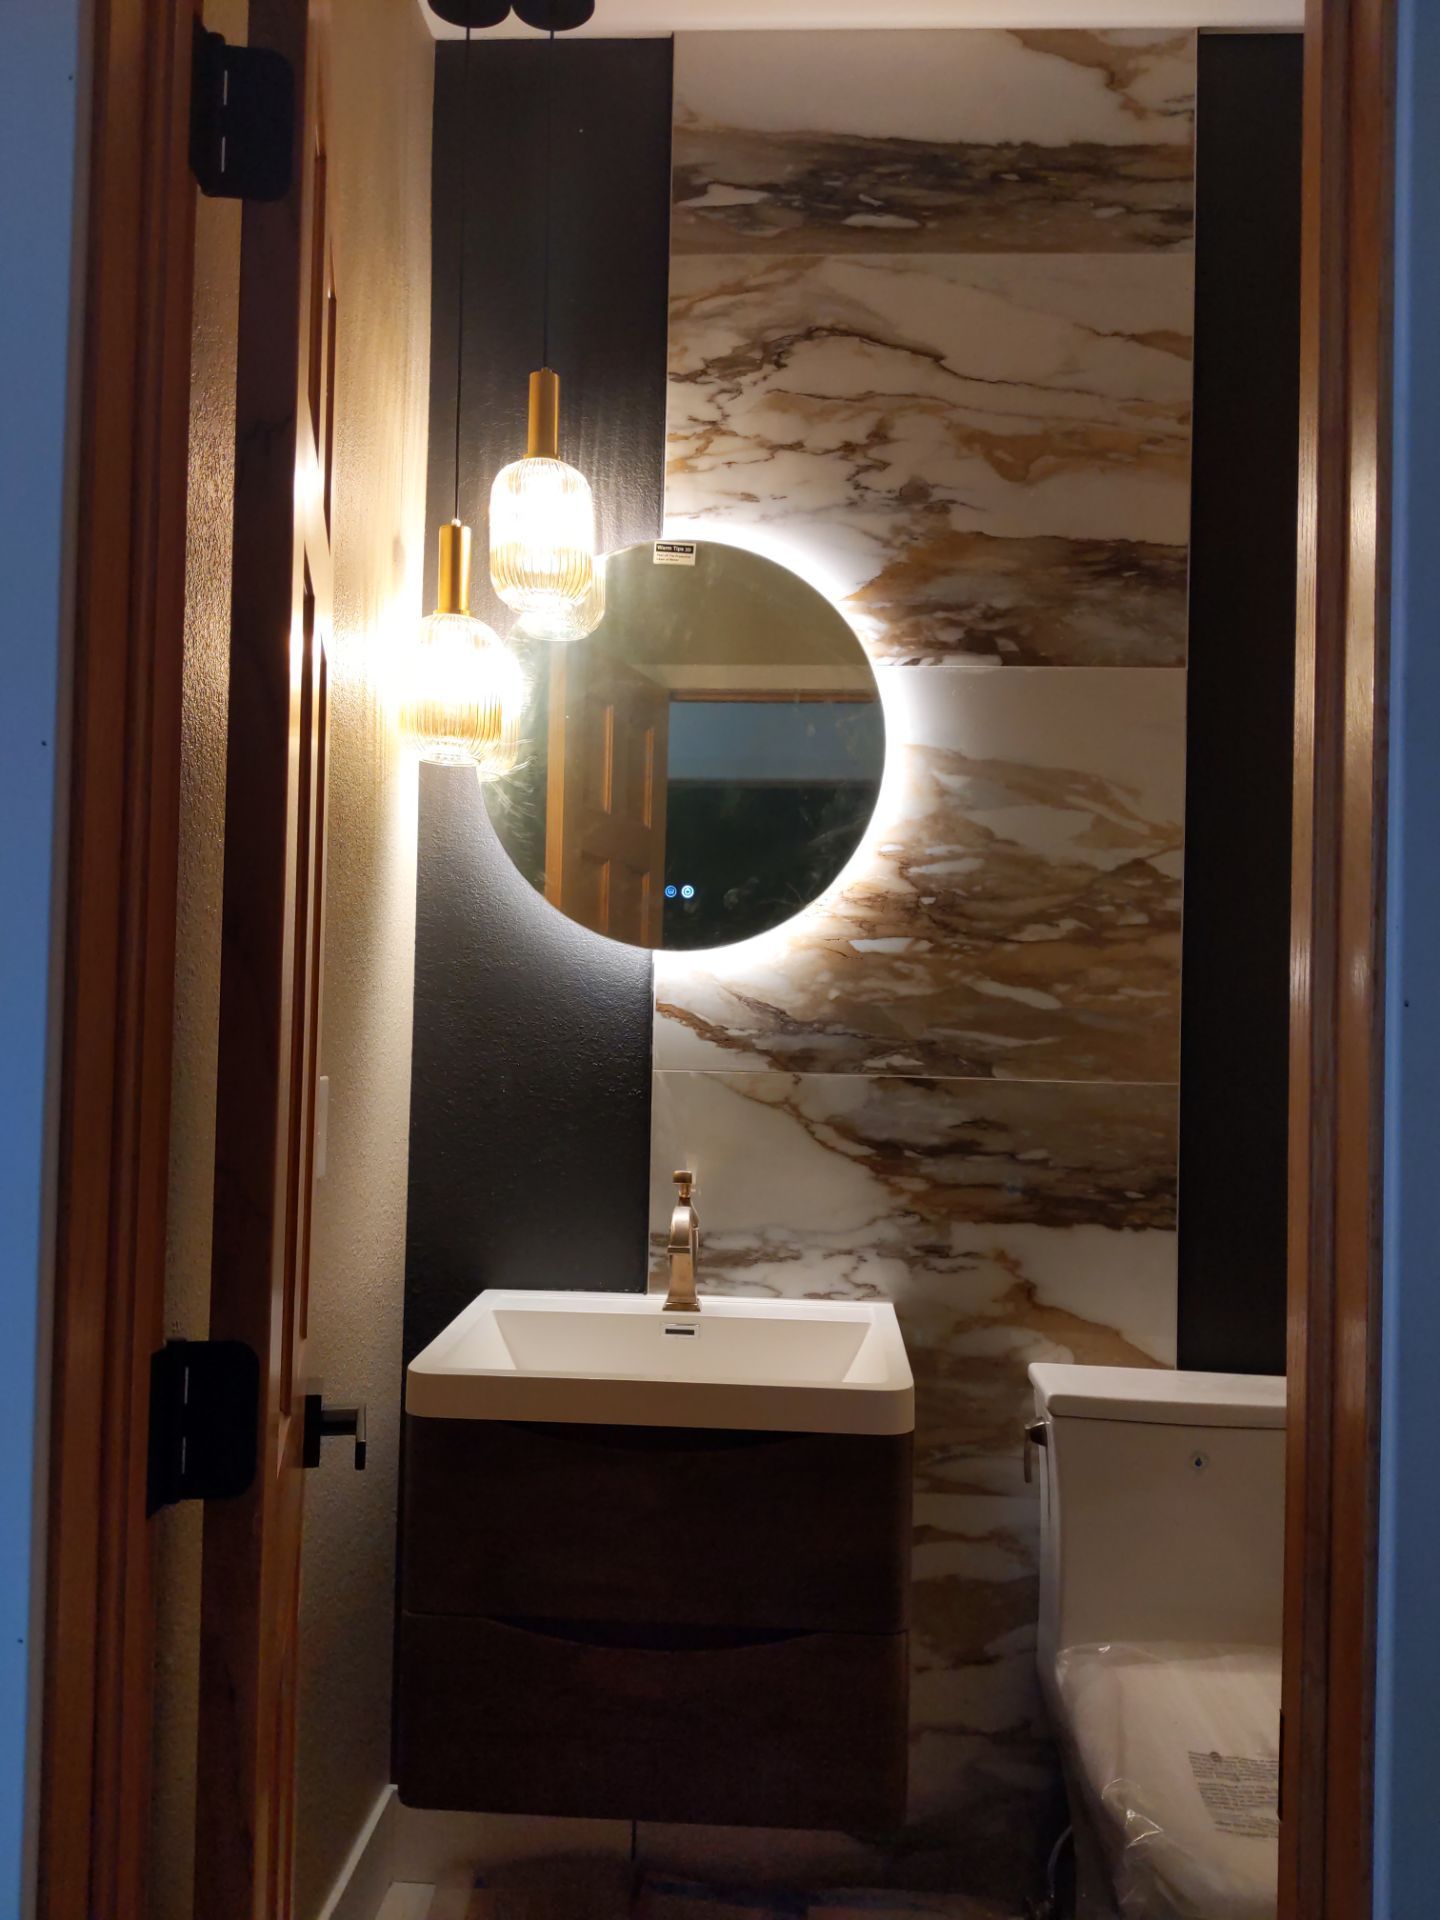
AFTER-Powder-Room
AFTER: This powder room got a major glow up with an accent tile wall, floating vanity, fresh flooring & paint, lighted vanity mirror, and pendant lights.

BEFORE- Blueprints Laundry
BEFORE: The originally laundry room was designed like the rest of the home, in an outdated style that the new owners didn’t like.
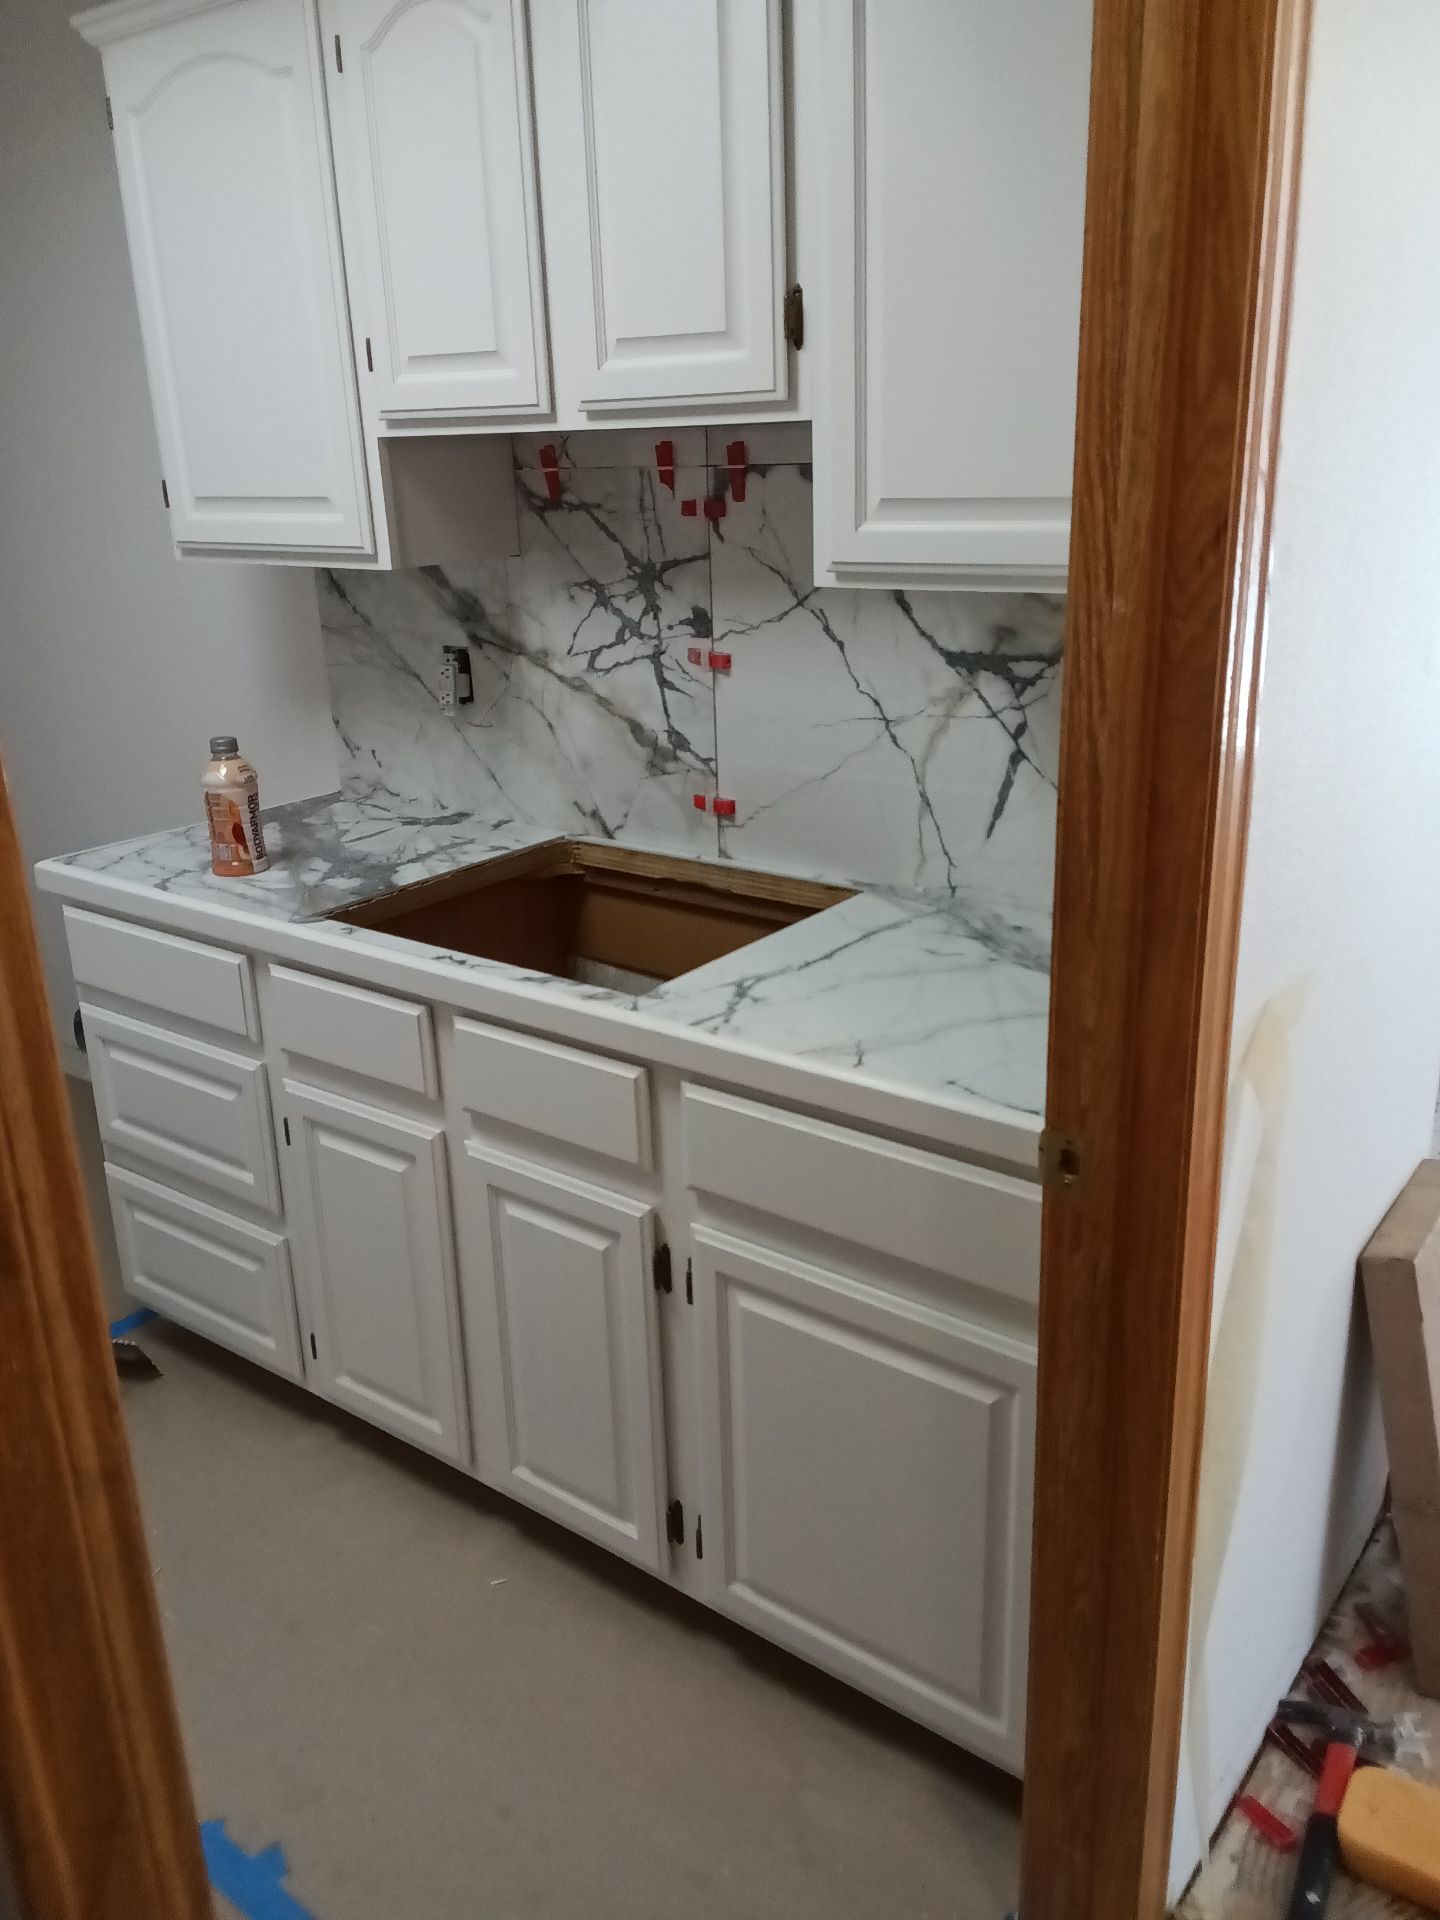
DURING-Laundry
DURING: What a difference we made to refresh this laundry room by just replacing the tiles on the floor, vanity top, and backsplash!
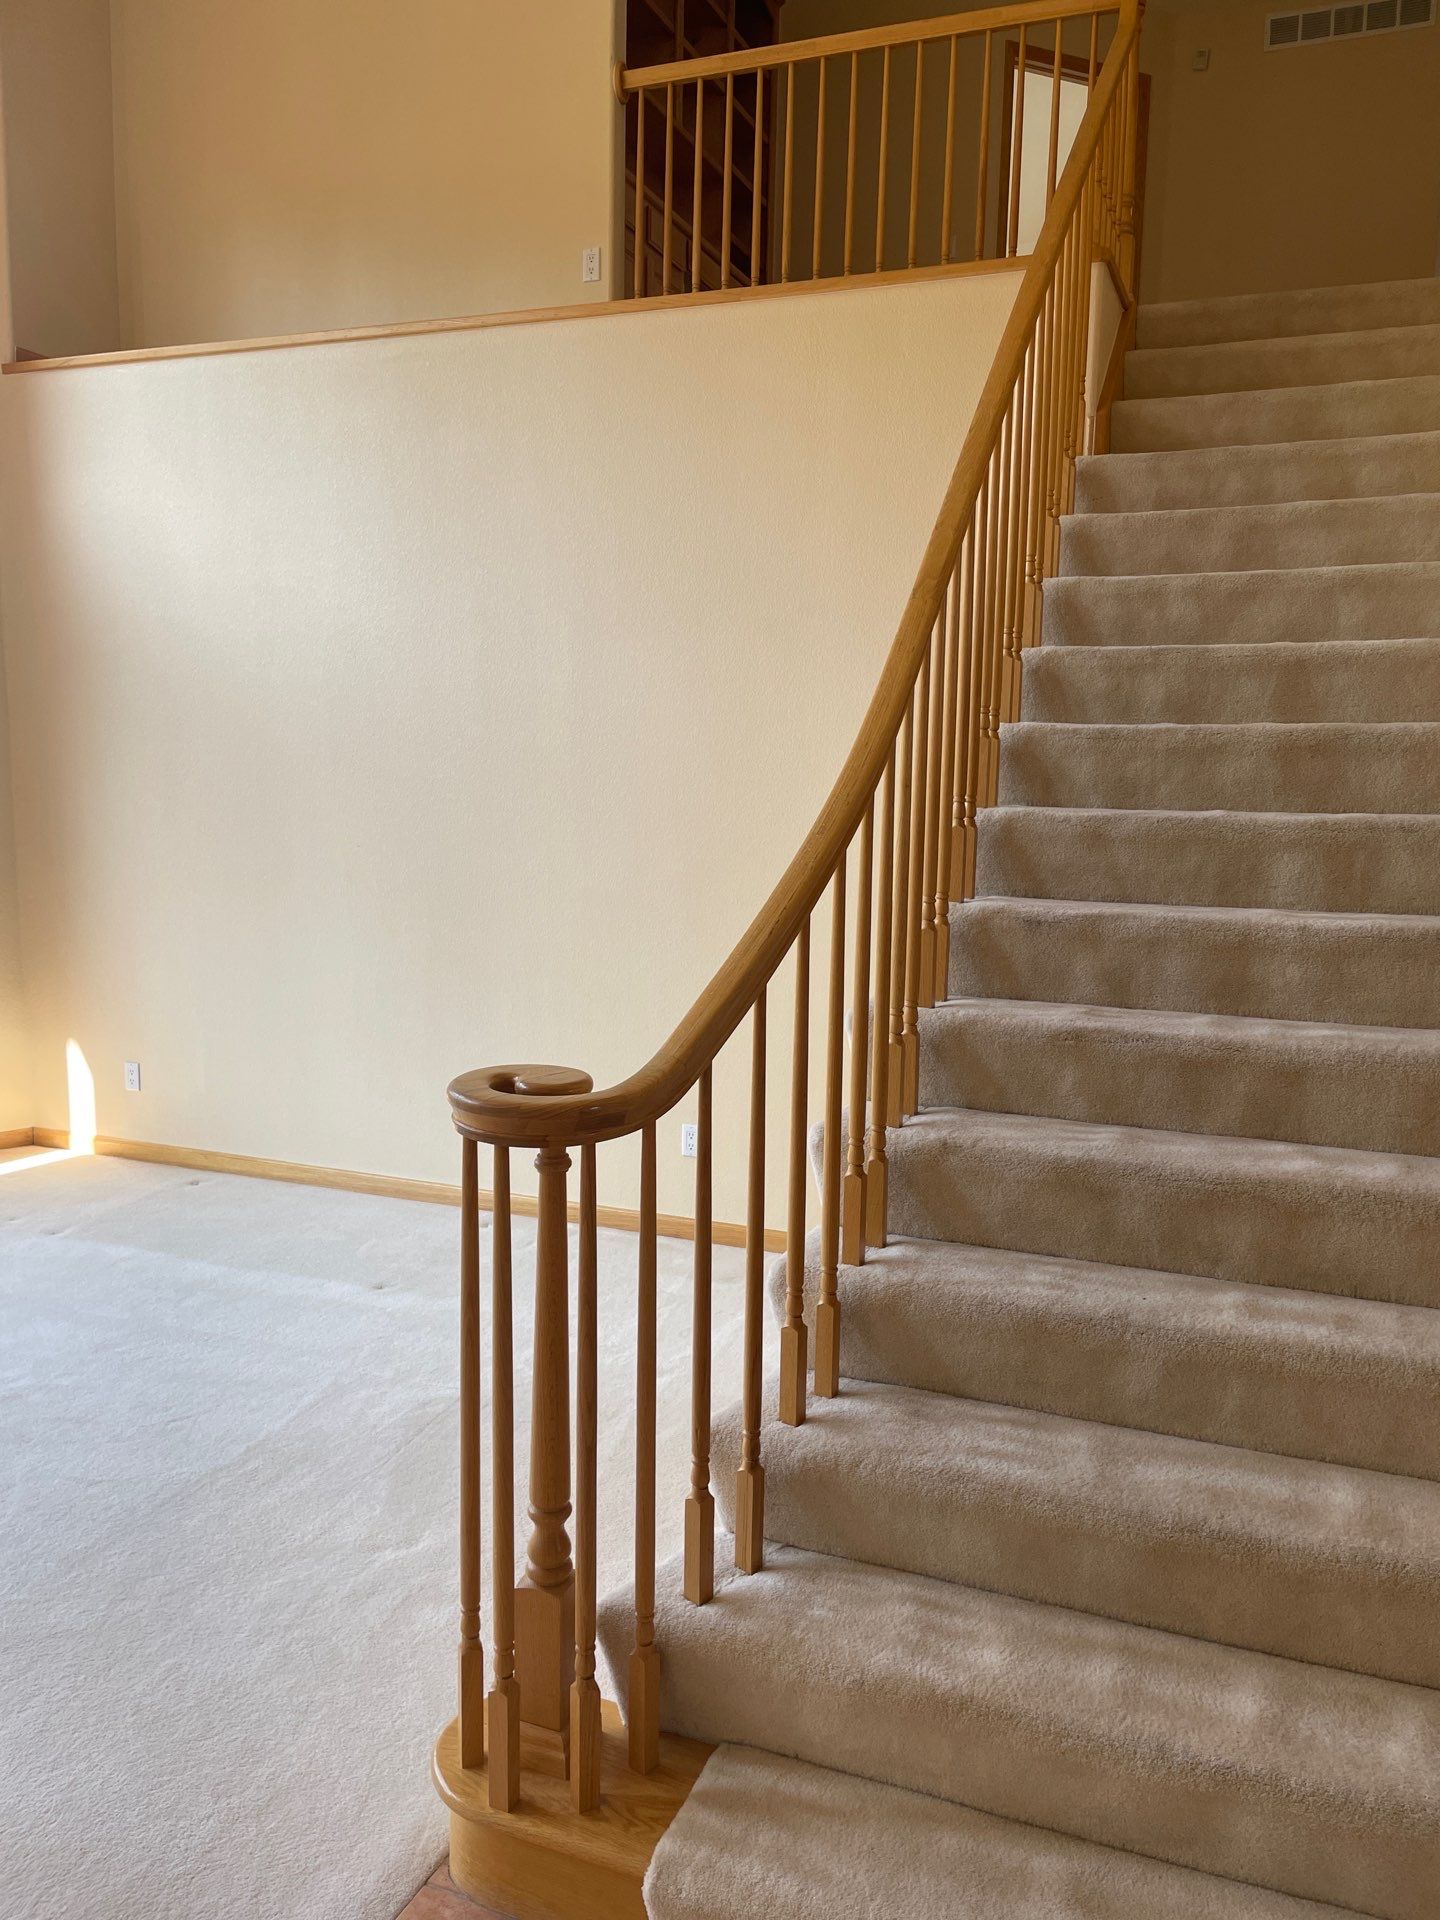
Before-Stairs
BEFORE: Nothing in this great room was great! The homeowners didn’t like the original shape of the bottom of the stairs, railing style, loft ledge, carpet, or paint color.
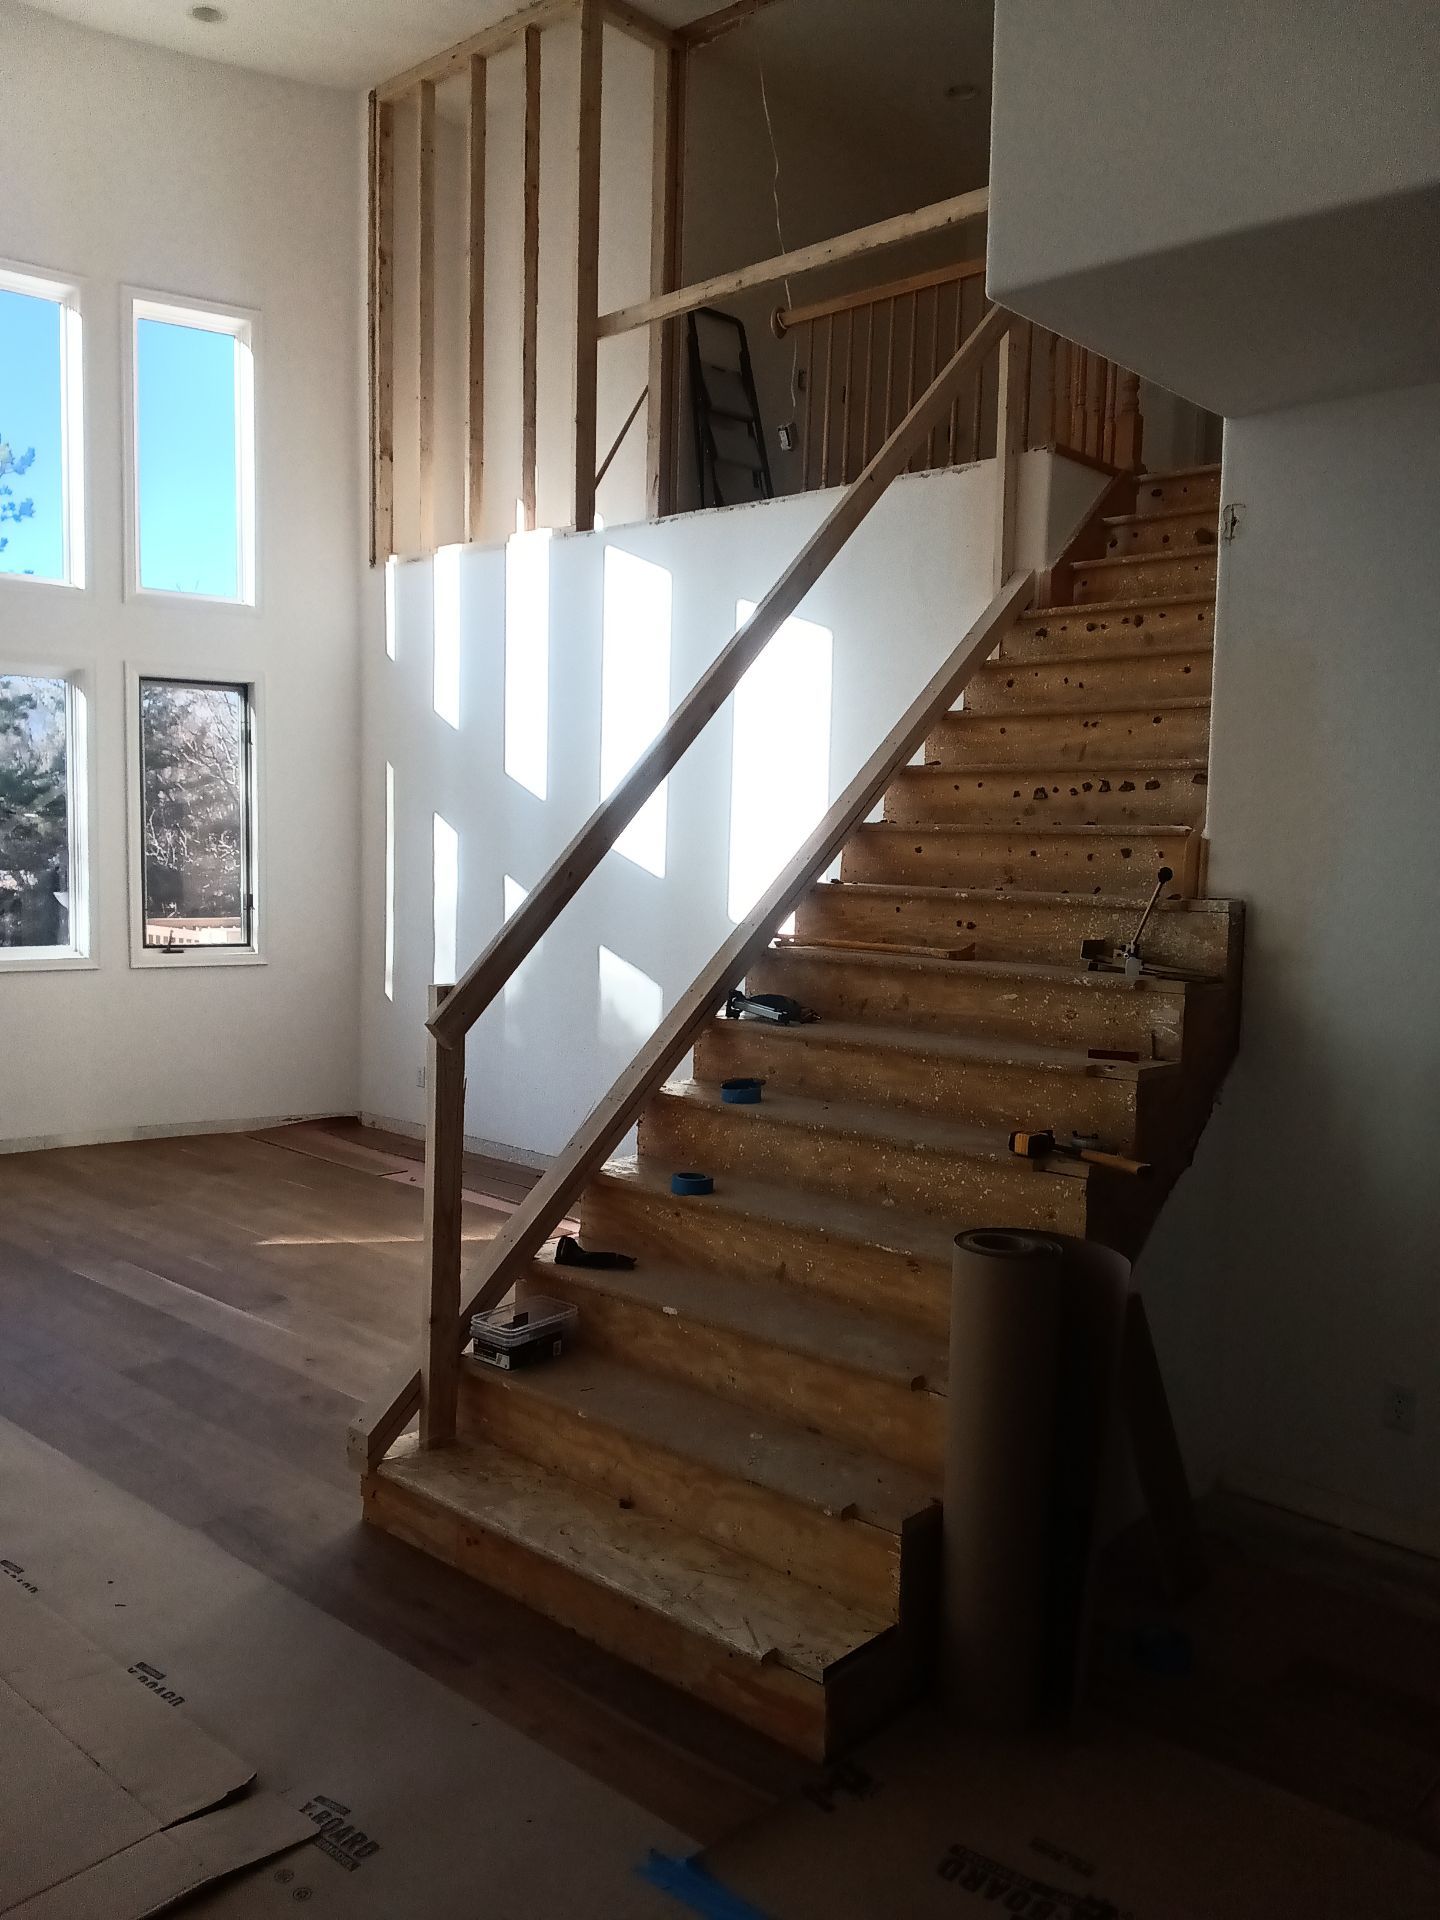
During-Blueprints-Stairs
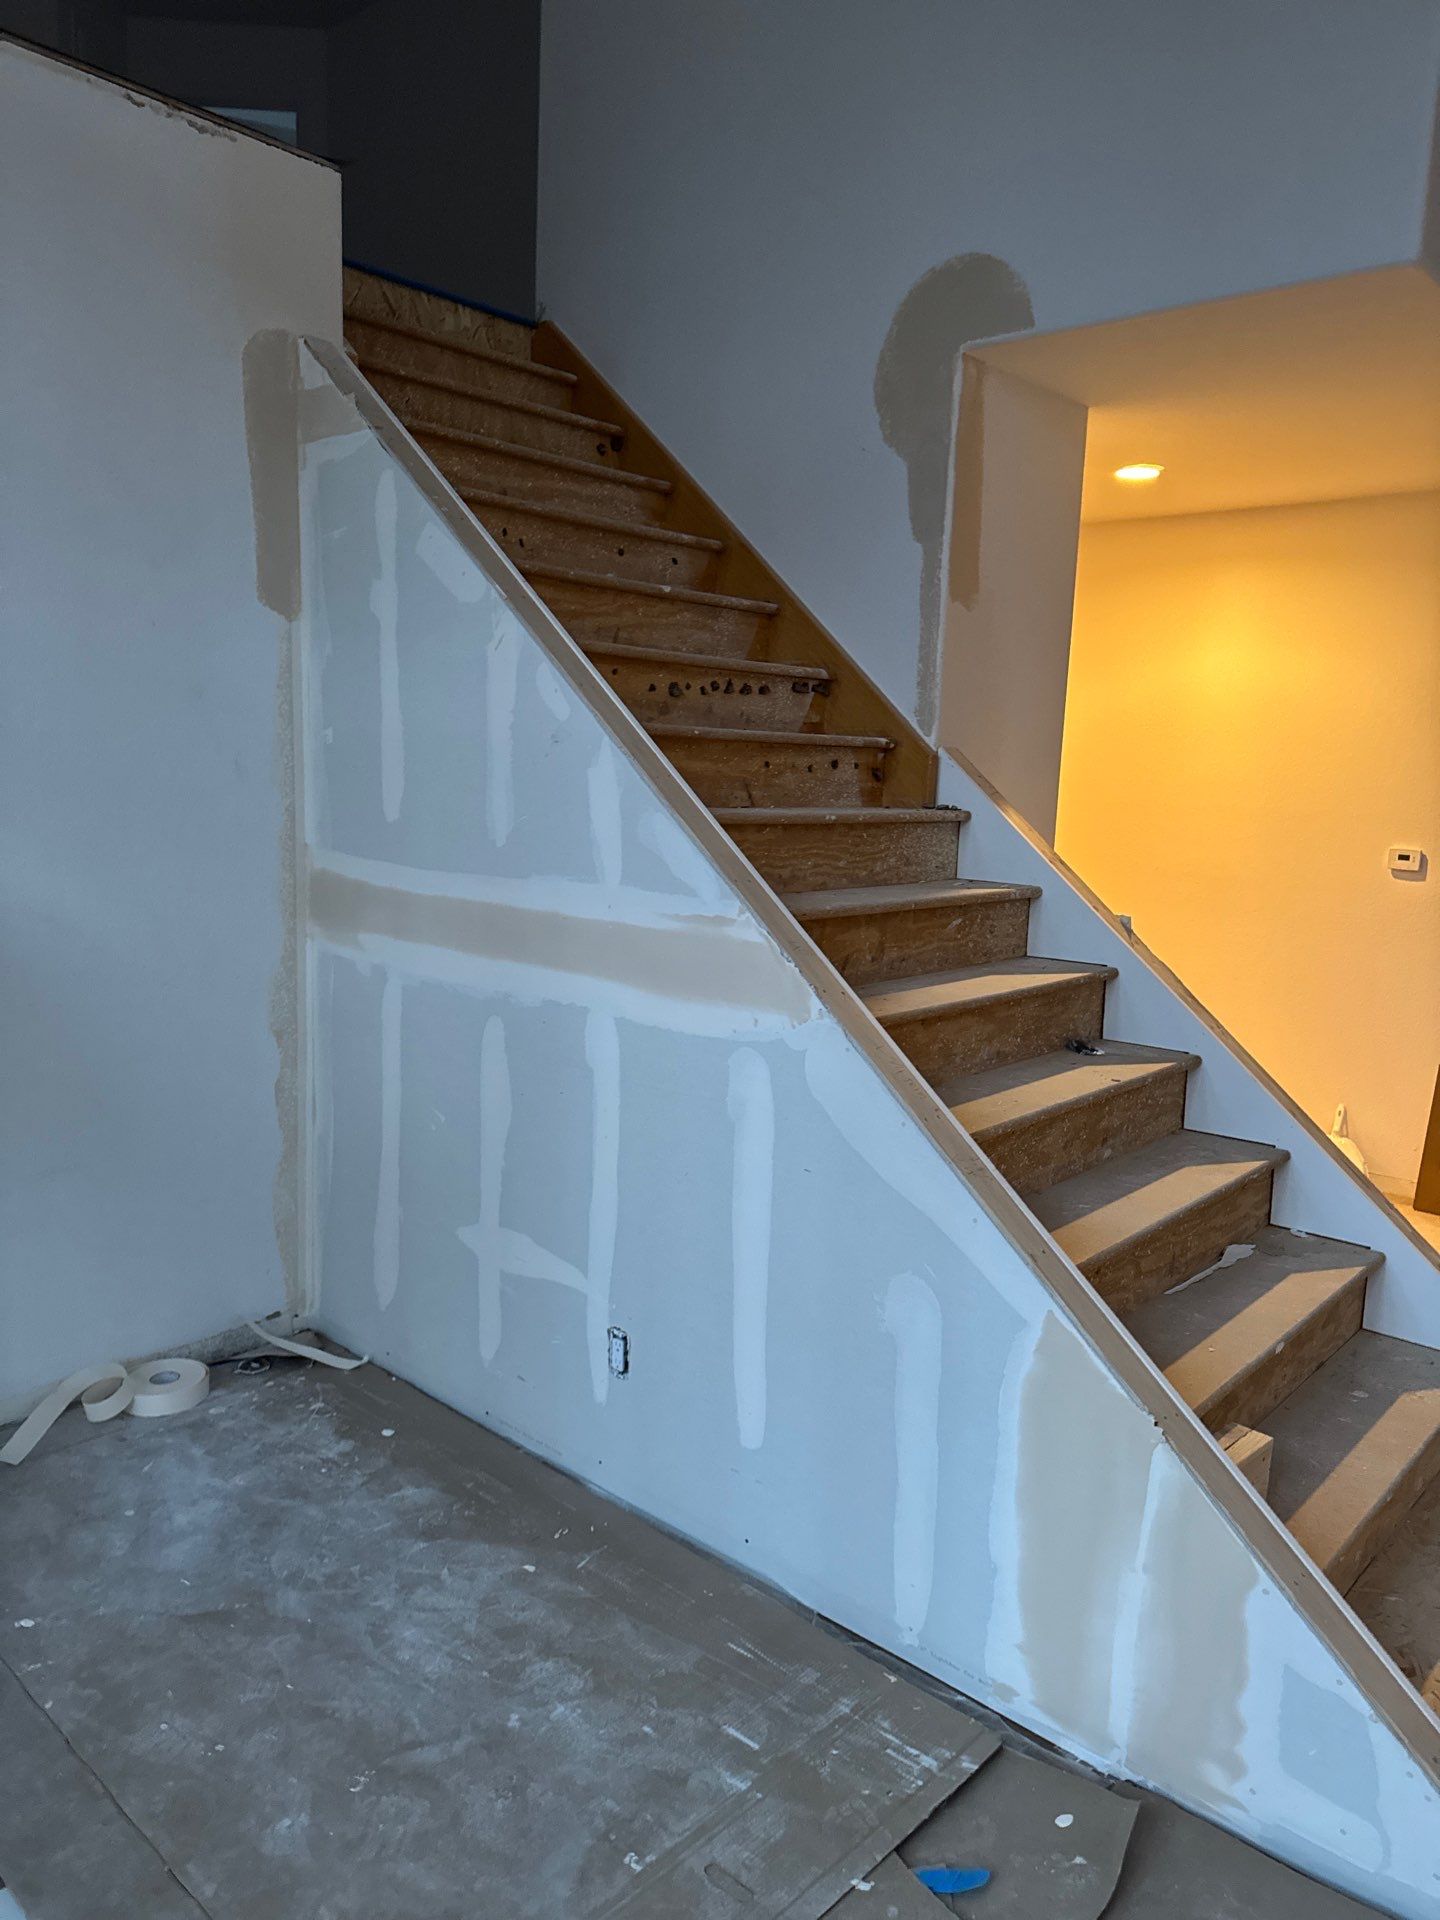
DURING: We redesigned the bottom of the stairs to be a straight run instead of fanning out, capturing more floor space for the great room.

DURING- Blueprints Stairs Demo
DURING: Out with the old—the carpet had to go to transform this great room.

DURING- Blueprints Tile Demo
DURING: We removed the outdated tiles and carpet to prepare for engineered hardwood flooring throughout the main floor.
During-Stairs
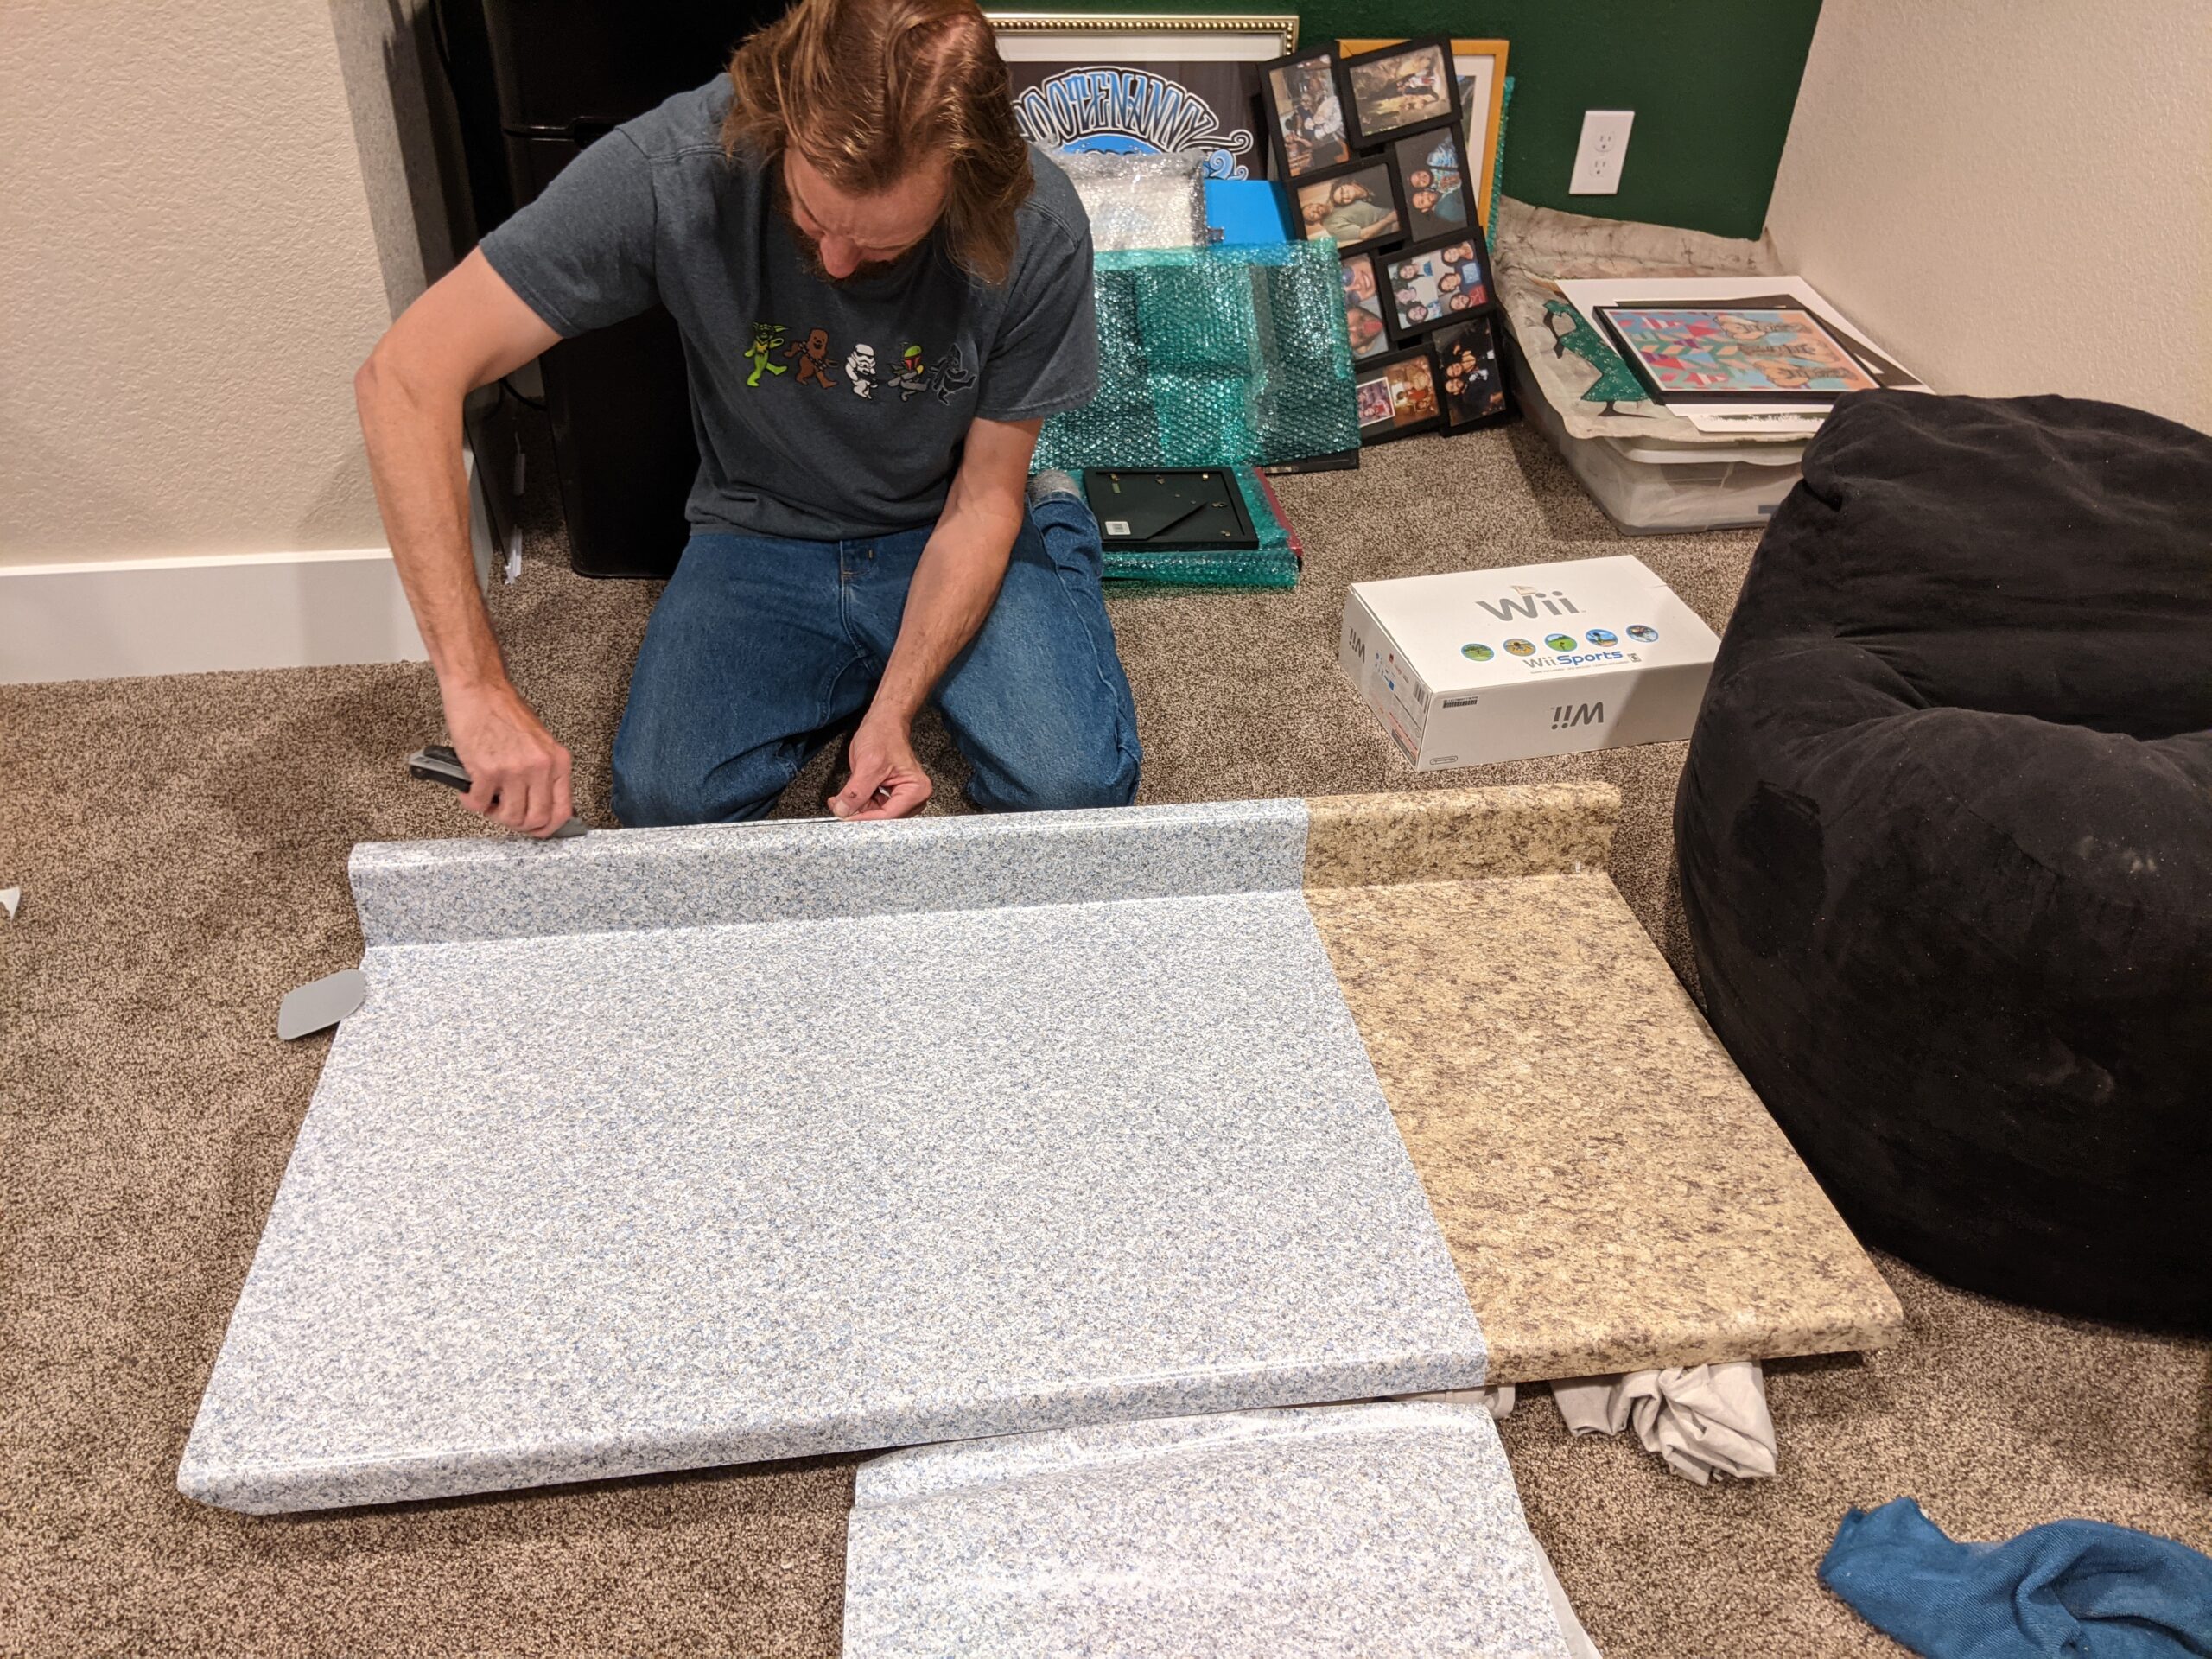
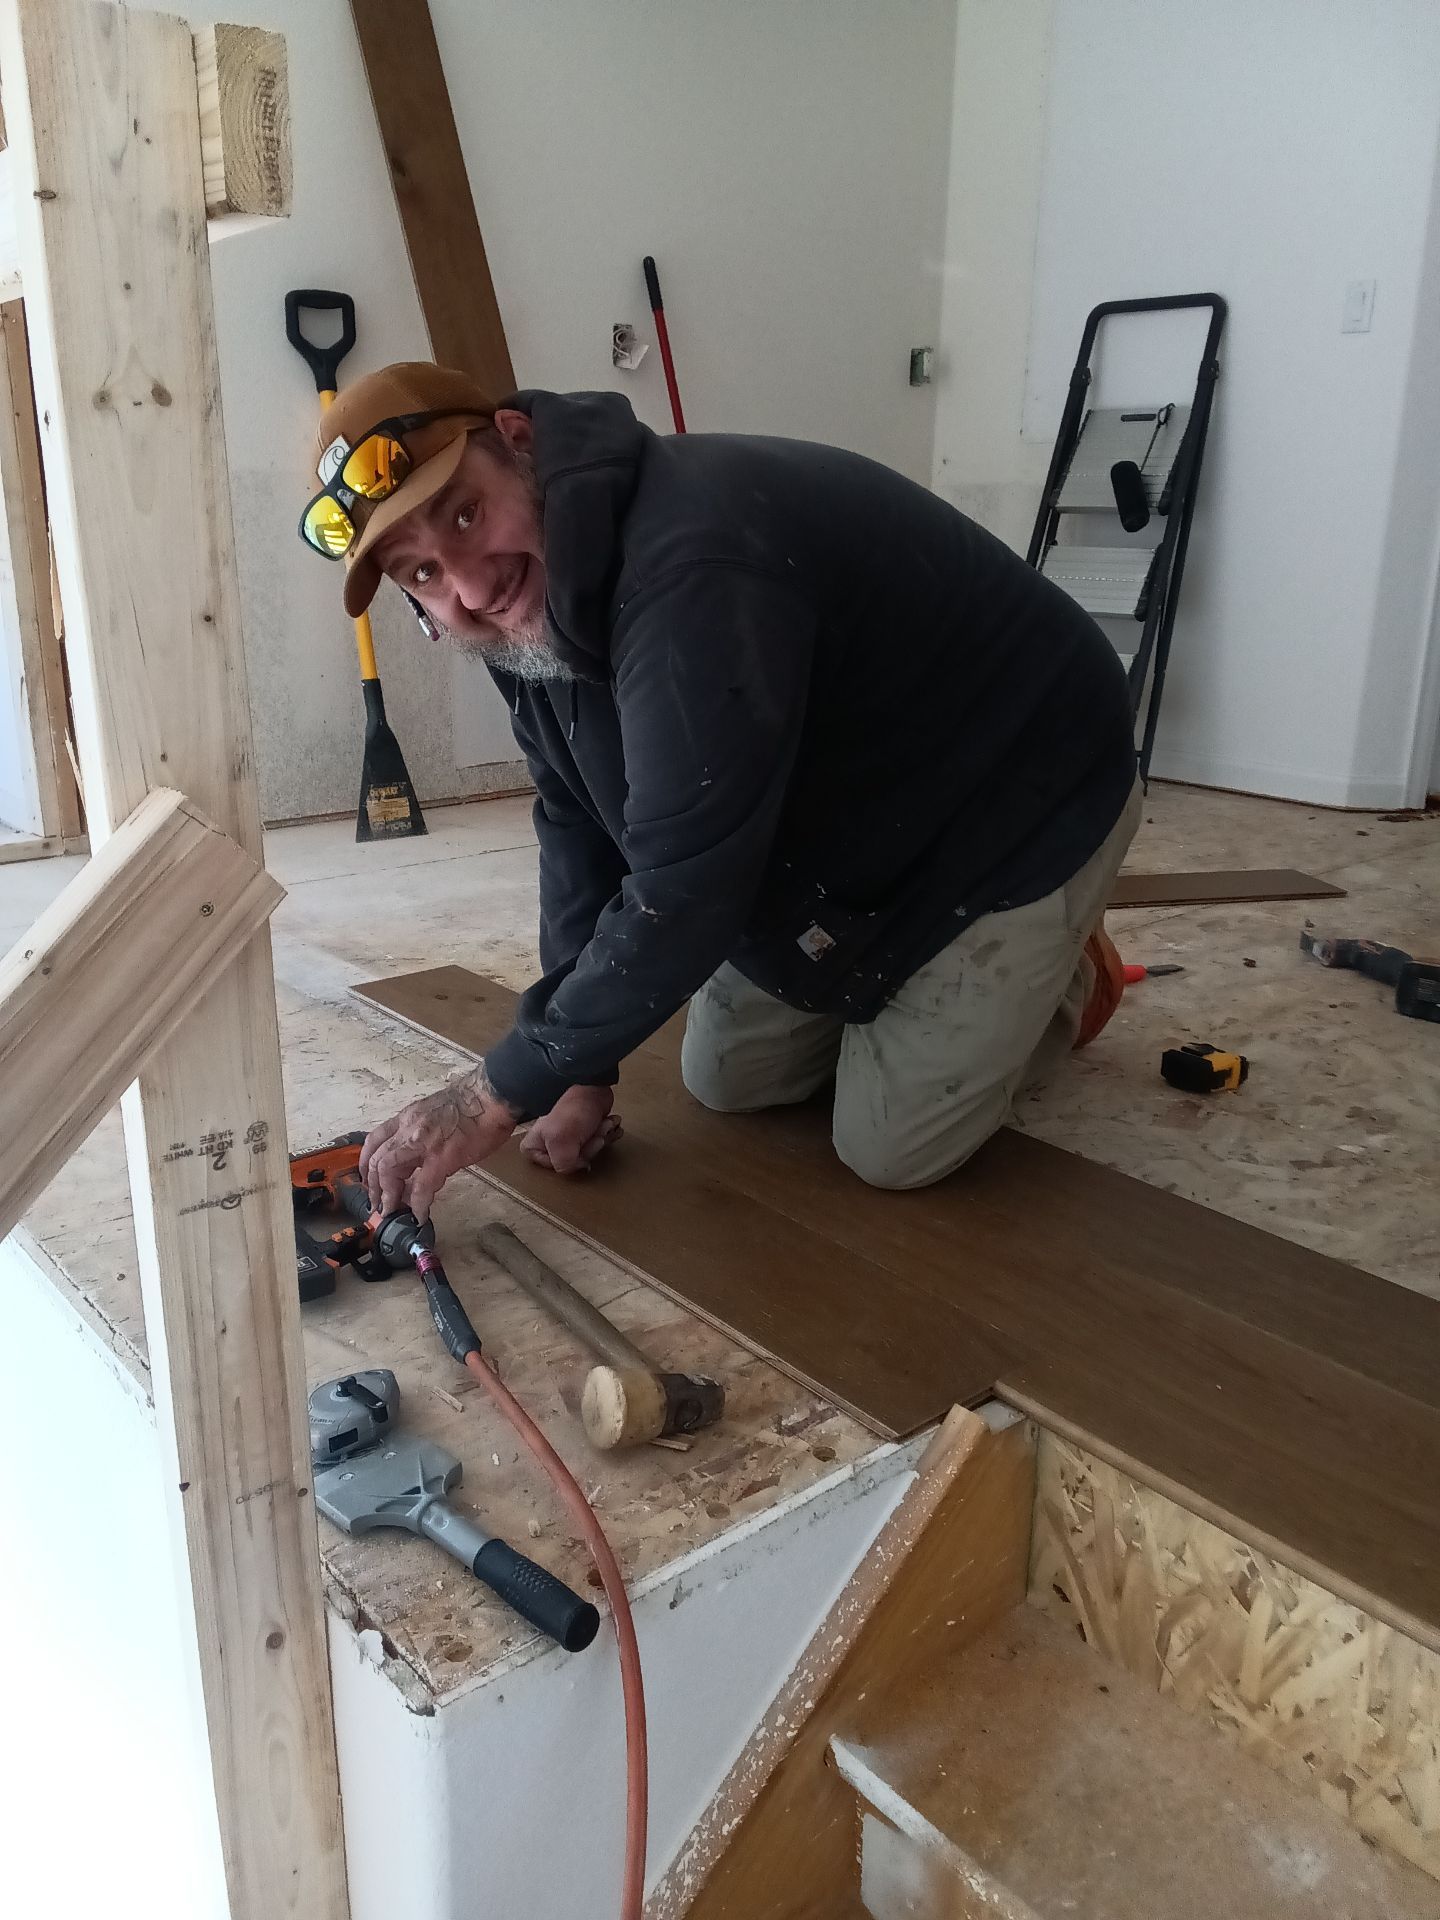
DURING: Our carpenter, Chris, is an expert at installing snap-together plank flooring, like he’s doing in this loft.

DURING- Blueprints Floor Install
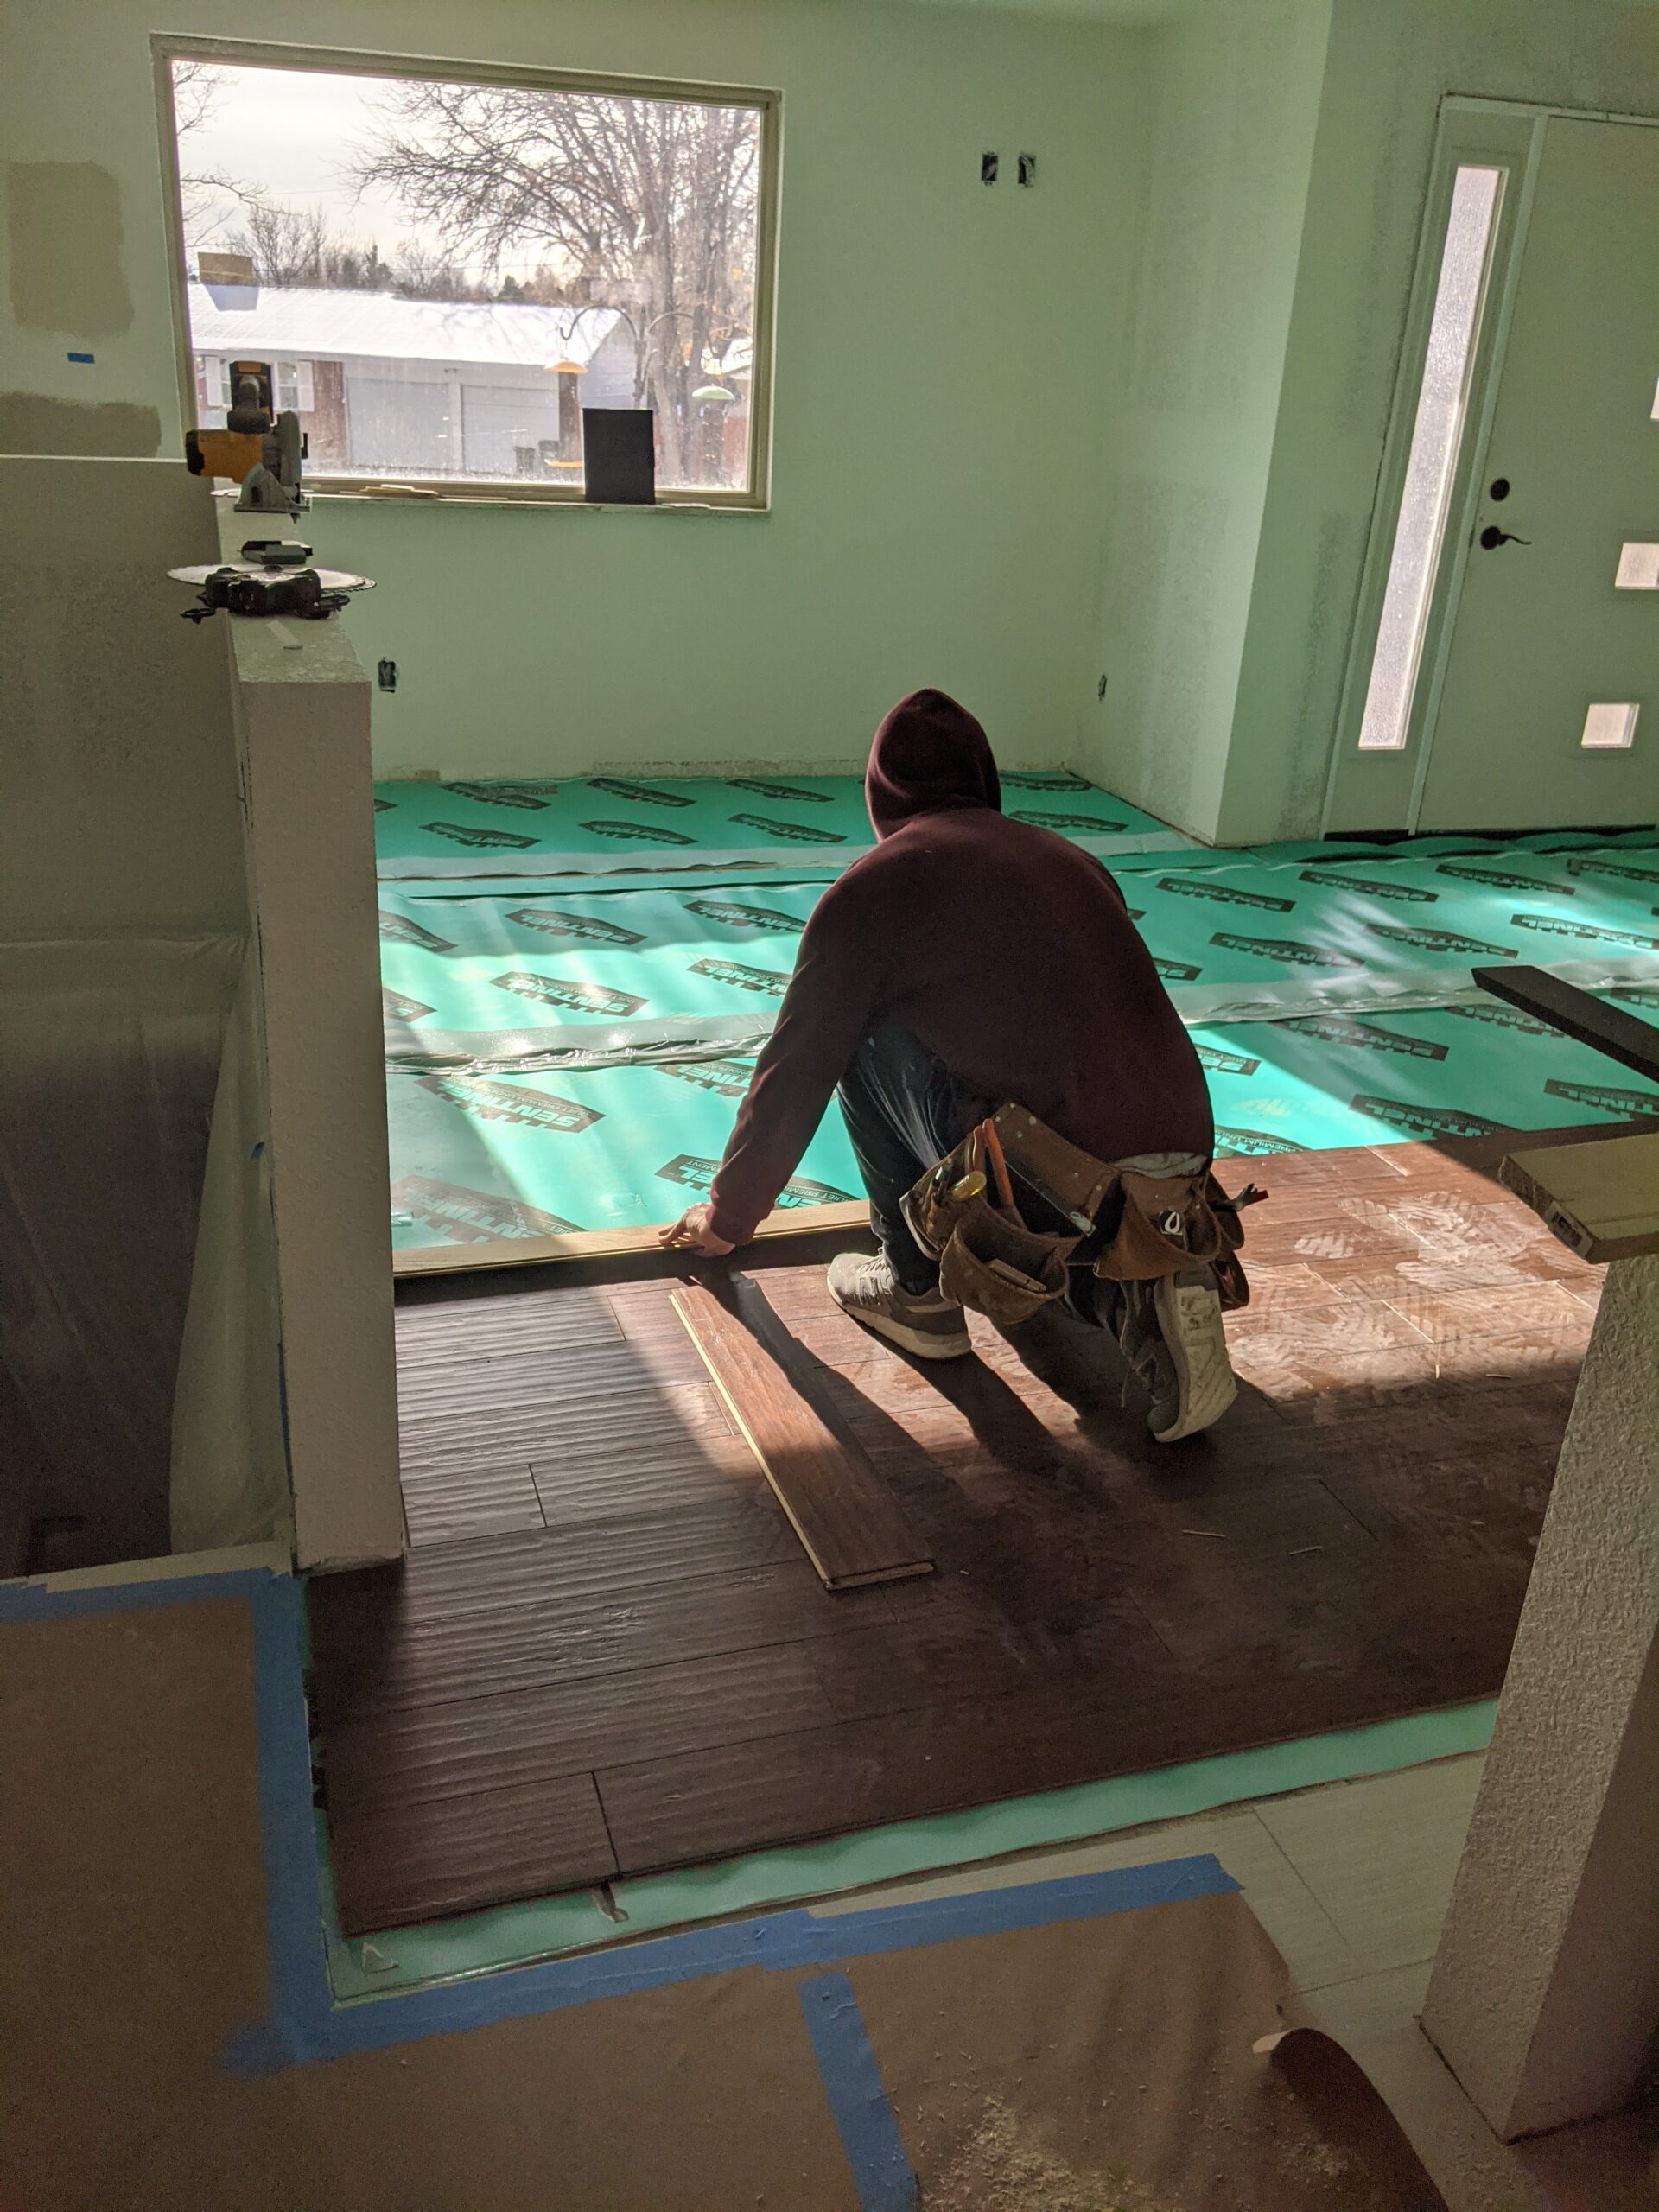
DURING: New wide-plank engineered hardwood floors were installed with care to provide unified flooring.

DURING- Blueprints Dining Floor
DURING: New engineered hardwood floors bring warmth and connect the living spaces throughout the main level.

DURING- Blueprints Loft Framing
DURING: The homeowners didn’t like the small ledge to the left of the loft in the great room, so we framed it in before installing drywall.
DURING- Blueprints Loft Drywall
DURING As part of a full home interior remodel, we installed drywall in this great room with the help of scaffolding to reach the top of the wall.

DURING- Blueprints Hall Floor
DURING: Make a great first impression in a grand entryway! We removed the original floor tiles. Next, we’ll eliminate 1 of these doorways on the right and replace the chandelier to welcome guests in style.
During-Blueprints-Entrance
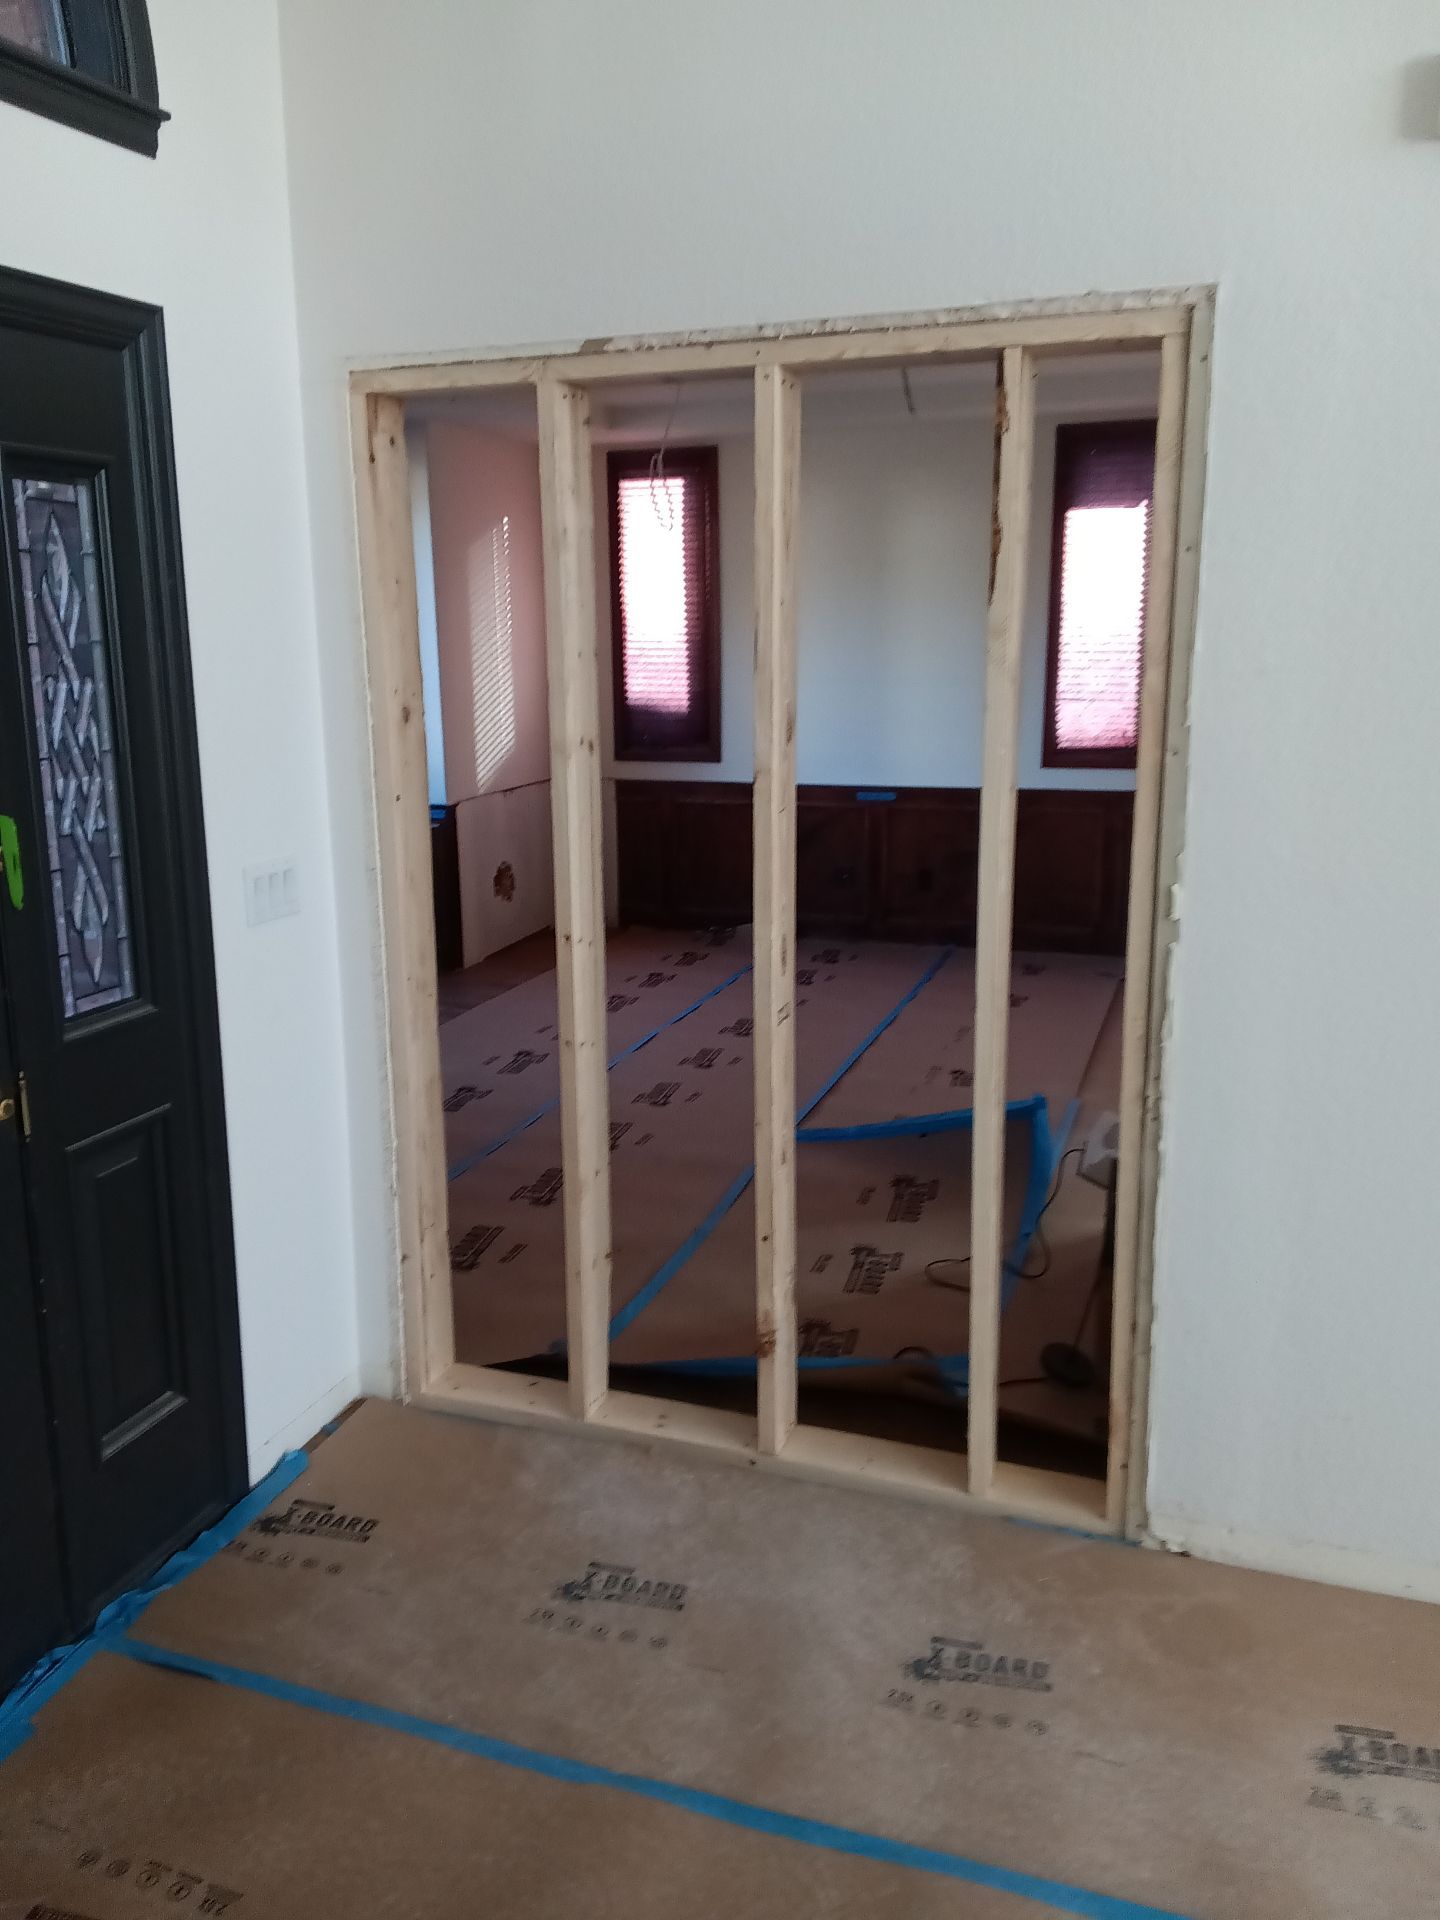
DURING: The original entrance to the library is framed in and ready to be covered with drywall.

DURING- Blueprints Wall Drywall
DURING: A new drywall installation creates a clean canvas for updates in the entryway during the remodeling process.

DURING- Blueprints New Wall
DURING: After this drywall is textured and painted, no one will know there used to be a doorway here.

DURING- Blueprints Loft Smooth
DURING: Taped and mudded drywall at the top of the great room wall is ready for texture and sanding before it gets primed and painted.
During-Blueprints-Loft-Drywall
DURING: We rebuilt the side wall of the great room stairs after we changed their flow.

DURING- Blueprints Drywall Master
DURING: Smooth walls ahead! Edgar meticulously muds the fresh drywall for a sleek, seamless finish throughout the home.
DURING- Blueprints Stair Rail
DURING: Contemporary black metal railings replace dated wooded spindles, giving this staircase a bold, modern update.

After-Blueprints-Stairs
AFTER: Custom, modern black handrails at the loft and down the stairs
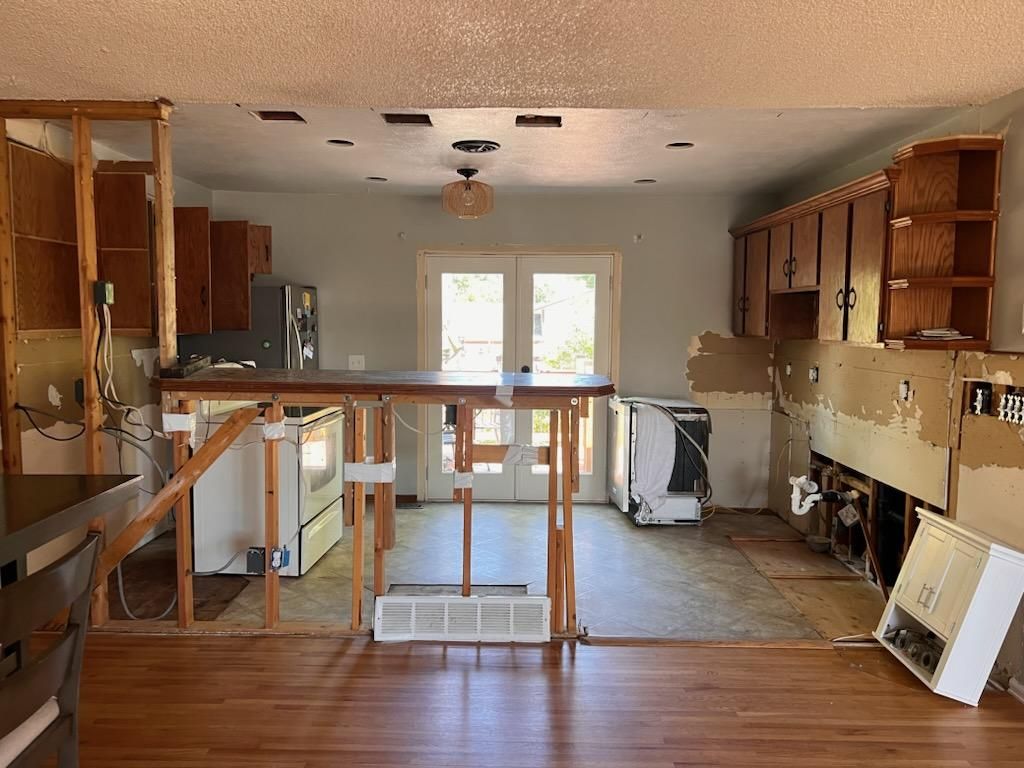
BEFORE-Blueprints-Kitchen
BEFORE: The original kitchen featured plenty of cabinetry but lacked modern lighting design and the island awkwardly interrupted the flow. We updated the electrical plan, flooring, and backsplash for their reimagined layout.

DURING- Blueprints Dining
DURING: The original floor’s been removed and wiring updated—laying the groundwork (literally!) for a fresh layout and stunning new finishes in this kitchen remodel.

After-Blueprints-Dining-Floors
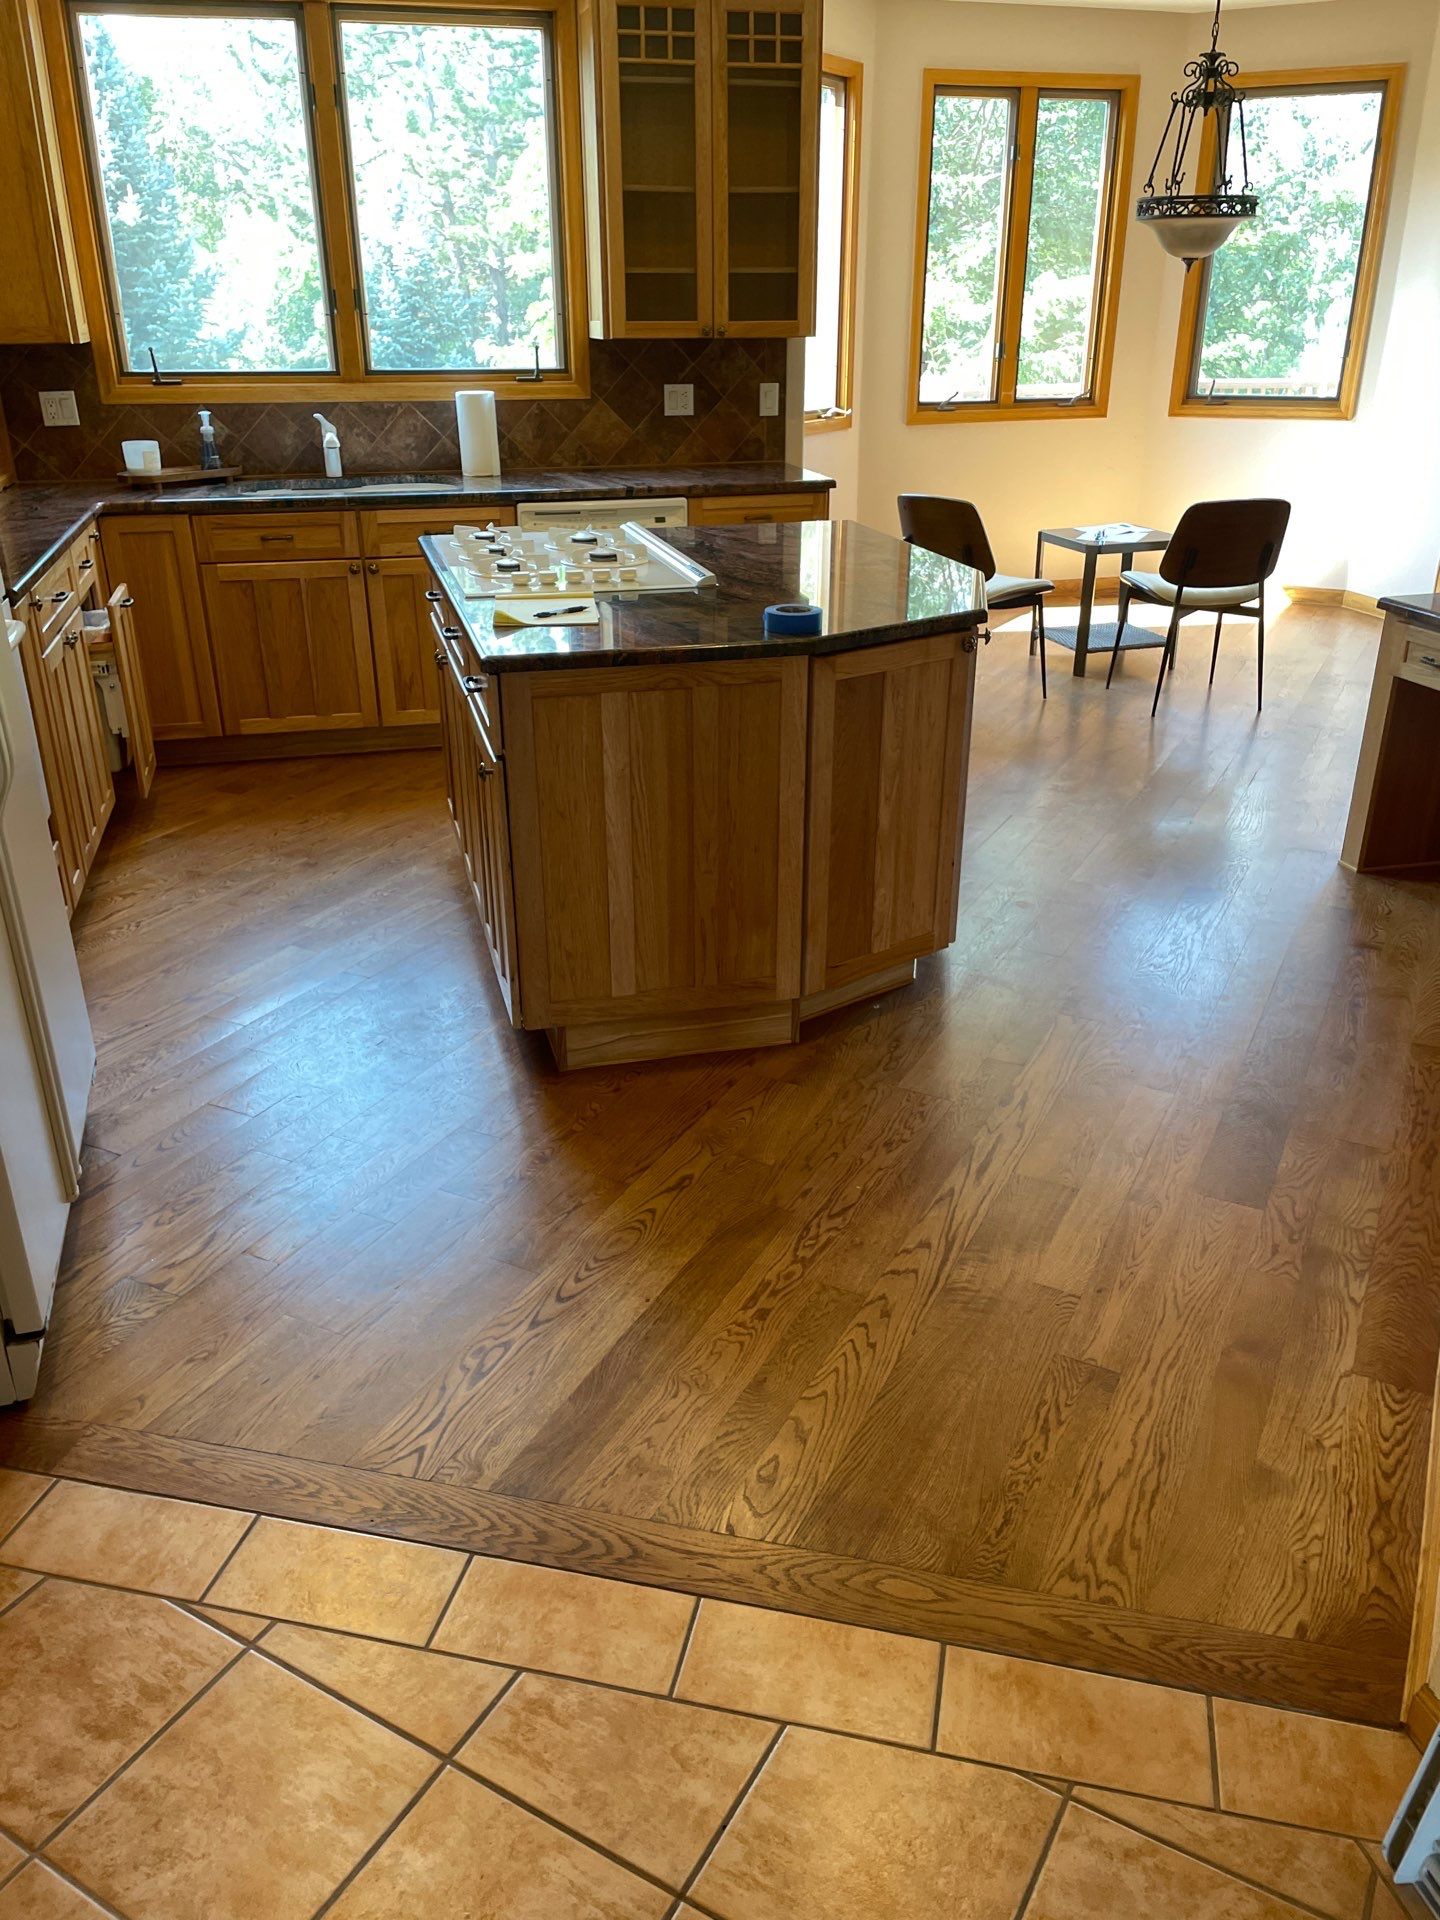
AFTER: We continued the same engineered hardwood flooring into the kitchen and den that we installed in the rest of the main level.
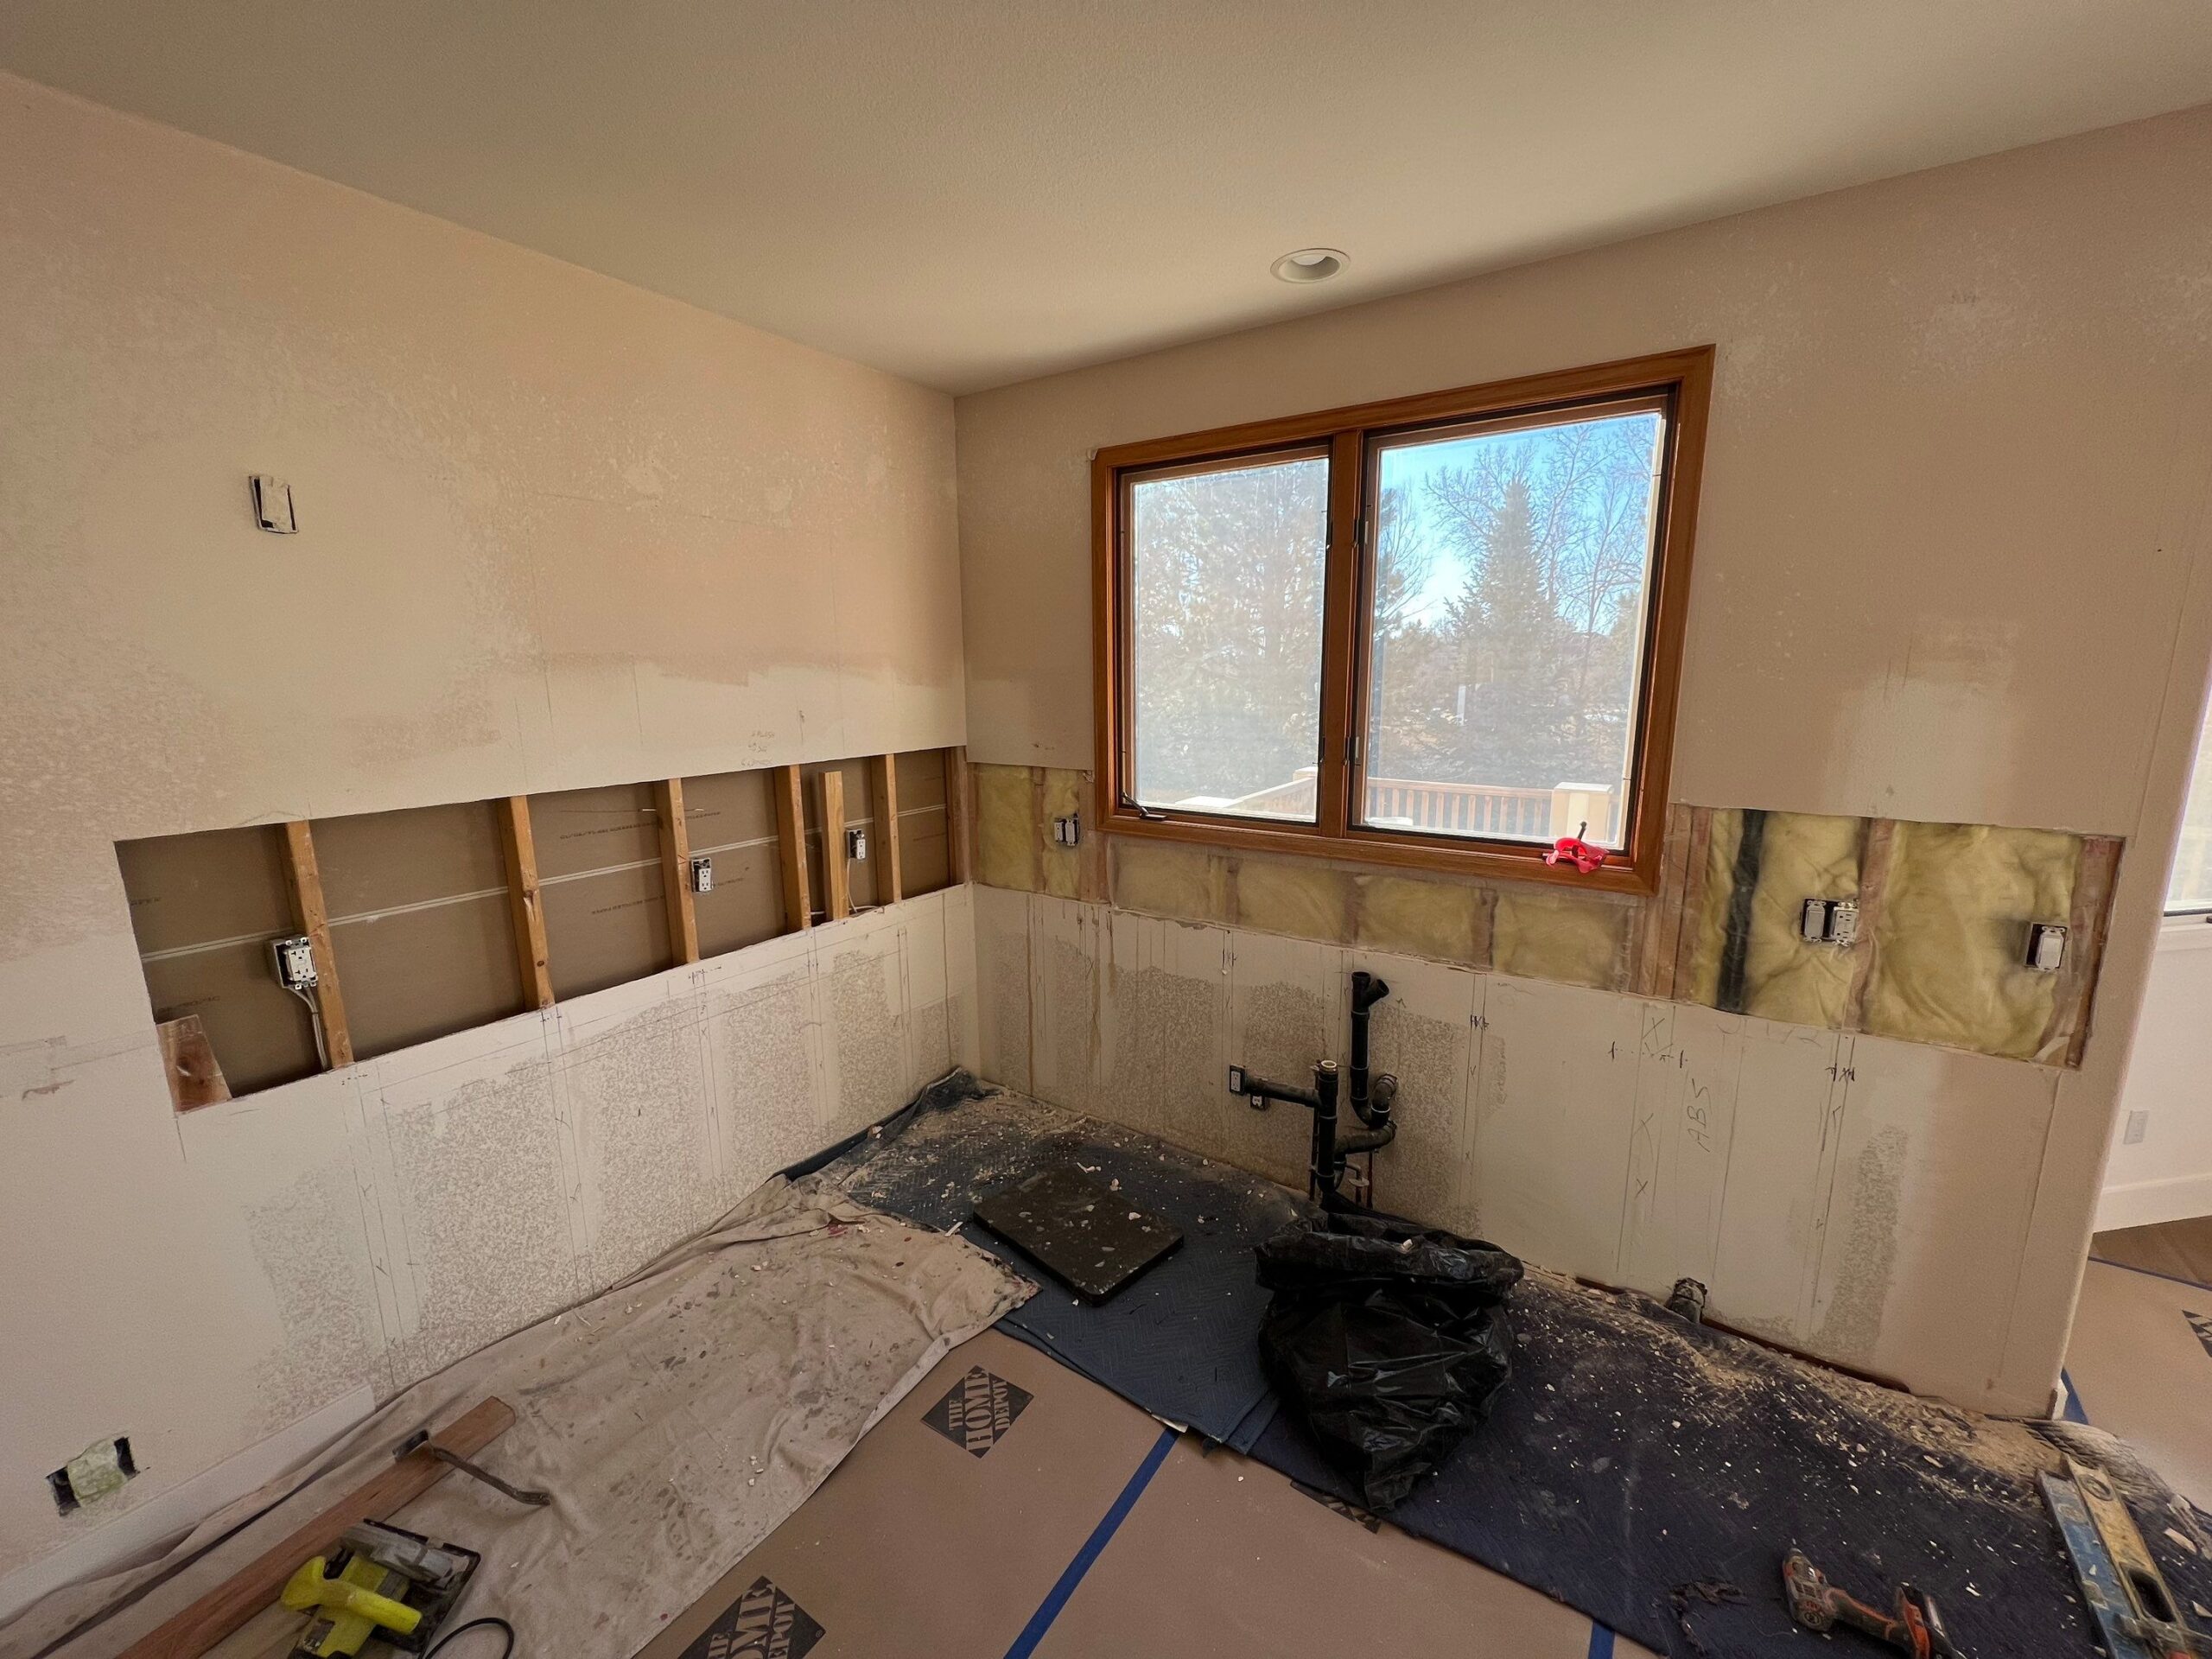
During-Blueprints-Kitchen-Backsplash
DURING: After removing the existing backsplash, we updated the electrical wiring and pipes in the walls, per building code.
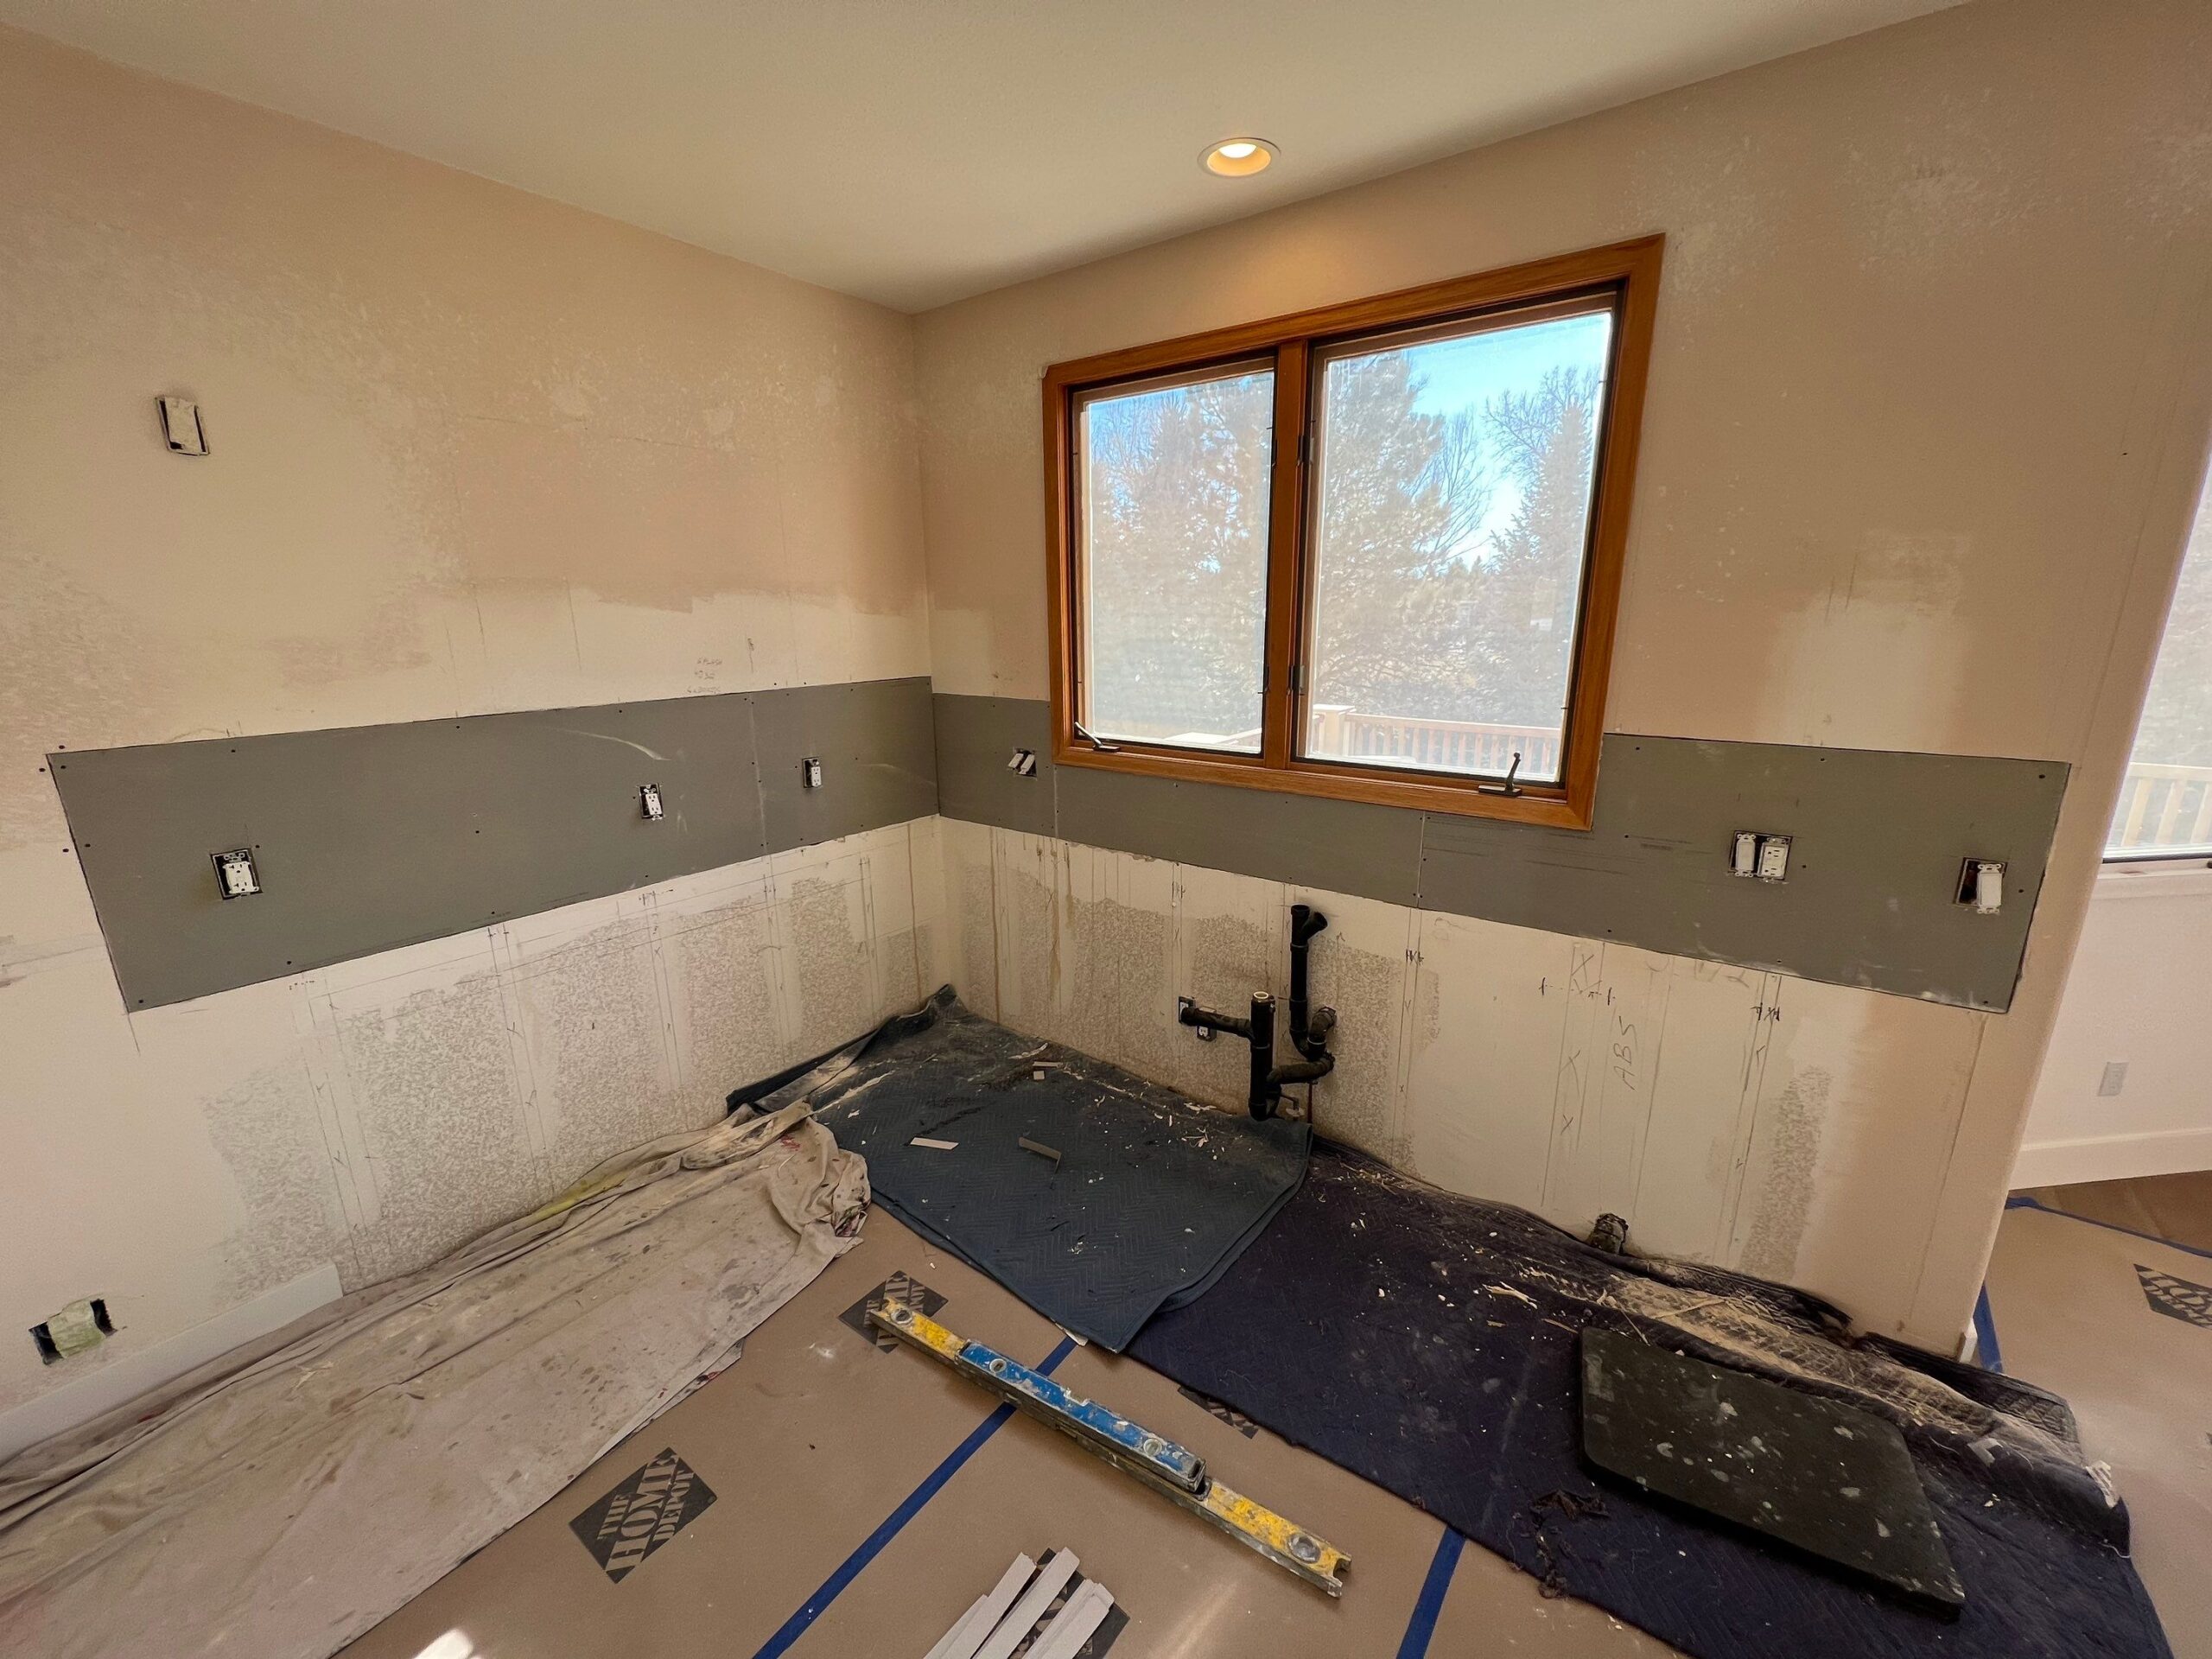
During-Blueprints-KitchenBacksplash 2
DURING: Next, we patched the drywall before installing a new tile backsplash.

DURING- Blueprints Kitchen Tile
DURING: Details make the design—each tile and fixture placed with care to elevate this kitchen remodel.

DURING- Blueprints Kitchen Tile 2
DURING: Subtle shine, major impact. New glossy subway tile backsplash brings contrast and depth to this crisp, modern kitchen.